ARO Client Installation and Initialization Tutorial
This tutorial guides you through the process of installing and initializing the ARO Client Software Image on the Bare-metal machine.
Before preparing the machine, review the recommended system requirements for running the ARO Client image on this page.
Please follow the tutorials below (Part 1, 2, & 3) to get your ARO Client ready for the coming Testnet.
Special Note for Previewnet Node Operators:
The VM-based installation method is deprecated and no longer supported in the coming Testnet due to performance limitations, particularly for edge services like PCDN.
If you are currently using a VM-based installation of the ARO Client (e.g., from the Previewnet phase when VM installations were supported), we strongly recommend migrating to the bare-metal installation method (See tutorials below) as soon as possible.
Part 1: Install ARO Client Software Image On Bare-metal Machine
Download the Latest ARO Client Software Image
Download Link: https://download.aro.network/files/images/aro-client-host-1.0.0.iso
MD5 checksum: ad2e01689cada0000272b64279dc8ecb
Install the ARO Client Software Image On Bare-metal Machine
Refer to this tutorial document for bare-metal installation.
When you are ready on the ARO Client Software Image installation, continue to the Part 2.
Part 2: ARO Client Node Initialization & Configuration
This section describes how to register, configure and complete all initial setup needed for a functioning status for your ARO Client node.
-
Start the Software Image
After setting up the machine, launch it to start the ARO Client software image.
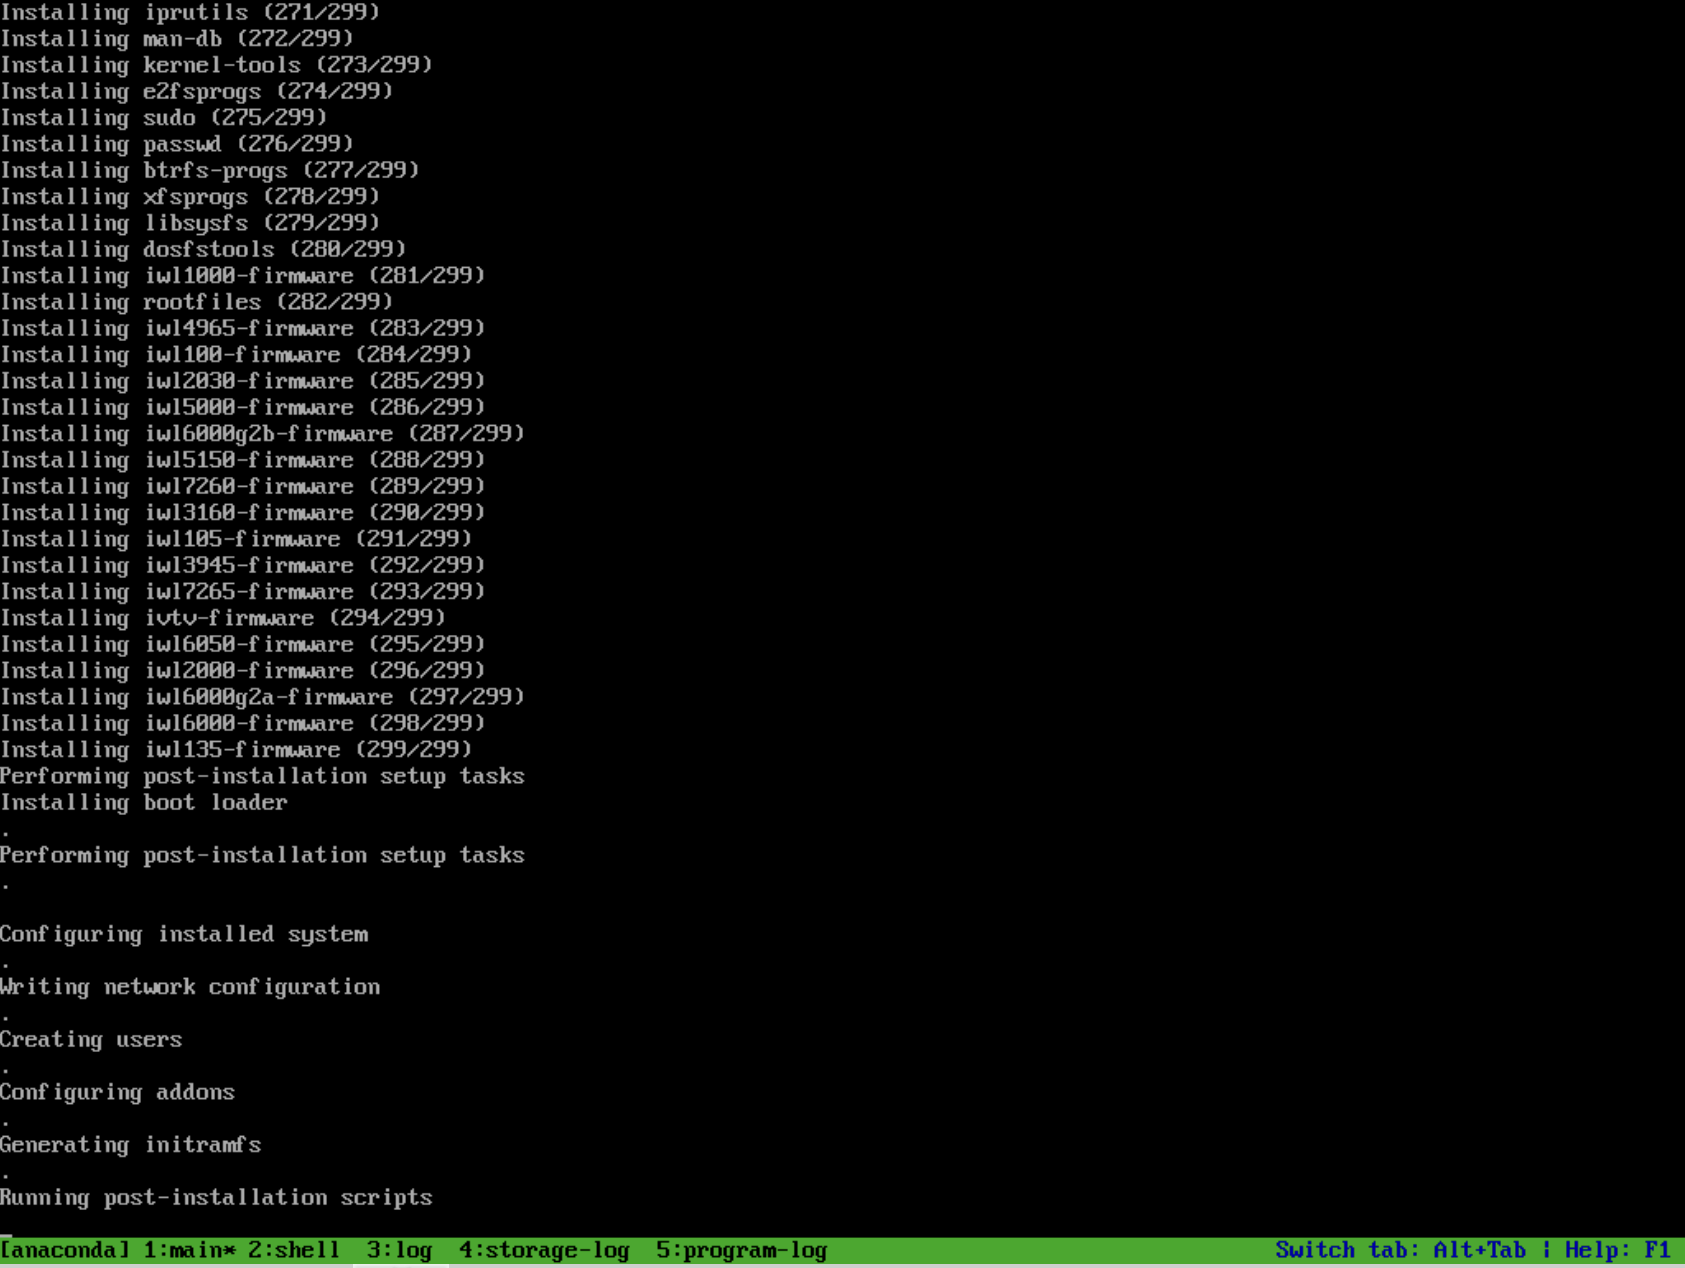
The loading process will begin automatically and may take a few minutes. Do not interrupt this process. -
Configure the Network
Once the loading process is complete, a network configuration page will appear.
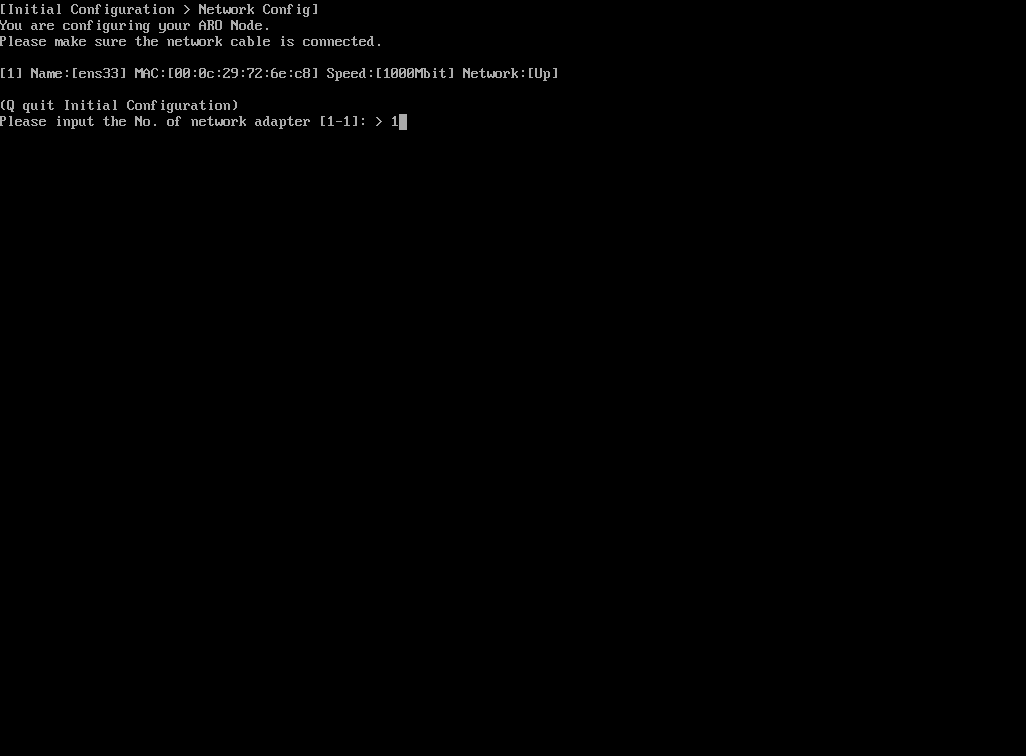
Select option 1 (the default option).
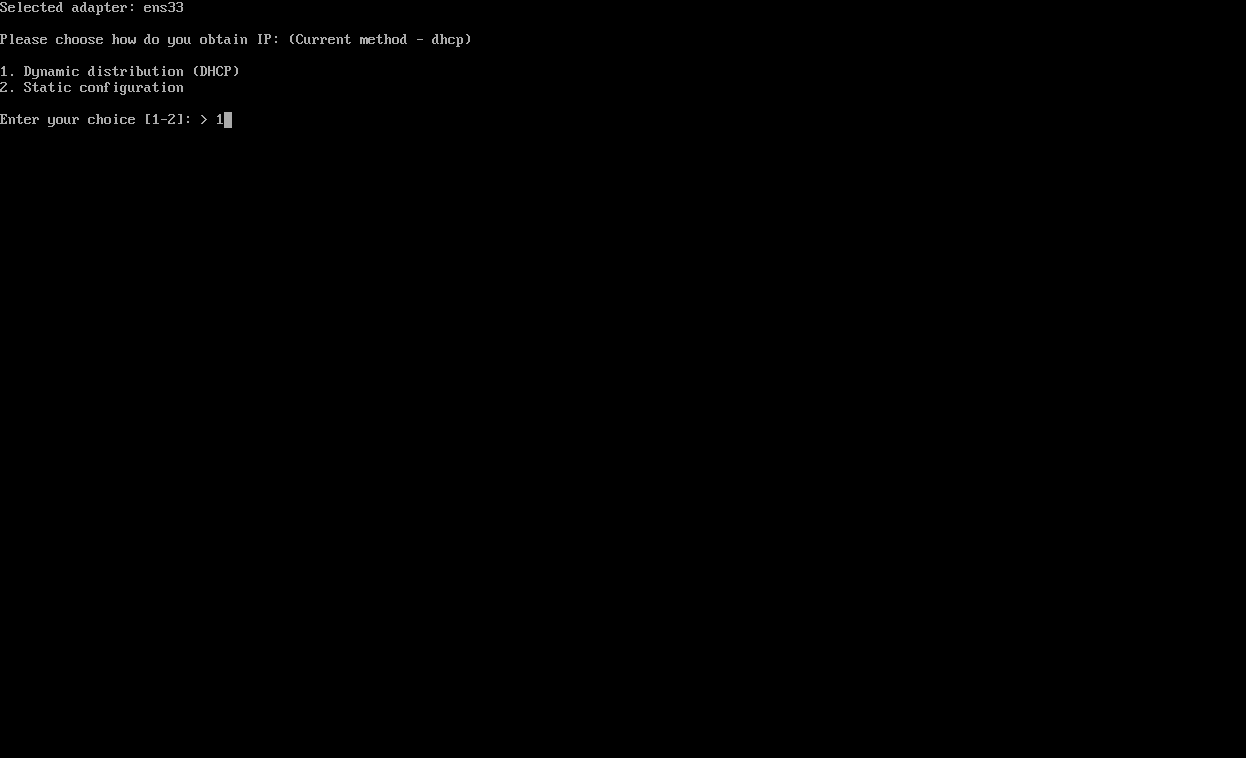
Configure the IP settings:- Select 1 for DHCP to automatically assign an IP address.
- Select 2 for a static IP if you need to manually configure the network.
After successful network and IP configuration, the system will perform an automatic ping test. If the test succeeds, you will proceed to the Edge Node activation process.
-
Initialize the Activation Process
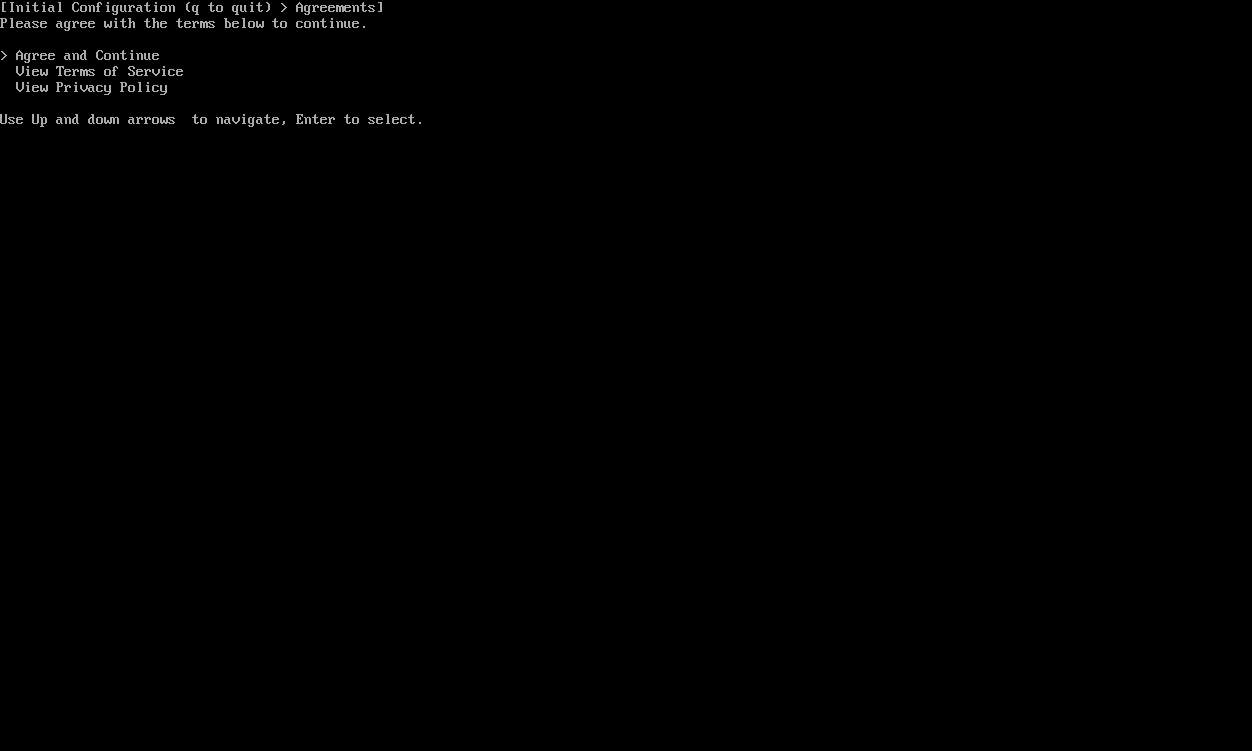
Review the Terms of Service and Privacy Policy. Select Agree and Continue to proceed.
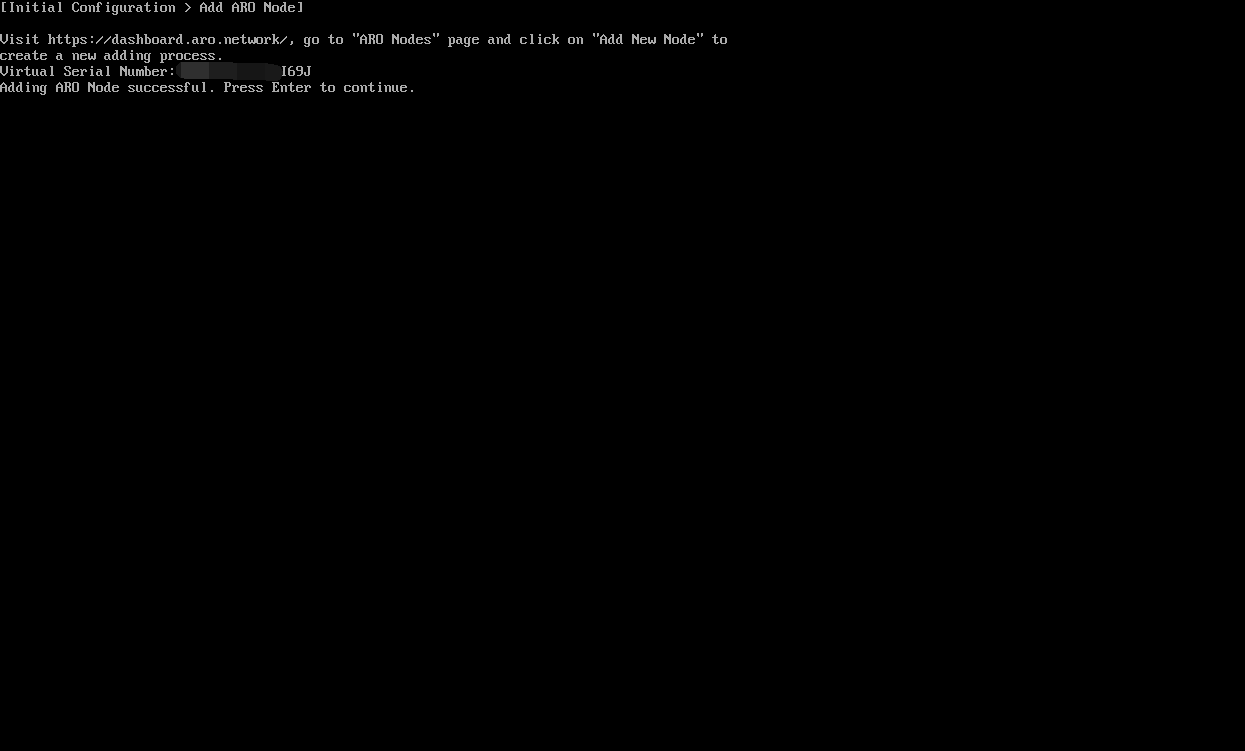
The 19-digit Virtual Serial Number for this Edge Node will appear on the screen. Record this number, as it is critical for activation.
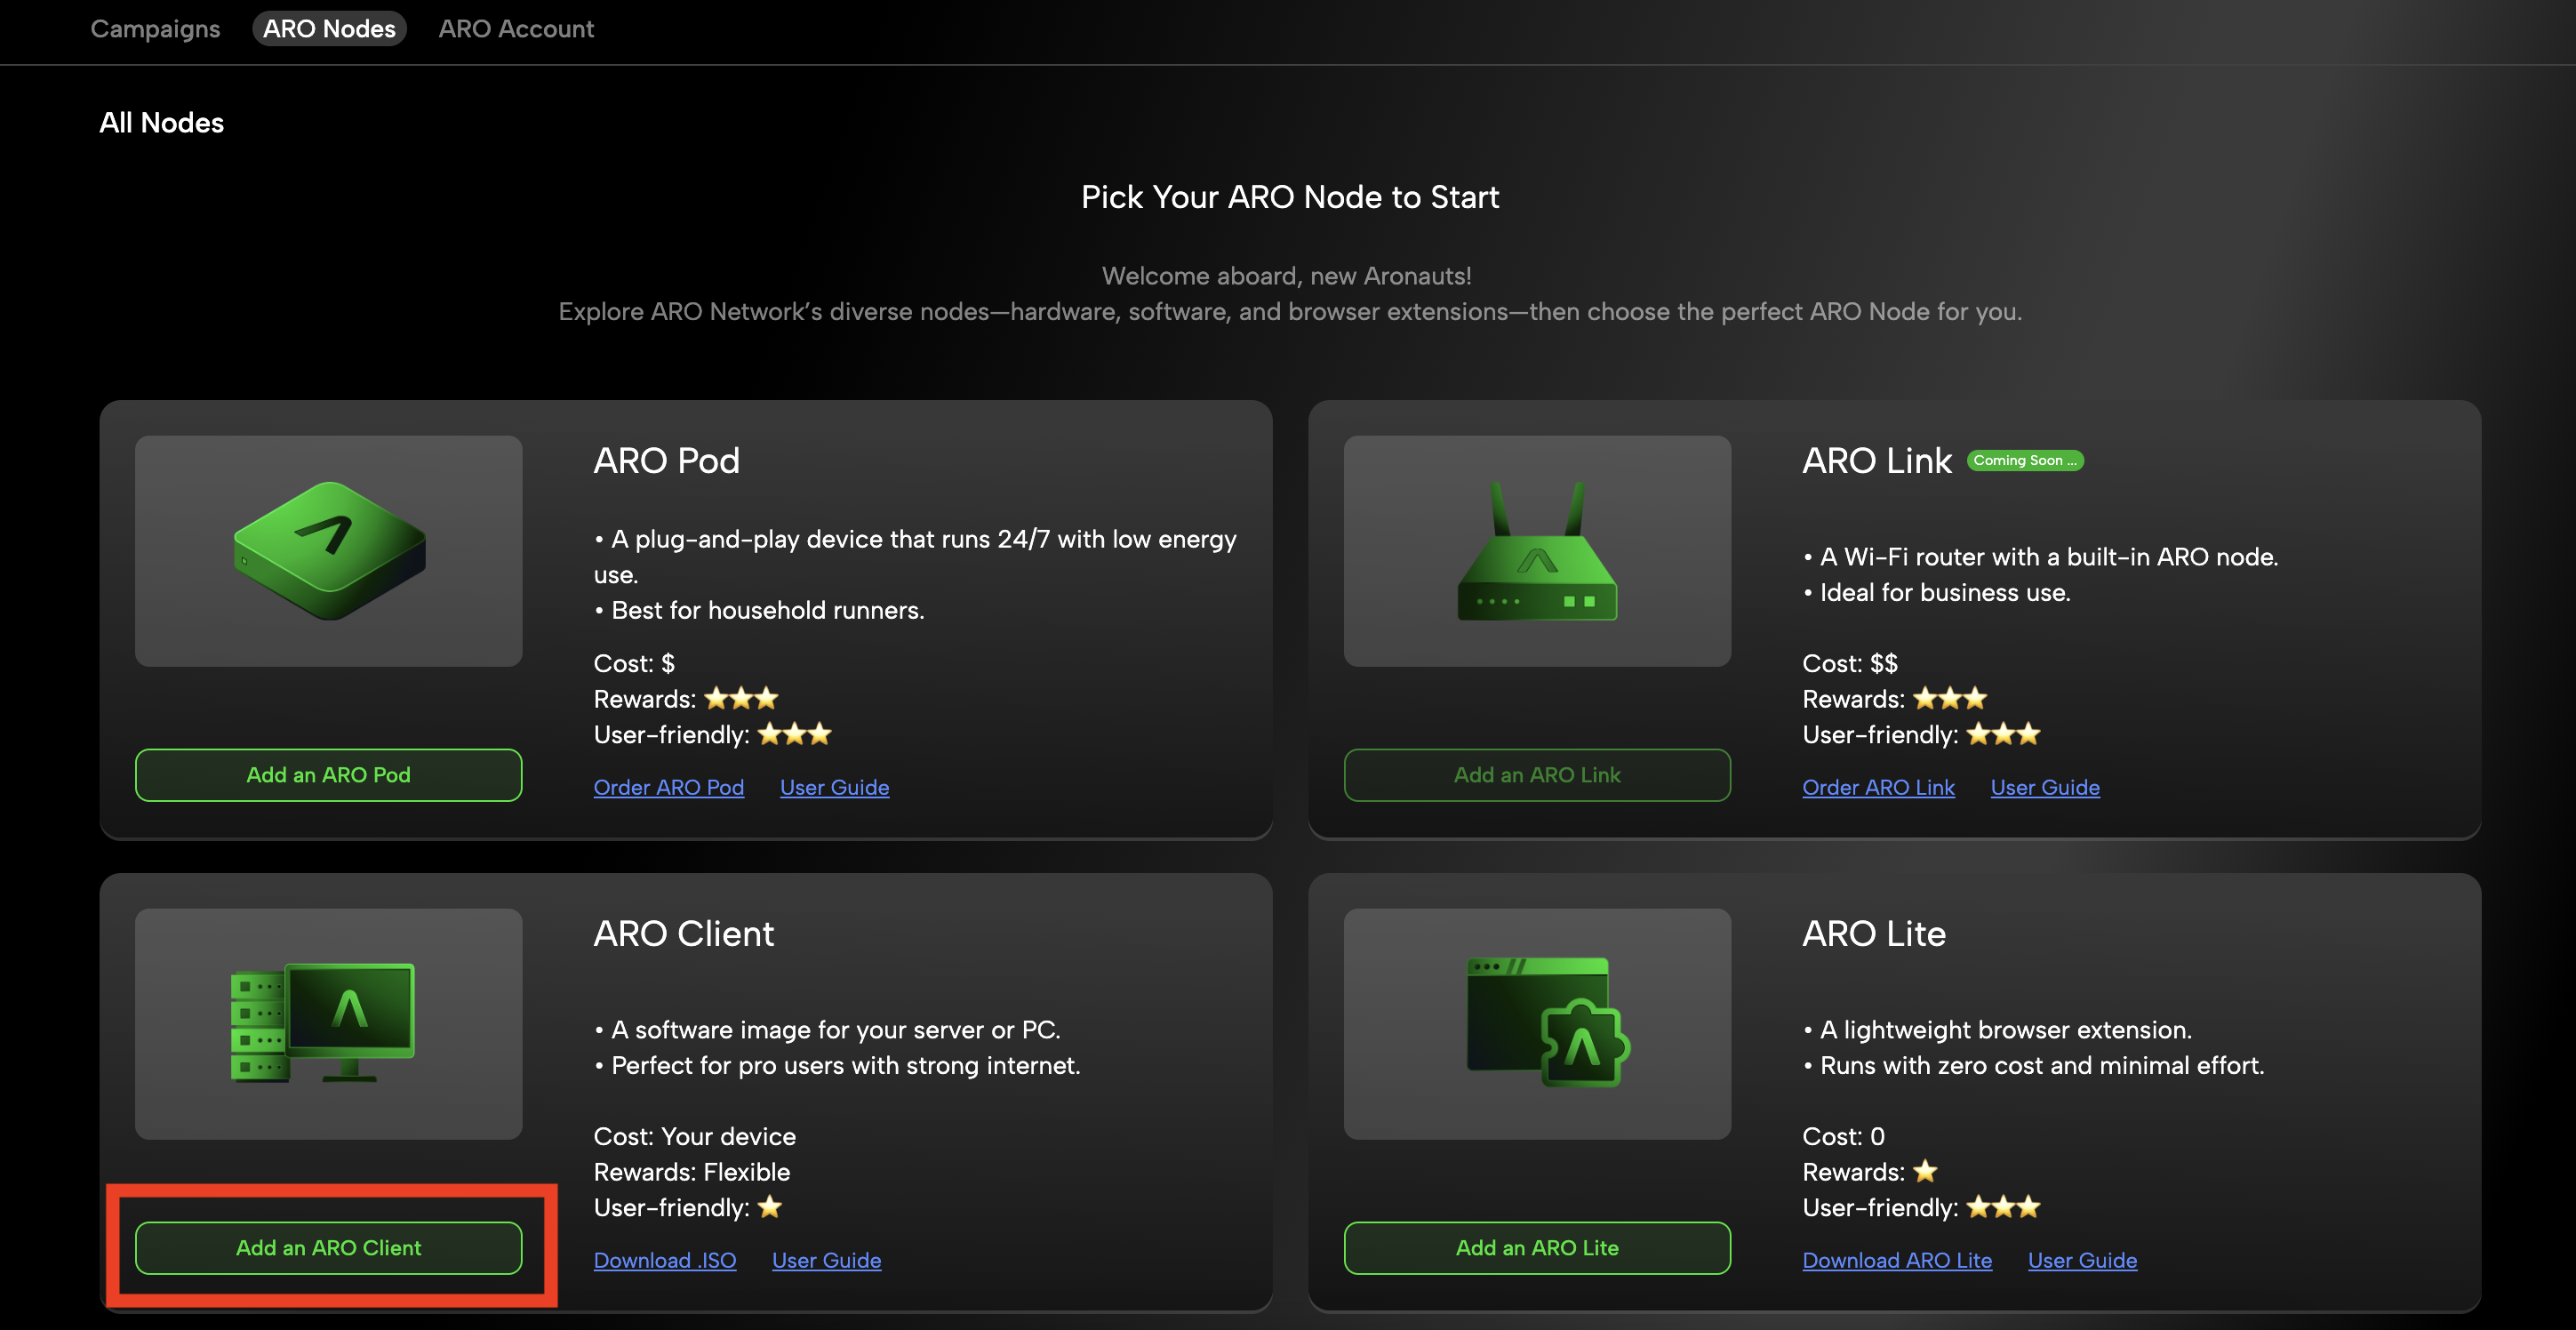
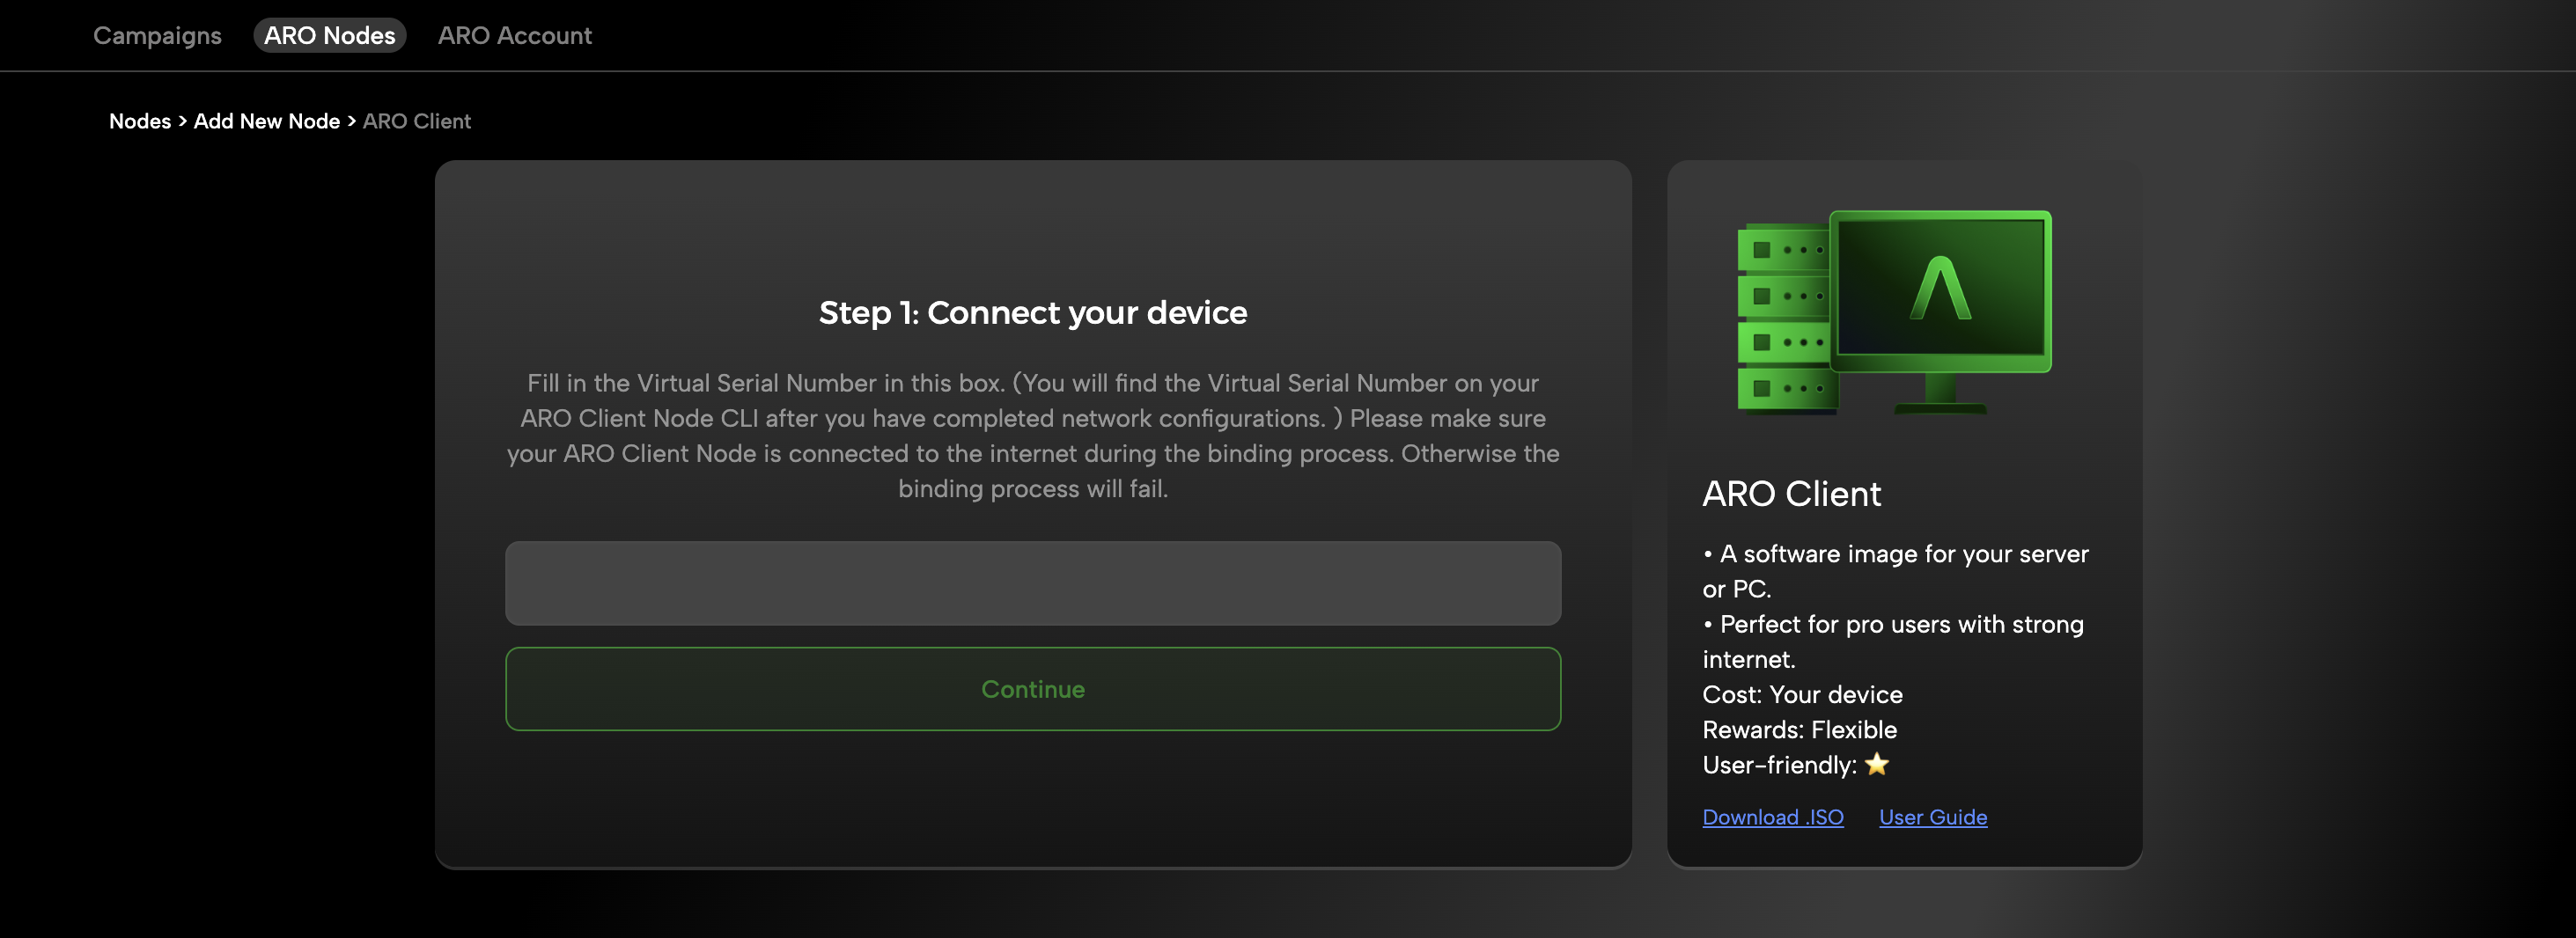
Open the ARO Dashboard. Navigate to ARO Nodes > Add an ARO Client, follow steps and enter the 19-digit Virtual Serial Number.
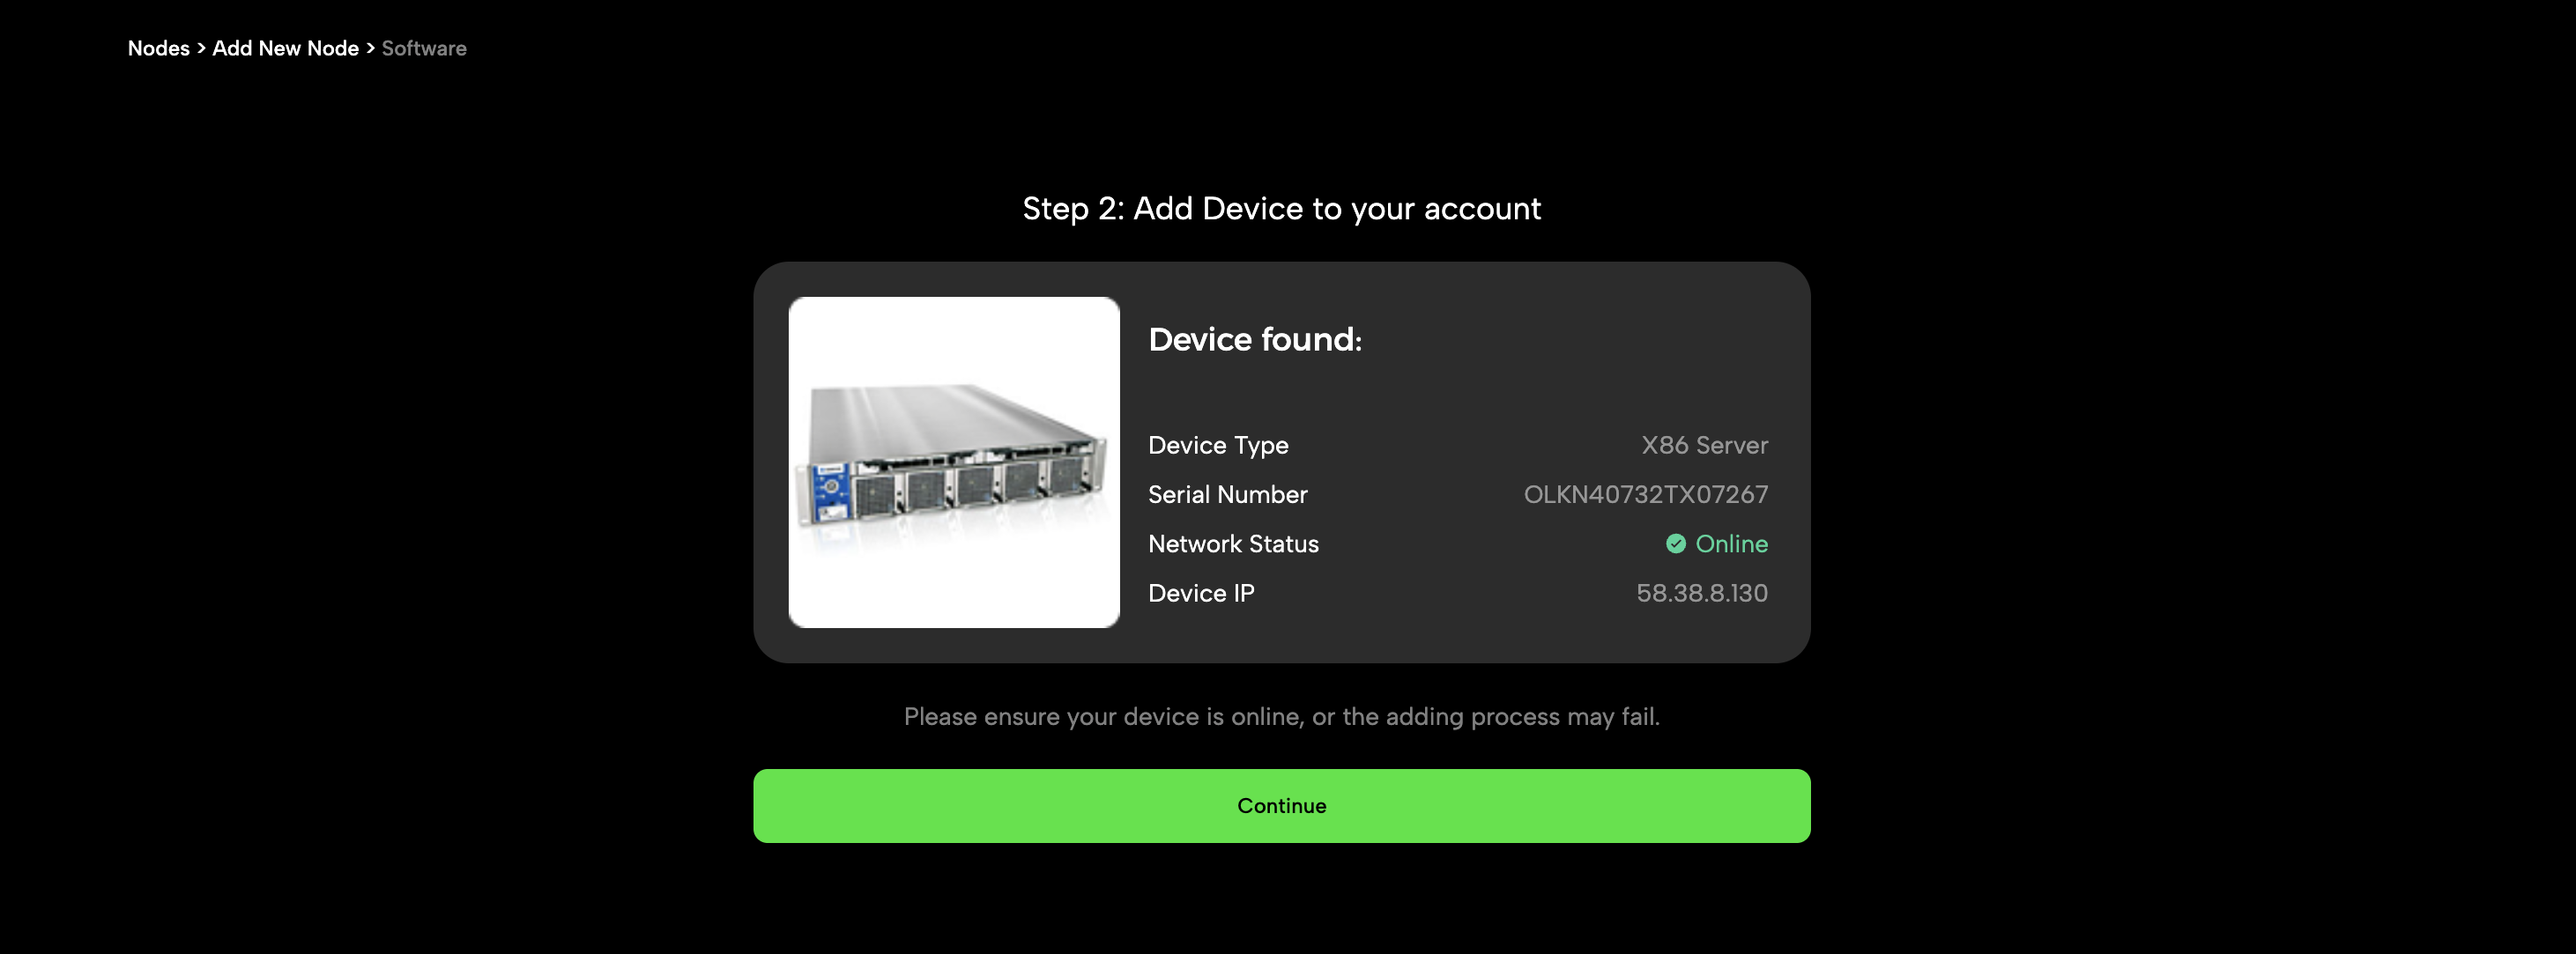
The dashboard will recognize the software image instance and display its information. Confirm to continue.Important: Ensure the software image is online during activation. If it is offline, the activation or node addition process may fail.
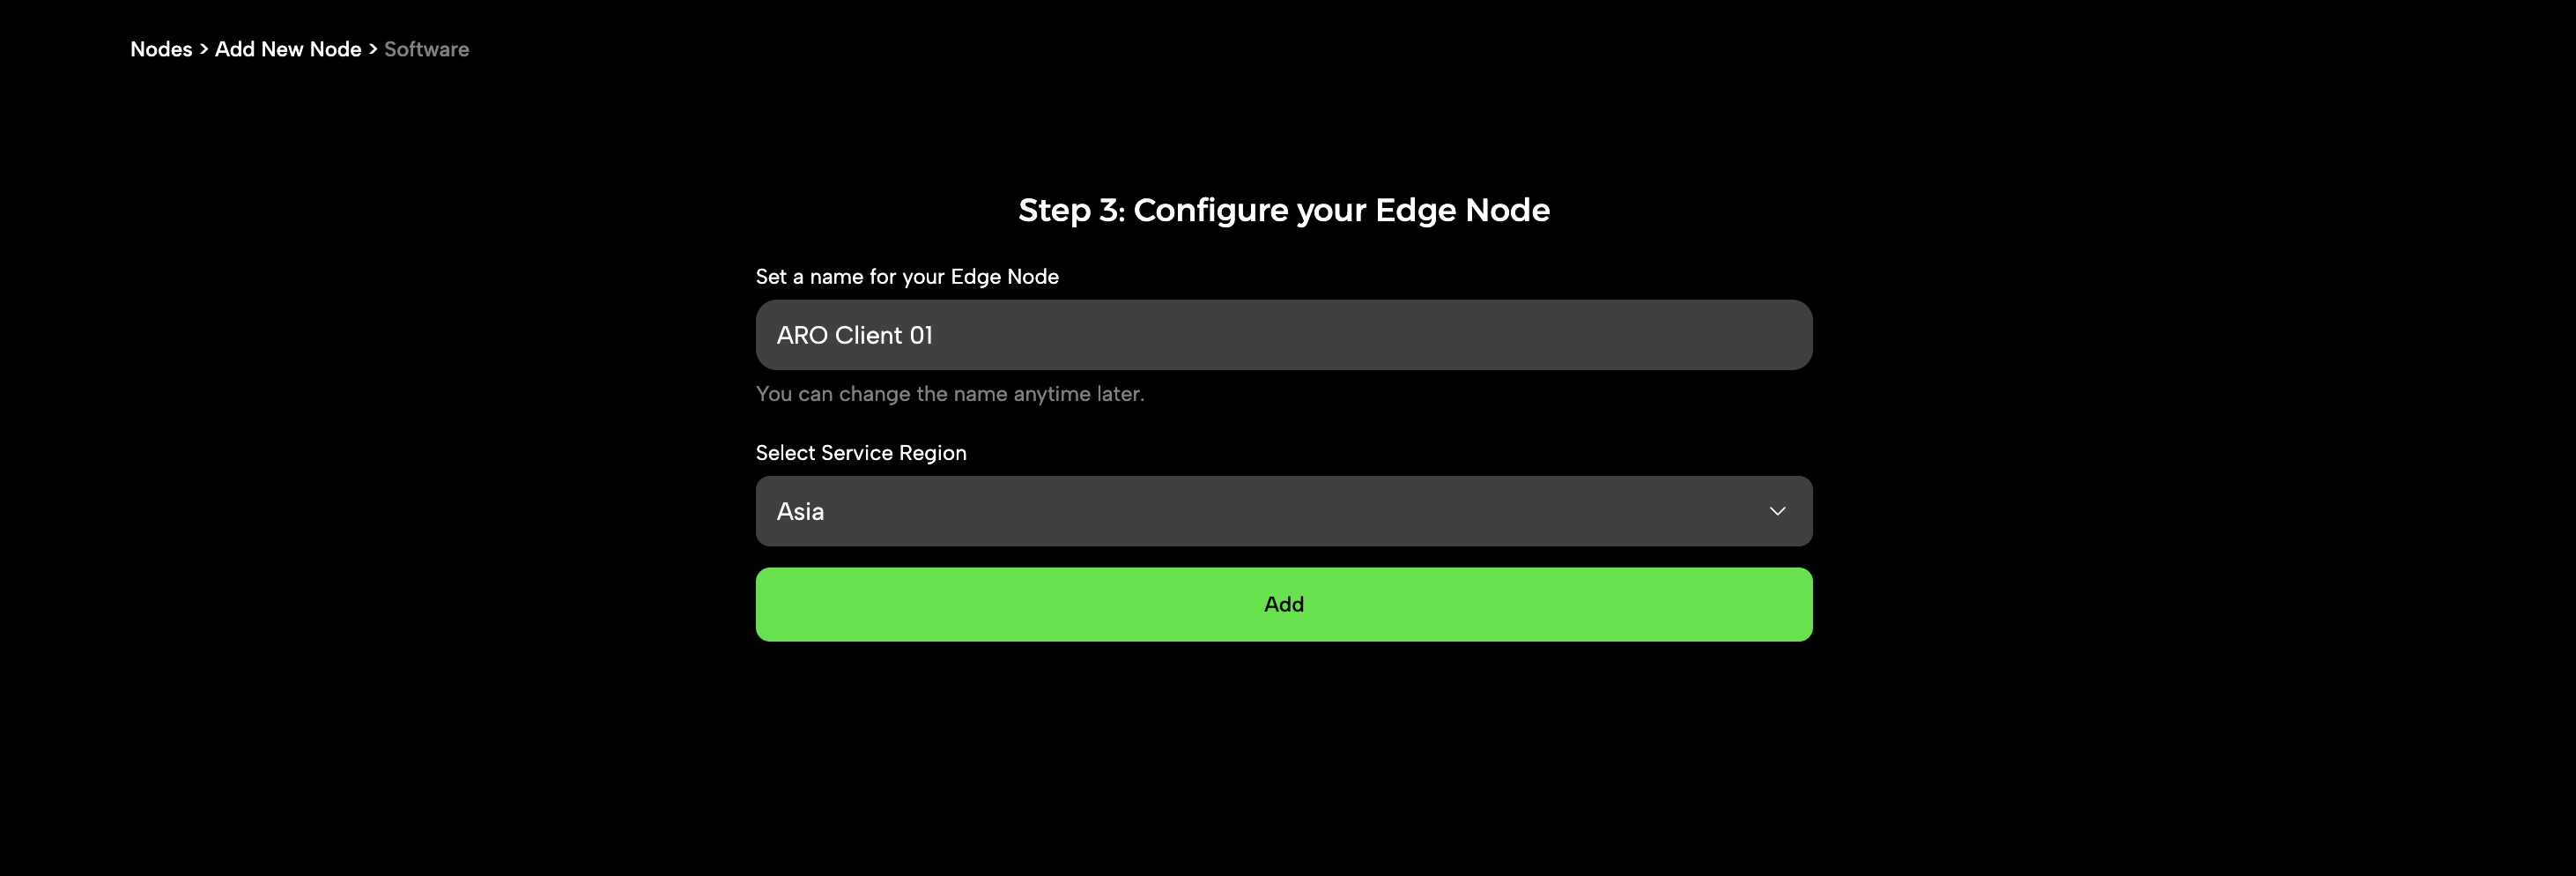
Select the appropriate region and assign a name to your new node. -
Verify Running Status
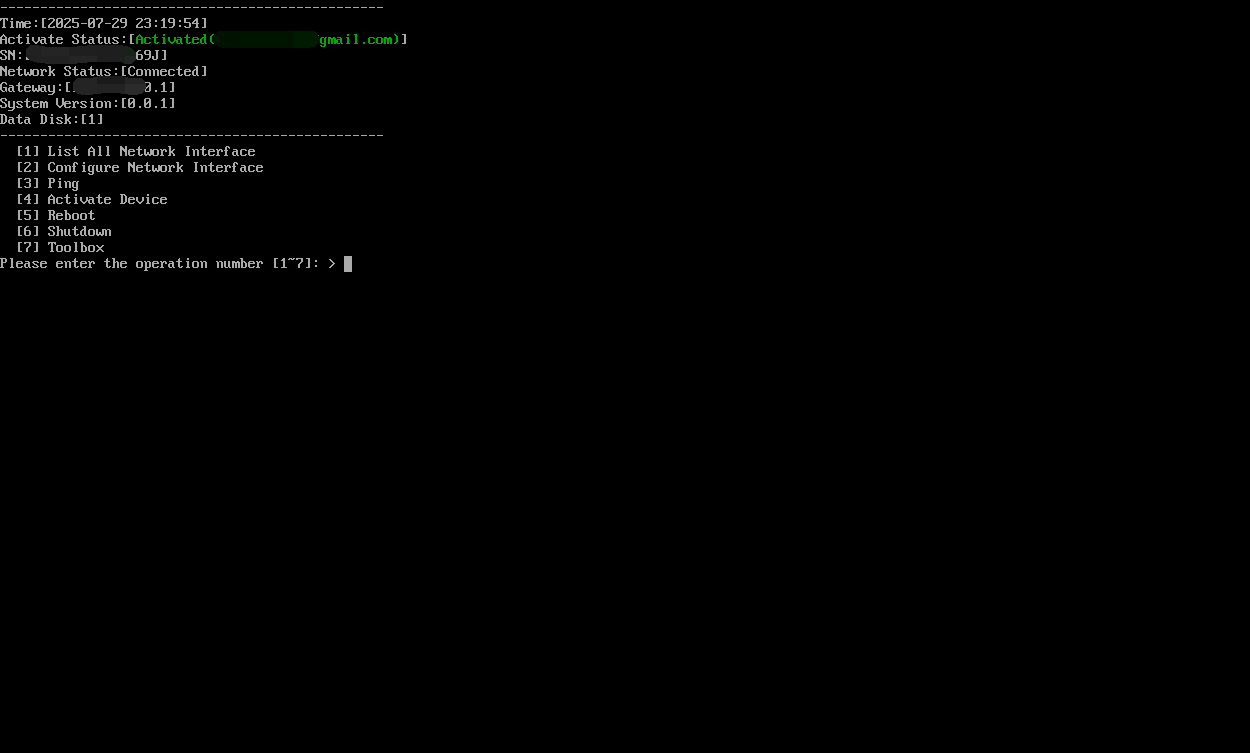
Congratulations! You have successfully set up your new ARO Client. The CMD console will return to the main menu, displaying real-time network status and activation status. If activation status shows 'Activated' together with your bound account in green, and network status shows 'Connected', then your ARO Client is running successfully.
FAQ
-
What network ports should be open?
To ensure proper connectivity and performance, please configure your firewall to allow the following inbound and outbound ports:✅ Inbound Ports
- UDP: All ports
- TCP:
80,443,9500–9700
🚀 Outbound Ports
- UDP:
40001–40100 - TCP:
443,30002,40001–40100
-
My CMD Console and Dashboard Node Detail page show different status.
This could happen in some case due to the latency of status update in the CMD Console. If this happens, please refer to the Dashboard for an update-to-date status, and refresh the CMD Console manually (PressEnteron the main menu and refresh the page).