ARO Pod & ARO Link Tutorial
Get Started with Your New Hardware Device!
This guide is for you if:
- You’ve received your new Hardware Node (e.g., ARO Pod or ARO Link) and want to set it up.
- You need help adding your new device to your Dashboard.
To learn more about Hardware Nodes, refer to this introduction.
To choose the best Edge Node for your needs, see this guide.
Watch this quick video guide for an easy onboarding experience.
Step 1: Plug In
Setting up Hardware Nodes like the ARO Pod or ARO Link is simple and intuitive with their plug-and-play design.
Unbox your device, power it on, and connect it to the internet using the provided cable. This process takes about a minute. Ensure a stable internet connection before proceeding to Step 2.
Step 2: Add Device to Your Dashboard
Ensure you’ve created an ARO Account (ARO ID) and are logged in to the Dashboard.
For account creation instructions, refer to this guide.
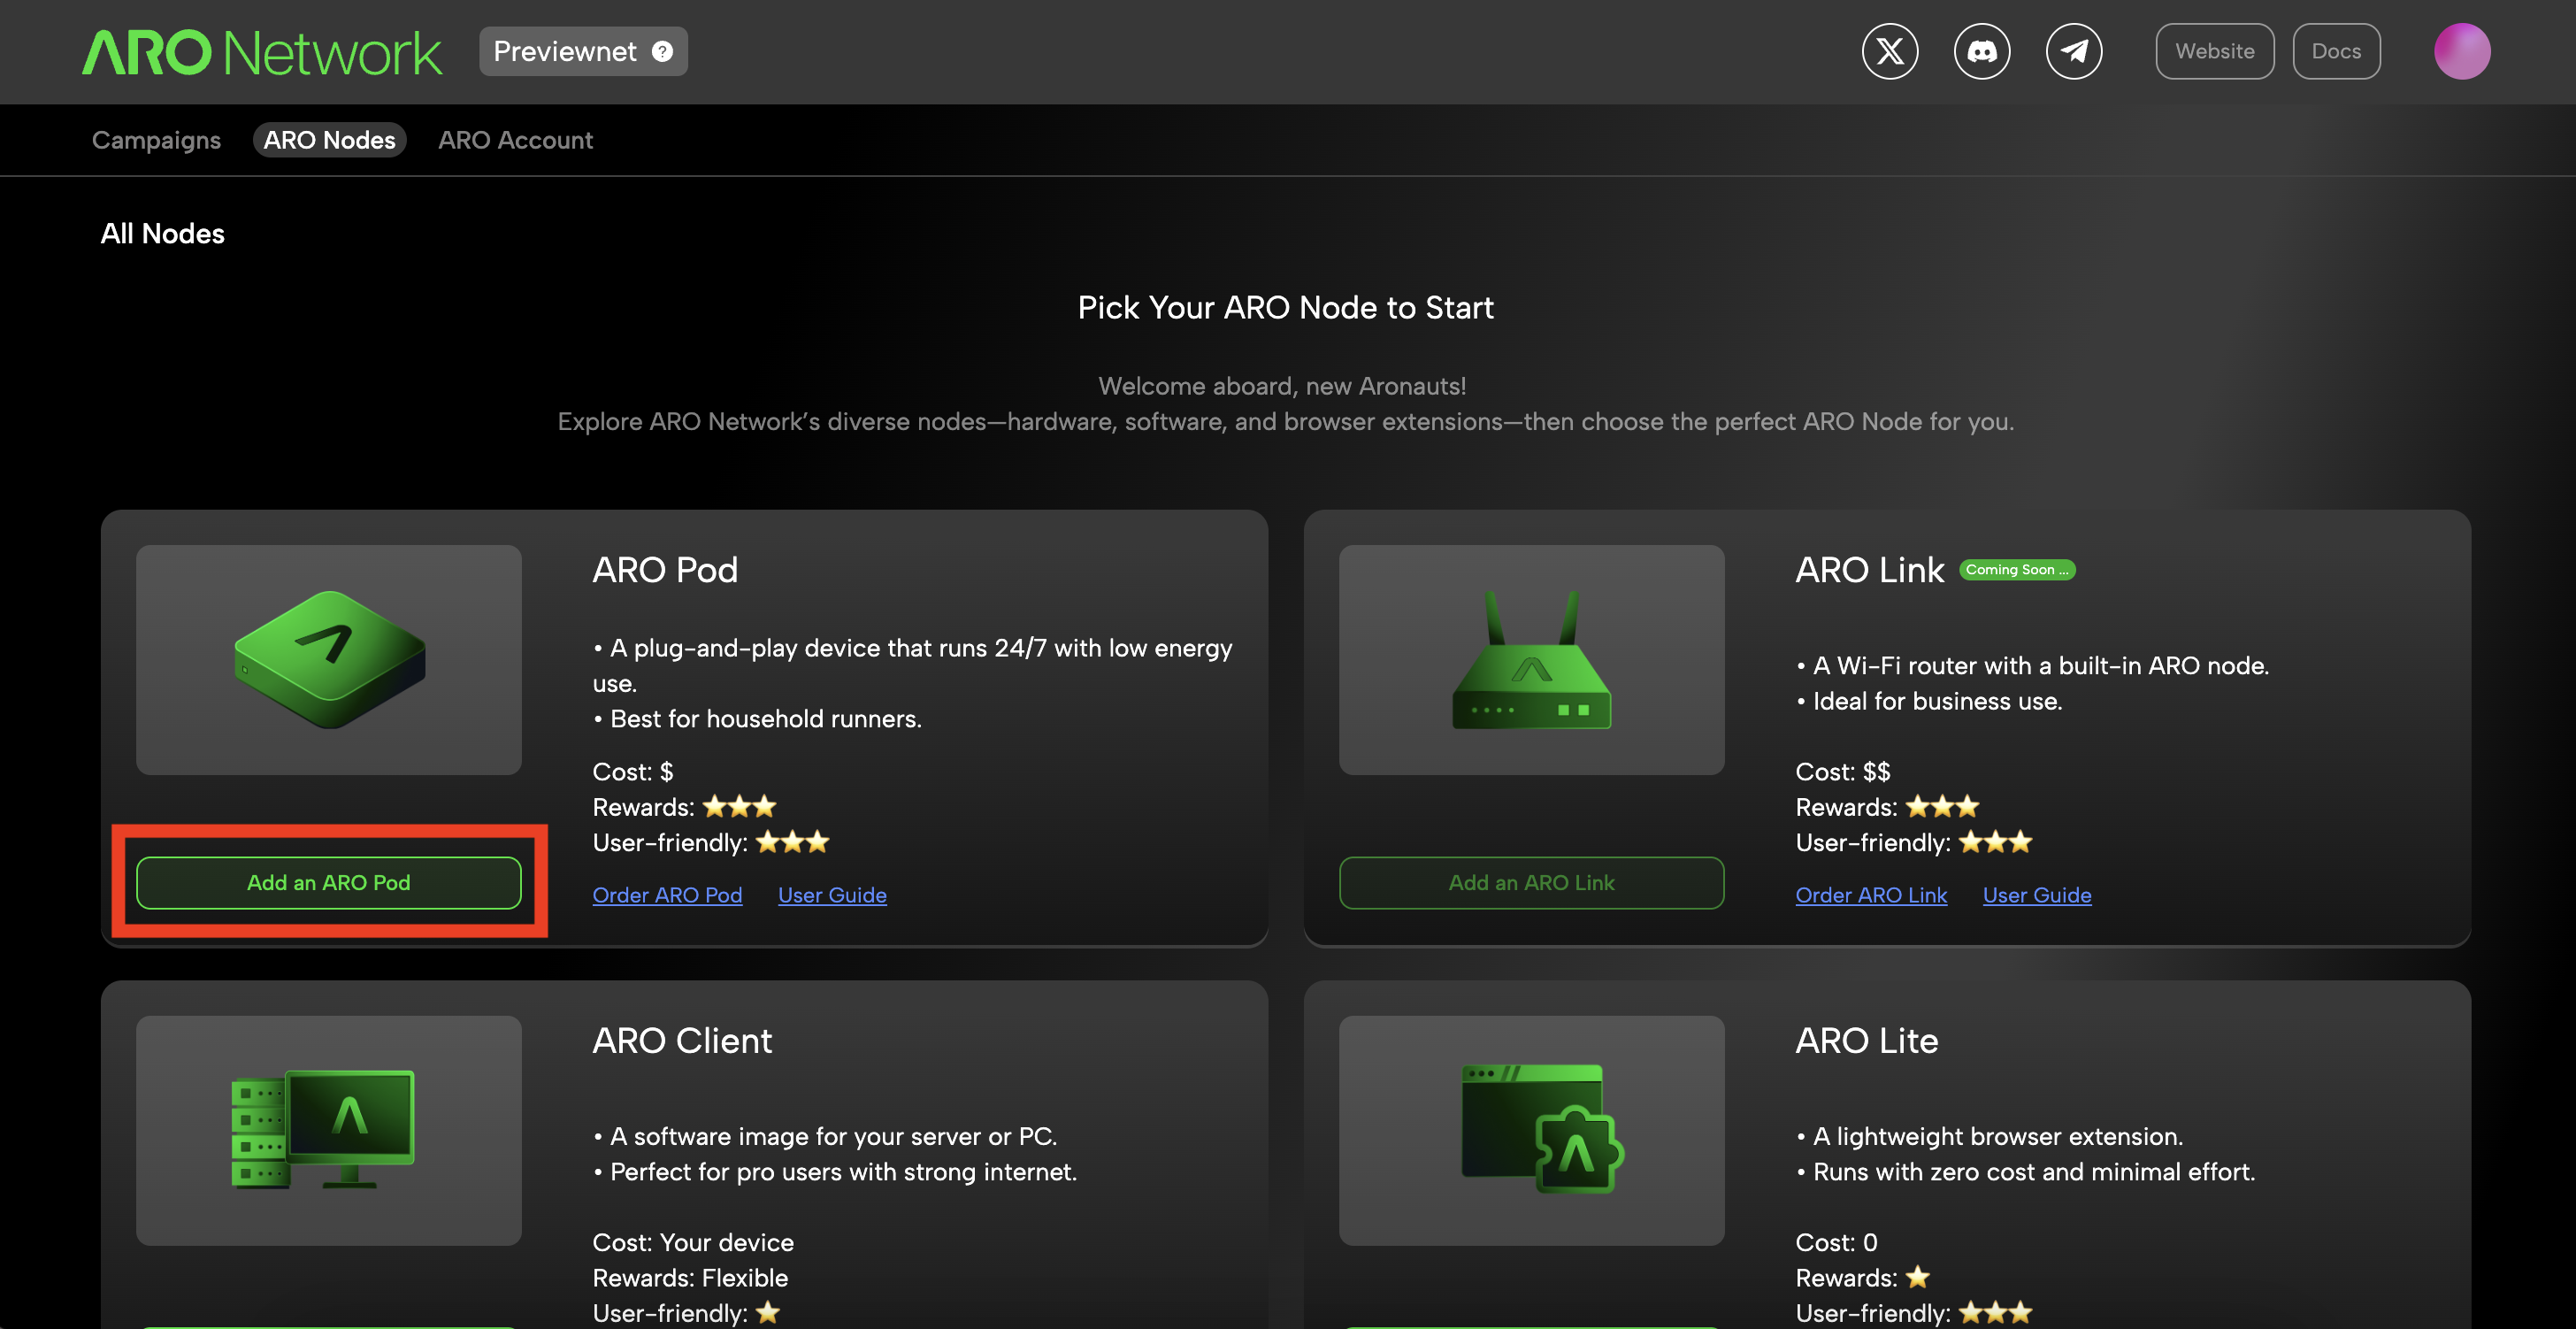
On the Edge Node page in your Dashboard, locate the "Add an ARO Node" button and click to initiate adding process.
Note: Please do ensure the device is online (powered on and connected to the internet) during this process.
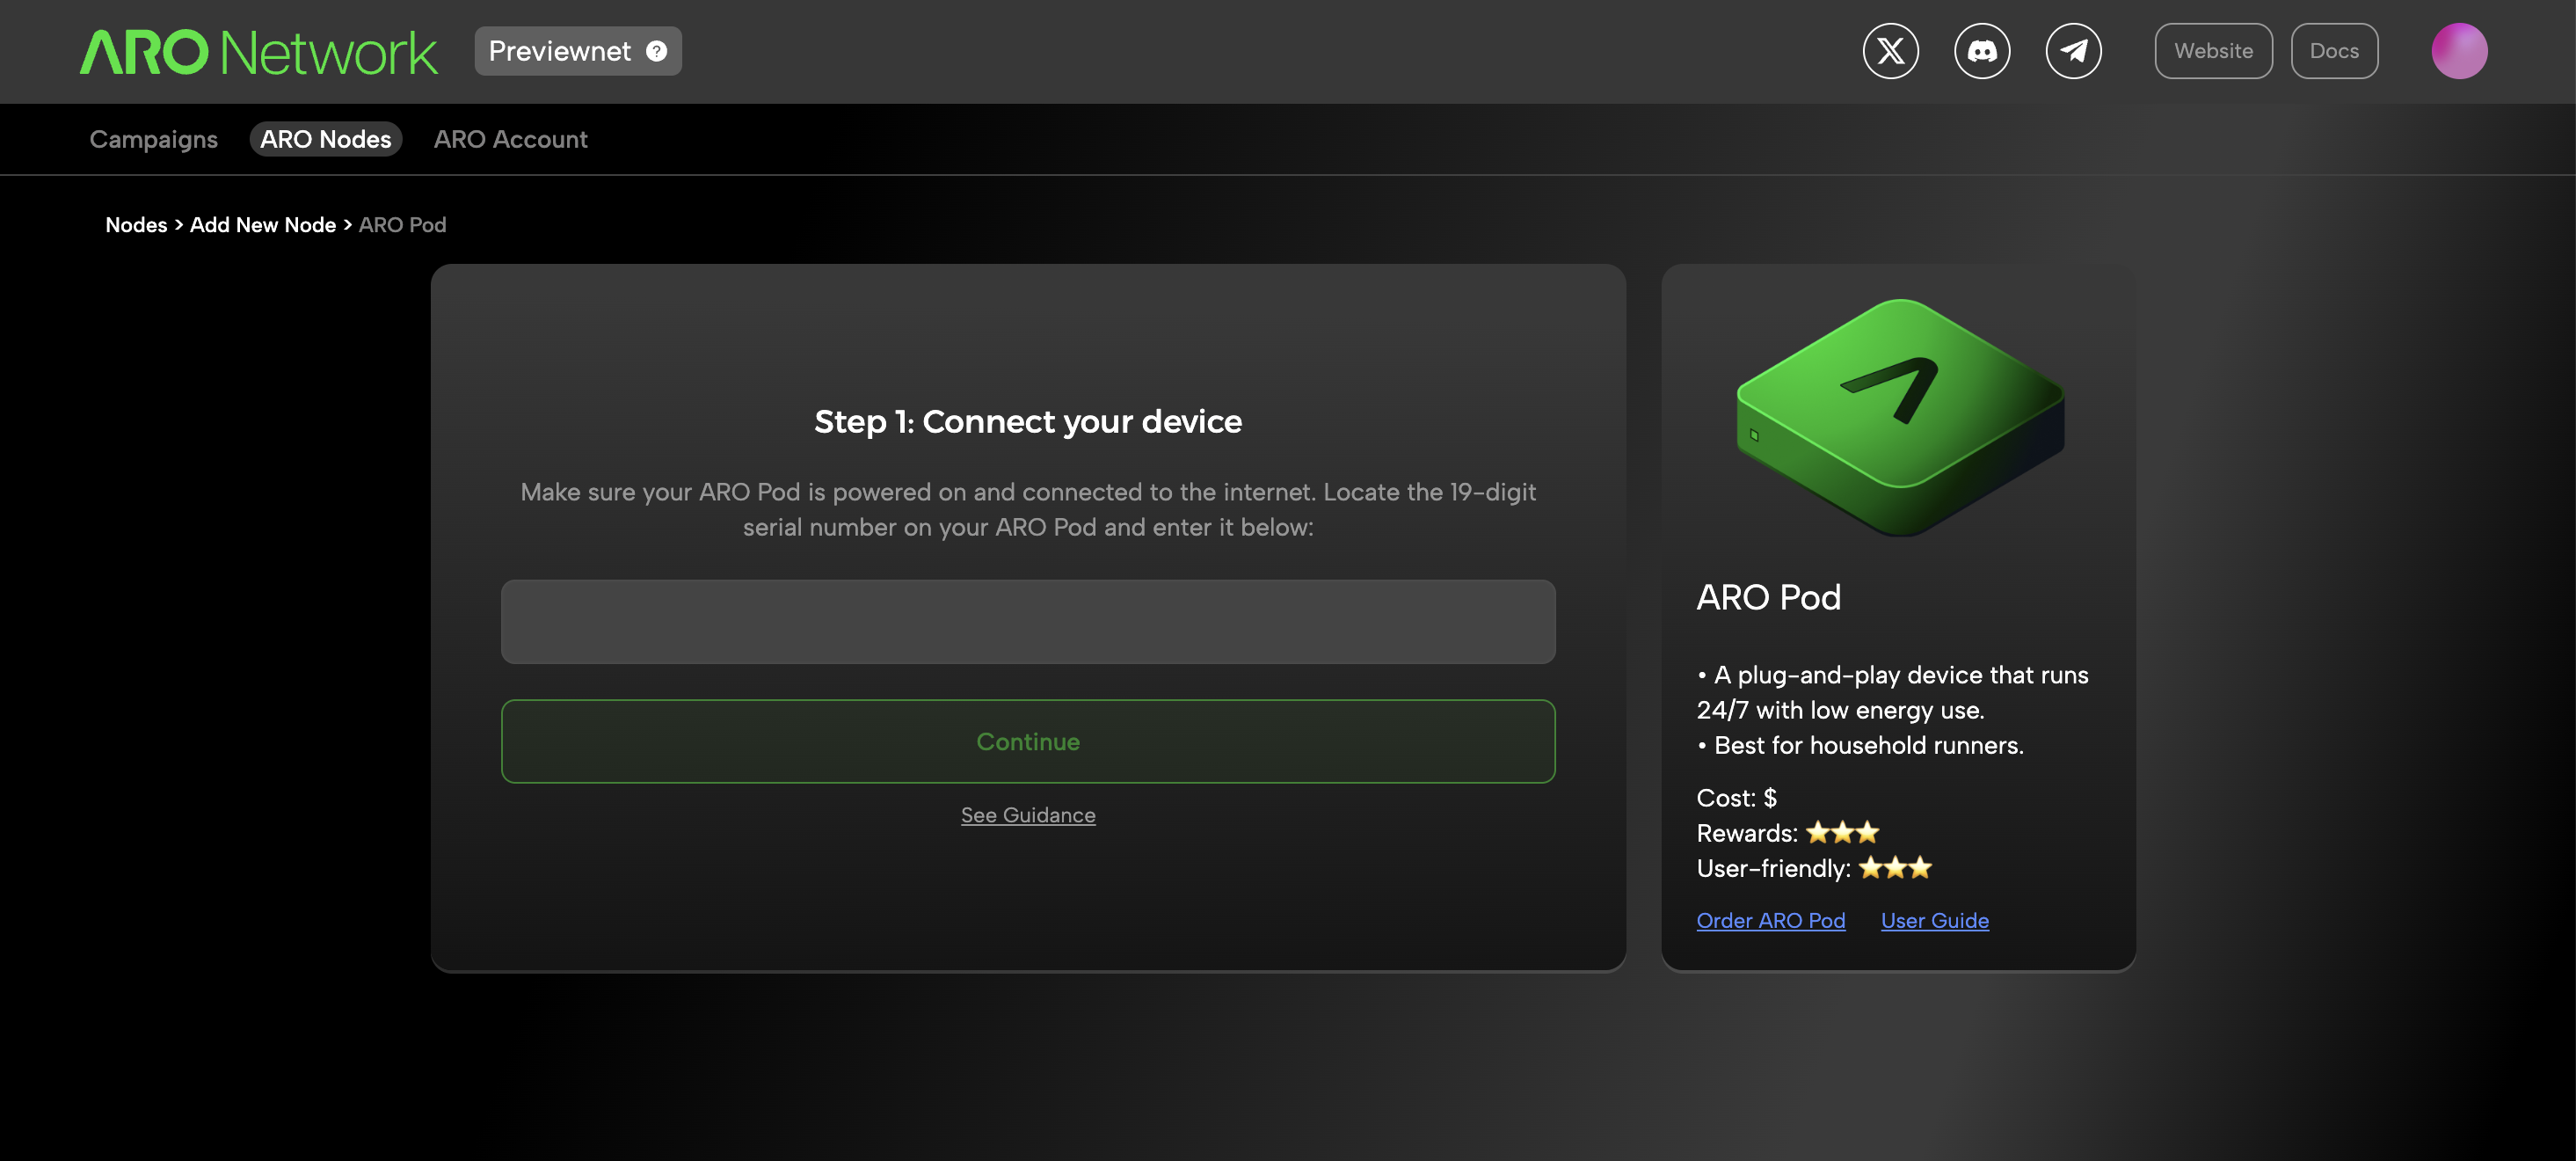
You’ll be prompted to enter the Serial Number (SN) of your device, which is printed on the device label. Enter it carefully to avoid errors.
If successful, the Dashboard will recognize your device, and you can complete the setup with a few clicks.
Step 3: Ready to Go!
Once the device is added, a device card will appear on the Edge Node page. Your first ARO Edge Node is now ready to operate!
Click on the card to check running details of your node.
FAQ
-
What network ports should be open?
To ensure proper connectivity and performance, please configure your firewall to allow the following inbound and outbound ports:✅ Inbound Ports
- UDP: All ports
- TCP:
80,443,9500–9700
🚀 Outbound Ports
- UDP:
40001–40100 - TCP:
443,30002,40001–40100