ARO Desktop Installation Guide
Supported Operating Systems
ARO Desktop currently supports the following desktop operating systems:
- macOS
- Windows
- Linux
macOS Installation Guide
Step 1: Download the macOS Package from Dashboard
- Go to Dashboard -> Add New Node.
- Choose macOS as your system.
- Download the
.dmginstaller.
Step 2: Install and Open ARO Desktop (Handle macOS Security Prompt)
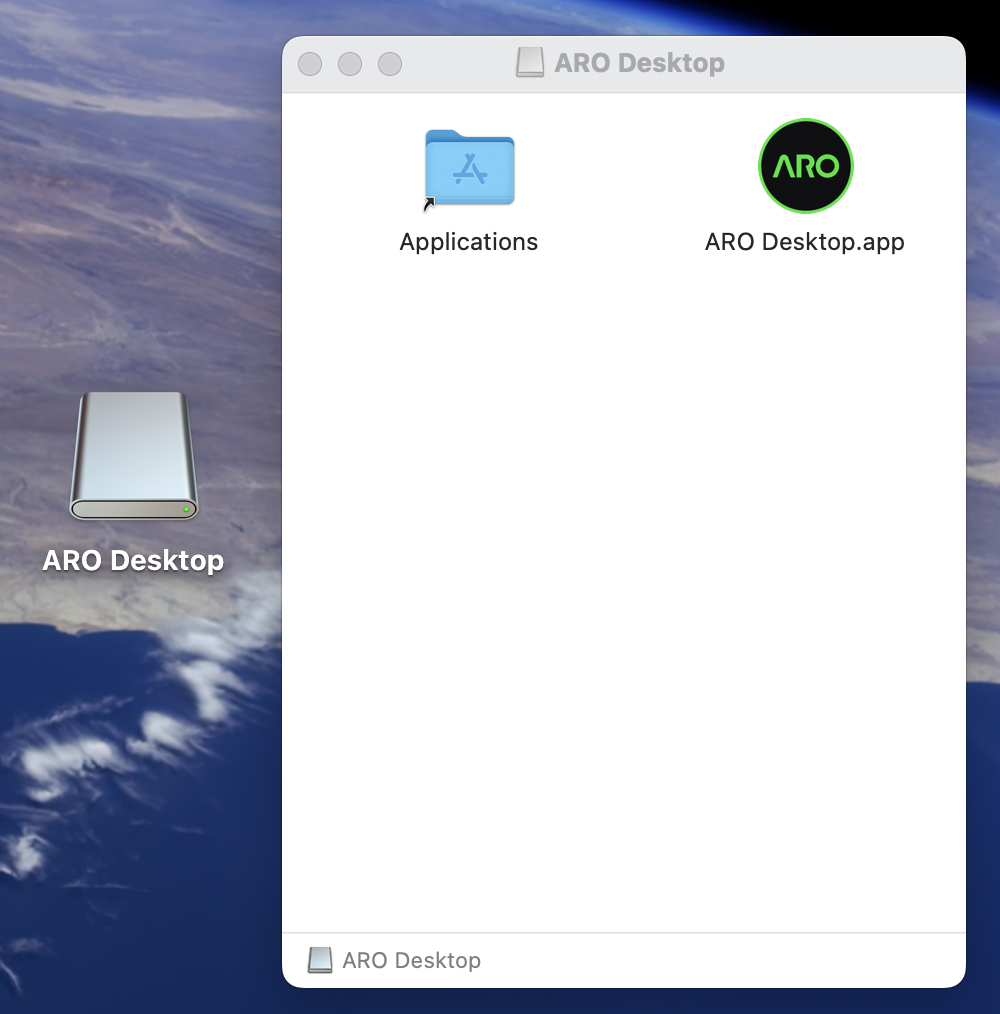
- Open the downloaded
.dmgfile. - Drag the ARO Desktop app icon into Applications.
- Open Applications and launch ARO Desktop.
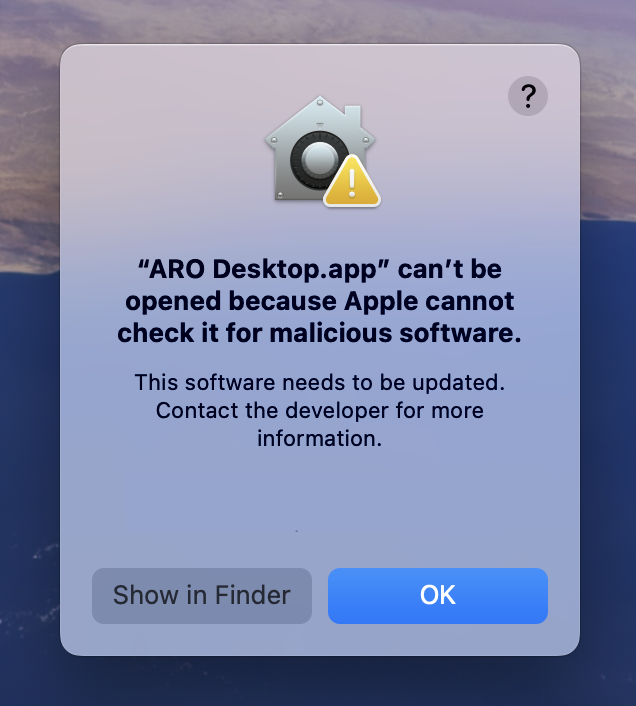
- You may see a macOS prompt saying the app cannot be opened.
This is expected in some environments because the app can be recognized as coming from an unidentified developer signature by macOS security checks.
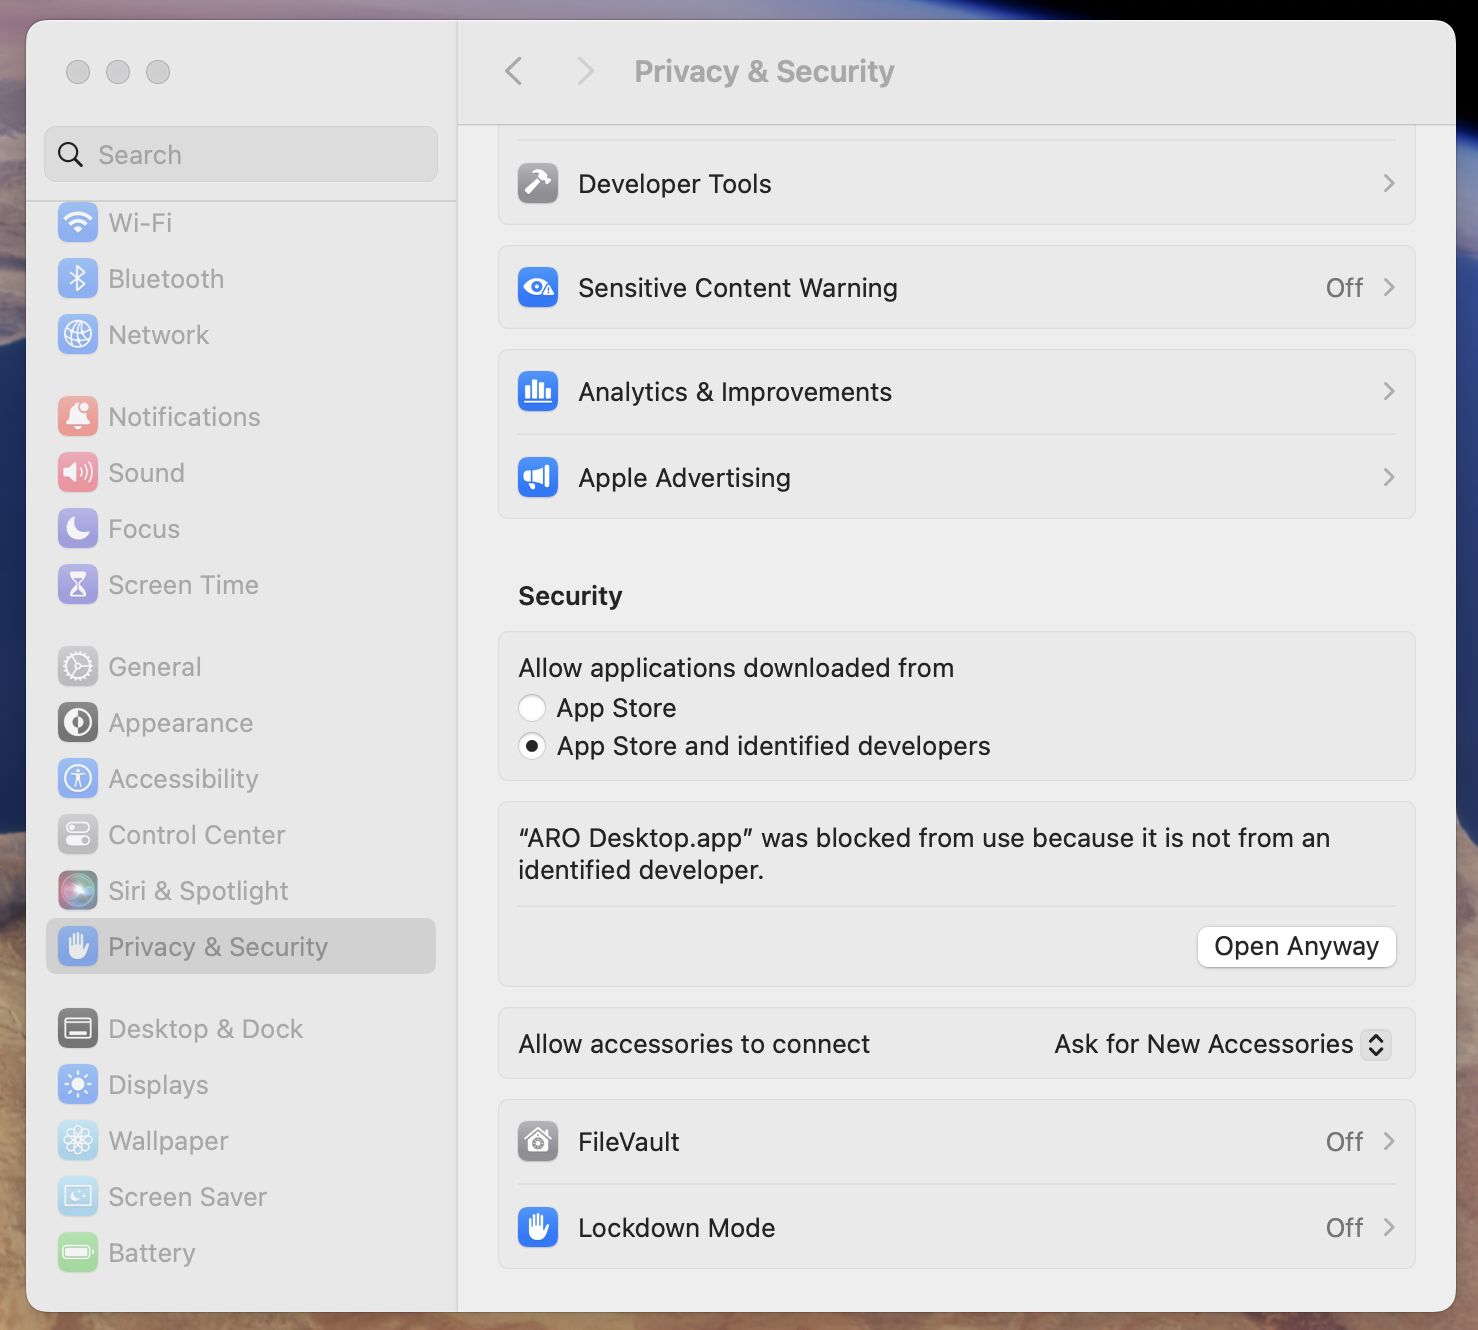
- Open System Settings.
- Go to Privacy & Security.
- In the Security section, find the blocked message for ARO Desktop.
- Click Open Anyway.
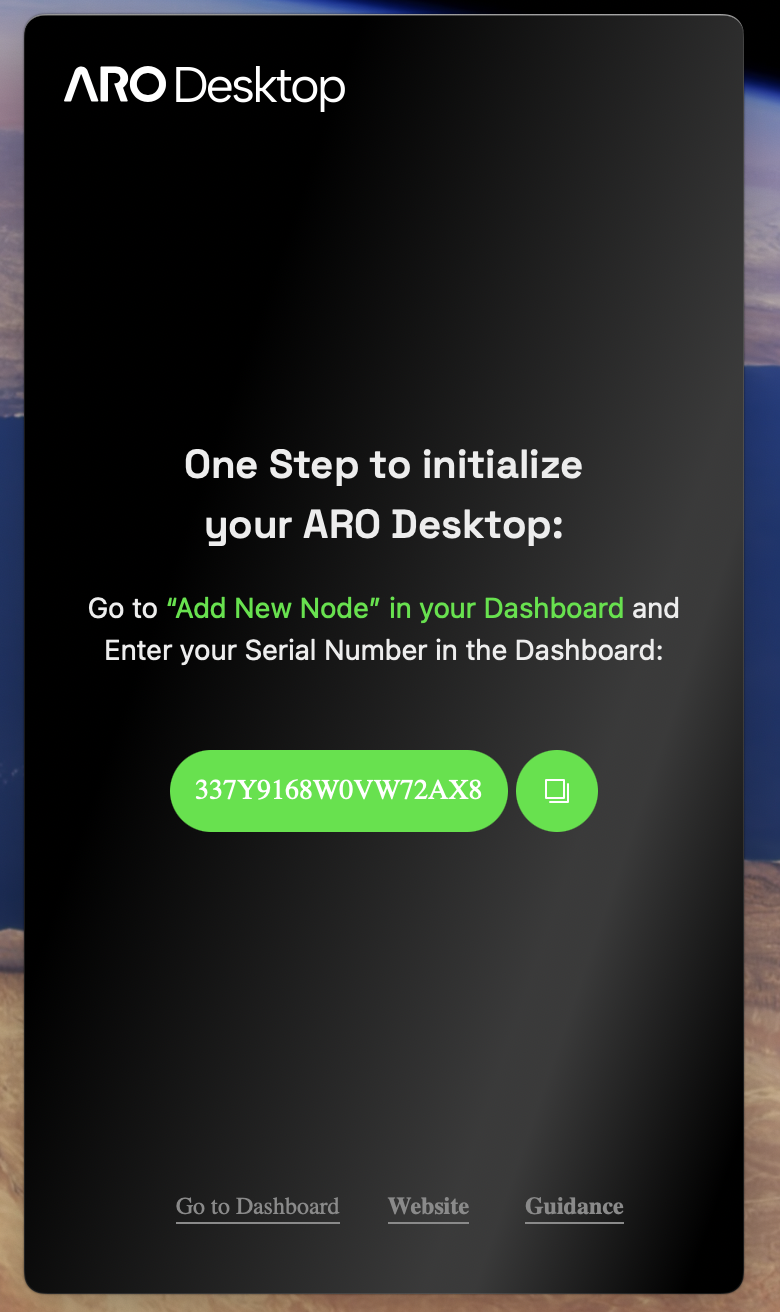
Step 3: Start ARO Desktop and Get Node SN
- Launch ARO Desktop again.
- You should now see the app startup screen.
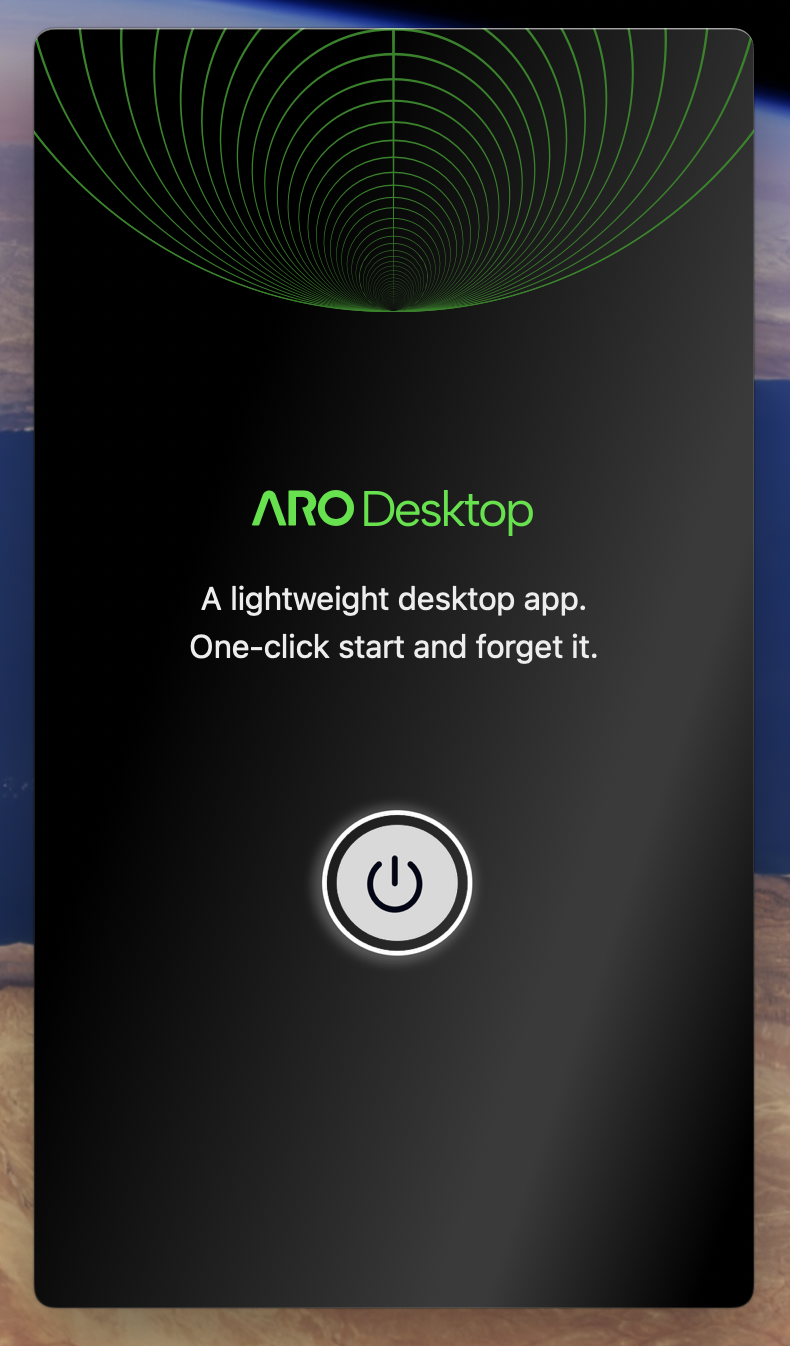
- Click Start to run the node.
- The app will generate a Serial Number (SN).
Step 4: Bind the Node in Dashboard
- Return to Dashboard -> Add New Node.
- Start the node-adding flow.
- Enter the generated SN and follow the on-screen instructions.
- Complete the first-time node binding.
Windows Installation Guide
Step 1: Download the Windows Installer from Dashboard
- Go to Dashboard -> Add New Node.
- Choose Windows as your system.
- Download the
.exeinstaller.
Step 2: Run the Installer and Follow the Setup Wizard
- Locate the downloaded
.exefile and double-click to run it. - Follow the installer wizard steps carefully.
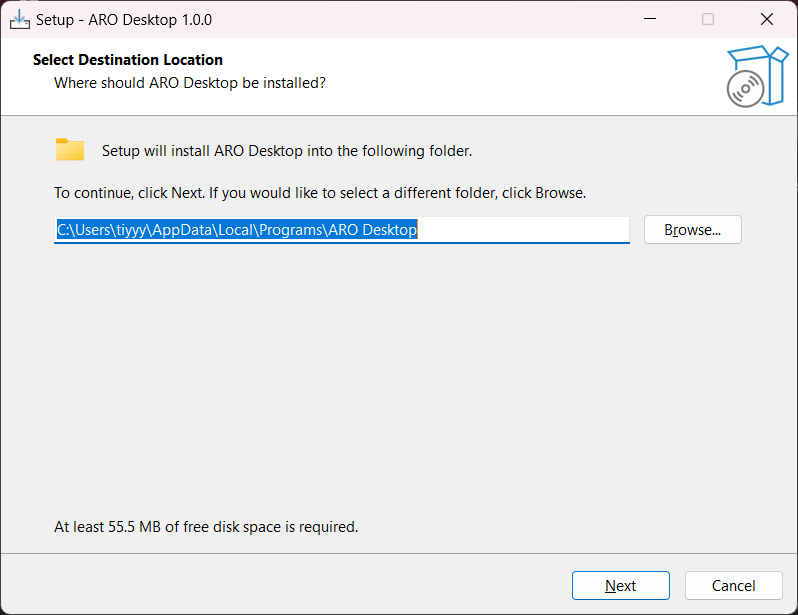


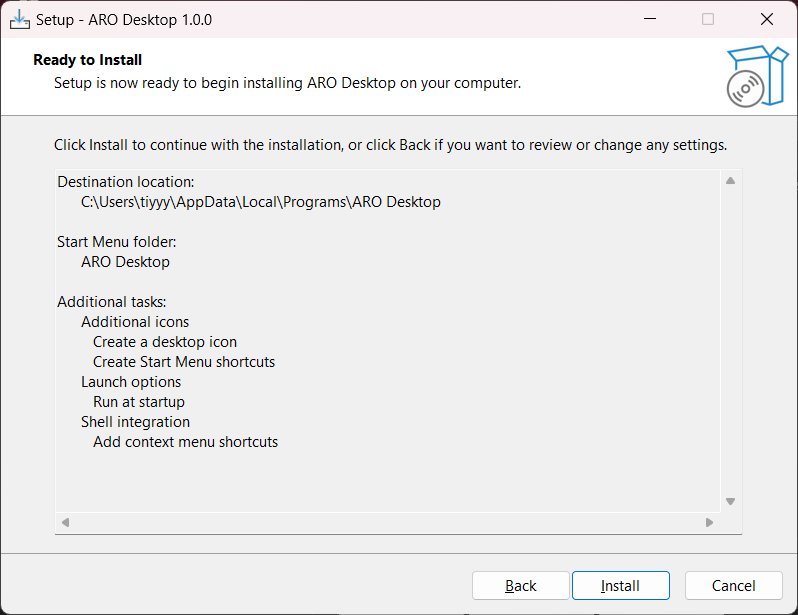
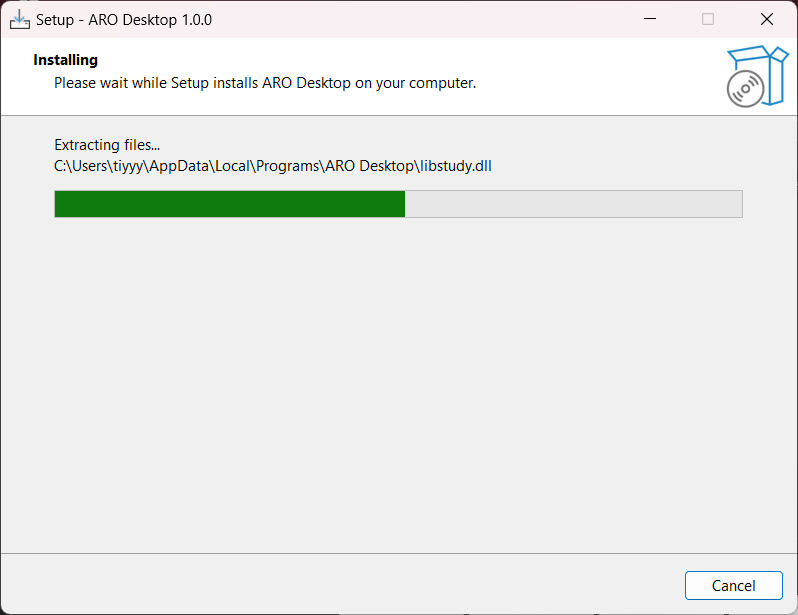
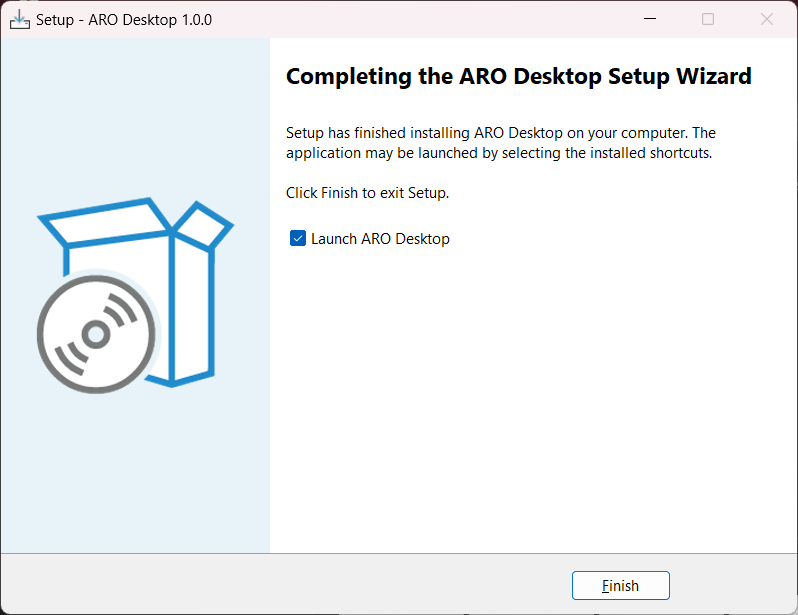
- Once the installation is complete, ARO Desktop will be ready to use.
If you encounter an error message about VCRUNTIME140_1.dll not found during installation or when launching ARO Desktop, this indicates that your Windows system is missing a required C++ runtime dependency.
To resolve this issue:
- Visit the Microsoft Visual C++ Redistributable download page.
- Download the appropriate version for your system (x86 or x64).
- Install the downloaded Visual C++ Redistributable package.
- Restart your computer.
- Return to step 1 and re-run the ARO Desktop installer.
Step 3: Start ARO Desktop and Get Node SN
- Launch ARO Desktop from your Start Menu or desktop shortcut.
- You should now see the app startup screen.
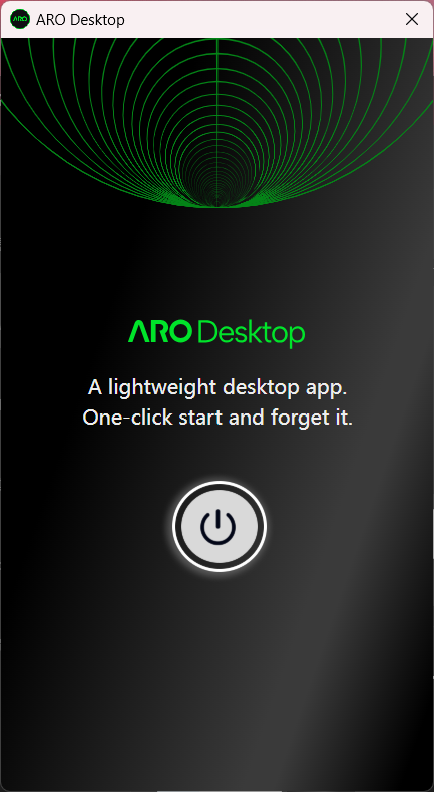
- Click Start to run the node.
- The app will generate a Serial Number (SN).
Step 4: Bind the Node in Dashboard
- Return to Dashboard -> Add New Node.
- Start the node-adding flow.
- Enter the generated SN and follow the on-screen instructions.
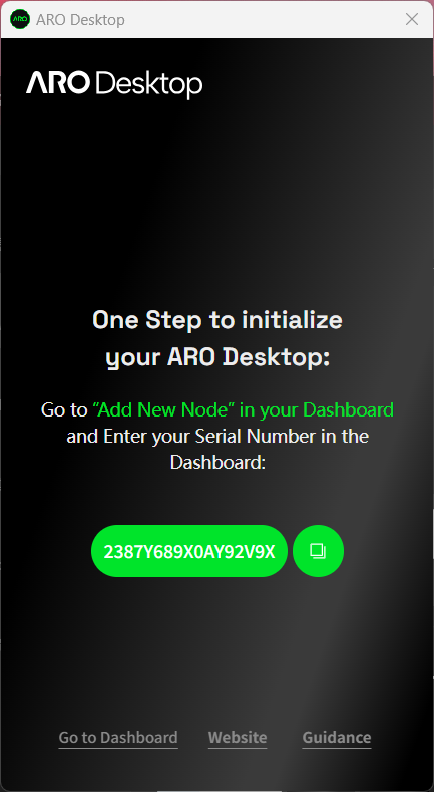
- Complete the first-time node binding.
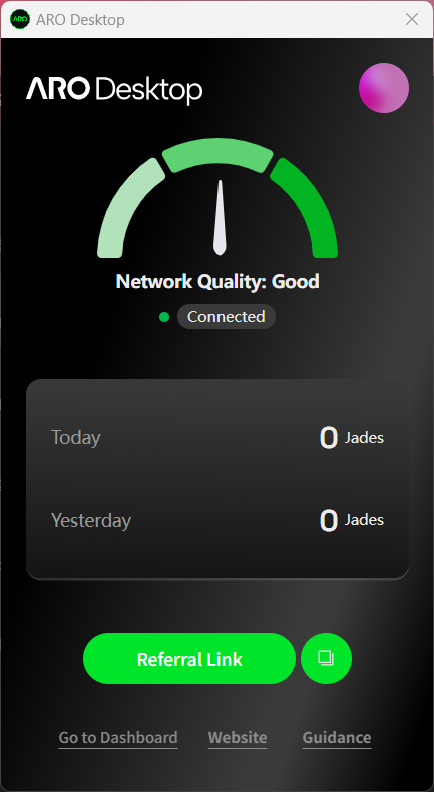
- Your Windows ARO Desktop node is now ready to operate!
Linux Installation Guide
ARO Desktop supports both Debian/Ubuntu-based and RPM-based (CentOS/RHEL) Linux systems.
Debian / Ubuntu
Step 1: Download the Linux Package from Dashboard
- Go to Dashboard -> Add New Node.
- Choose Linux as your system.
- Download the
.debinstaller.
Step 2: Install ARO Desktop
sudo apt install ./ARO_Desktop_<version>_amd64.deb
Replace <version> with the actual filename you downloaded.
Step 3: Start ARO Desktop and Bind Your Node
- Launch ARO Desktop.
- Click Start to run the node.
- The app will generate a Serial Number (SN).
- Go to Dashboard -> Add New Node.
- Enter the SN and complete the binding flow.
Uninstall (Debian / Ubuntu)
sudo apt purge aro-desktop
CentOS
Step 1: Download the Linux Package from Dashboard
- Go to Dashboard -> Add New Node.
- Choose Linux as your system.
- Download the
.rpminstaller.
Step 2: Install ARO Desktop
sudo dnf install -y ./ARO_Desktop-<version>-1.x86_64.rpm
Replace <version> with the actual filename you downloaded.
If the installation fails due to missing packages (e.g. webkit2gtk4.1), enable EPEL and CRB first, then retry:
sudo dnf install -y epel-release
sudo dnf config-manager --set-enabled crb
sudo dnf install -y ./ARO_Desktop-<version>-1.x86_64.rpm
Step 3: Start ARO Desktop and Bind Your Node
- Launch ARO Desktop.
- Click Start to run the node.
- The app will generate a Serial Number (SN).
- Go to Dashboard -> Add New Node.
- Enter the SN and complete the binding flow.
Uninstall (CentOS)
sudo dnf remove aro-desktop
Troubleshooting
Incomplete uninstall on Debian / Ubuntu
If apt purge leaves residual package state, manually clean the dpkg status entry:
- Open the dpkg status file:
sudo nano /var/lib/dpkg/status
-
Search for the
aro-desktopblock: pressCtrl + W, typearo-desktop, then pressEnter. -
Delete the entire block starting from
Package: aro-desktopthrough the end of that entry. -
Save and exit:
Ctrl + O→Enter→Ctrl + X. -
Repair dpkg and fix broken packages:
sudo dpkg --configure -a
sudo apt --fix-broken install
- Refresh the desktop application database:
sudo update-desktop-database
Kill ARO Desktop process (if needed)
pkill -f aro-desktop