PCDN Worker Installation Tutorial
About PCDN Worker
A Peer-to-Peer Content Delivery Network (P2P CDN or PCDN) is a decentralized content delivery system that uses the collective bandwidth and storage of user devices to distribute content, unlike traditional CDNs that rely on centralized servers.
By enabling peers to act as both clients and servers, PCDNs distribute the content delivery load across a network of users, which can improve efficiency and scalability, especially for bandwidth-intensive applications like live streaming and software updates.
The PCDN Worker is an Edge Cloud Worker deployed on ARO Network's open application infrastructure for Edge Services (supports third-party application). The PCDN Worker enables ARO Client with high-performance PCDN Edge Service capabilities.
Follow this tutorial to intall PCDN Worker software image on your ARO Client.
Note: Please complete
Debianinstallation and ARO Client installation before you proceed with this tutorial.
1. Pre-Installation Preparation
1.1 Prepare a Physical Machine with ARO Client Installed, Monitor, and Keyboard
You need a physical machine with ARO Client already installed (refer to the ARO Client Installation Tutorial). Ensure the machine is connected to the internet via an Ethernet cable.
1.2 Obtain the LAN IP Address of ARO Client
Find your LAN IP Address of ARO Client.
For example, get the LAN IP Address from the Debian system:
ip addr
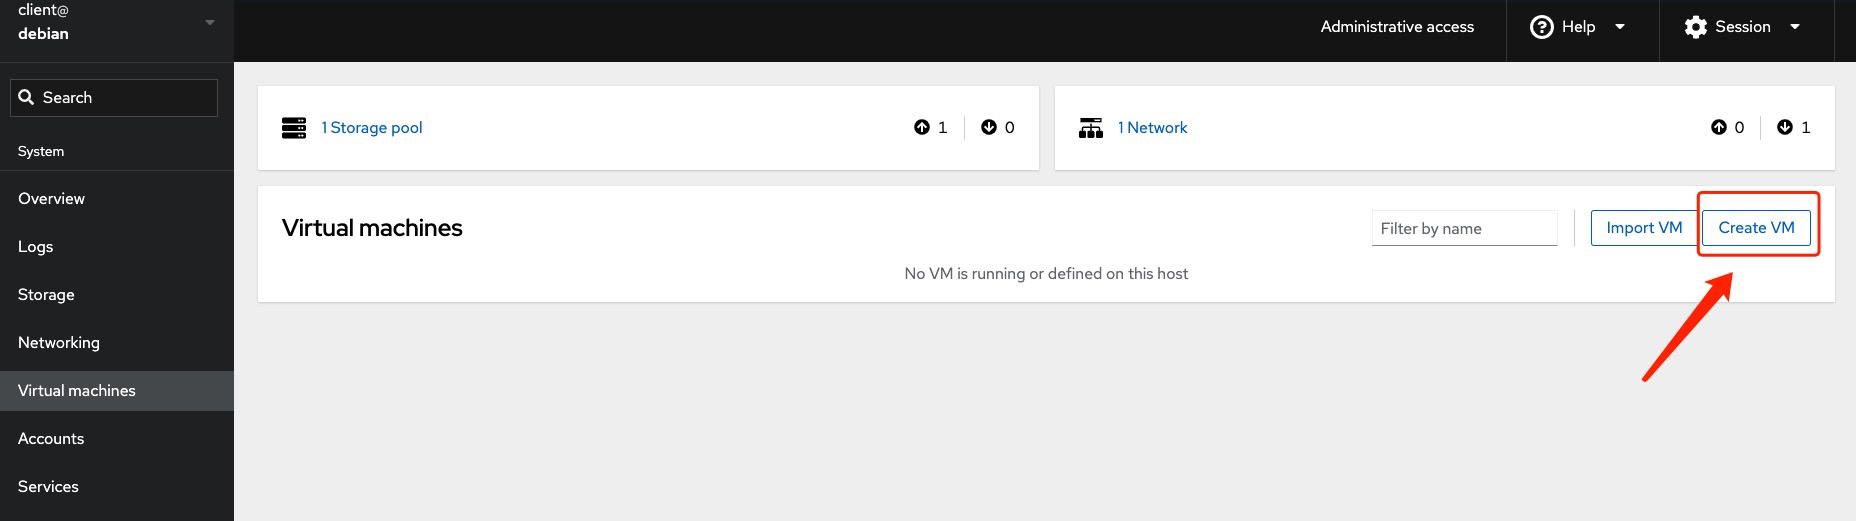
2. PCDN Worker Installation
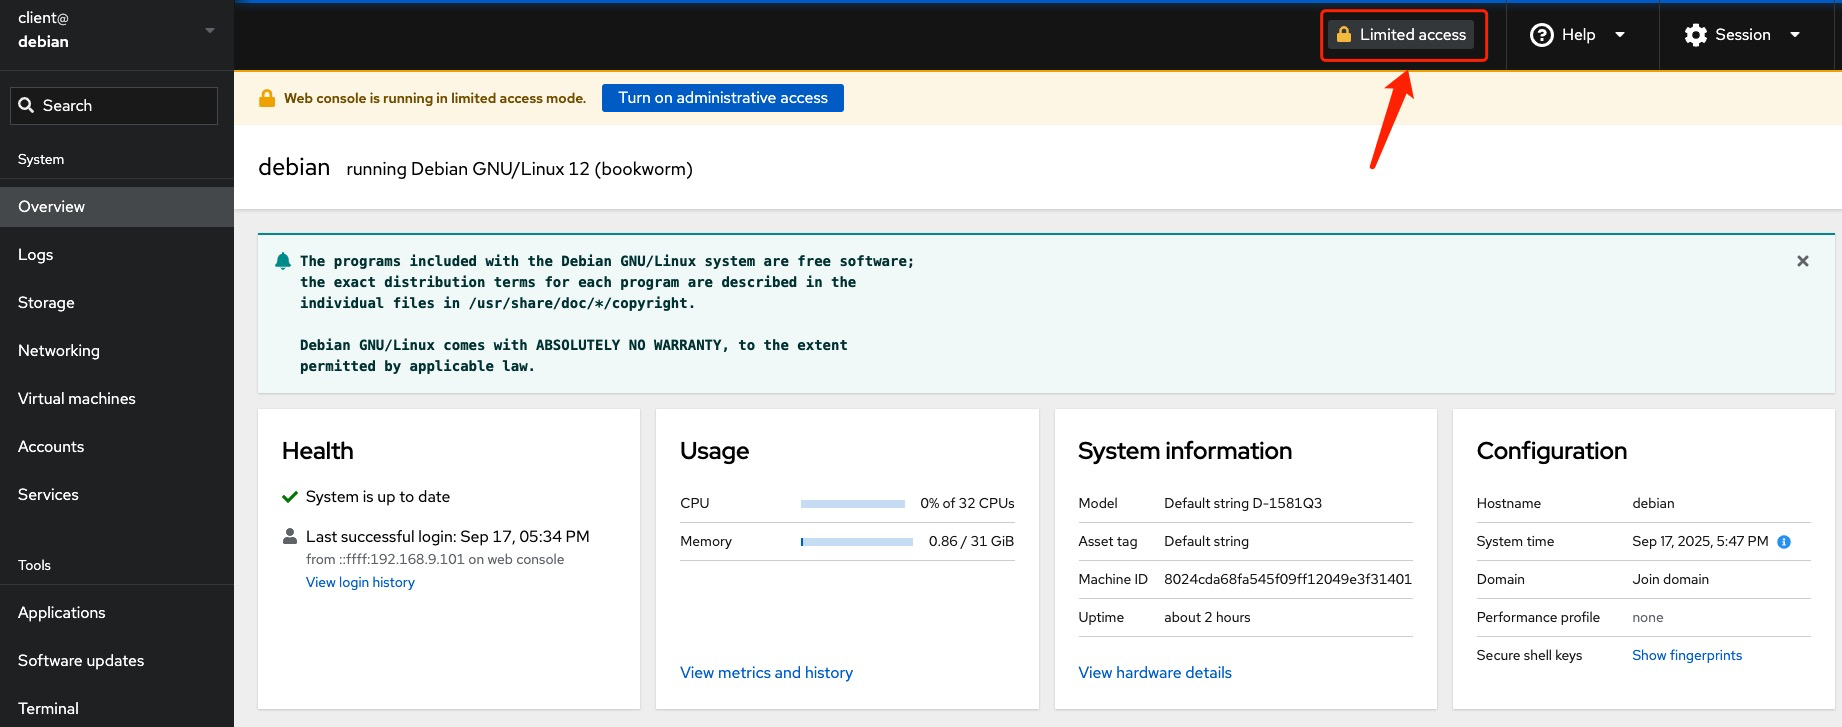
2.1 Log in to the Web Interface
On another machine within the same LAN, open a browser and navigate to https://Your LAN IP:9090, replacing Your LAN IP with your actual IP address.
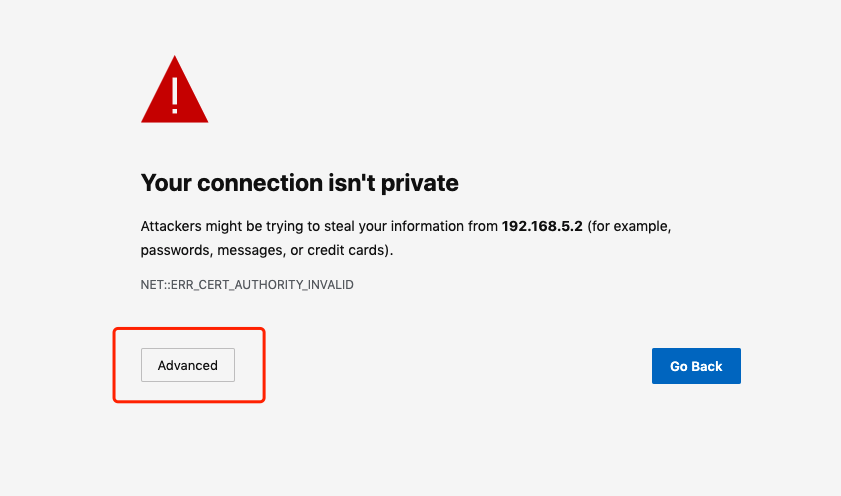
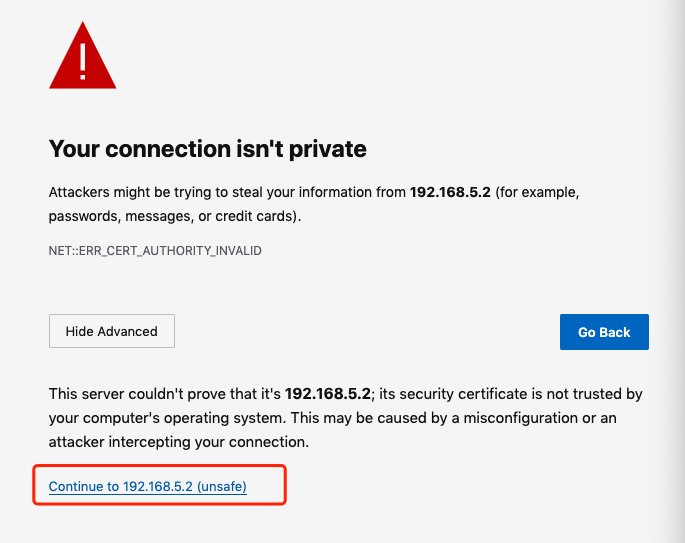
Select “Advanced”.
Enter the login interface with the username: client and password: 123456.
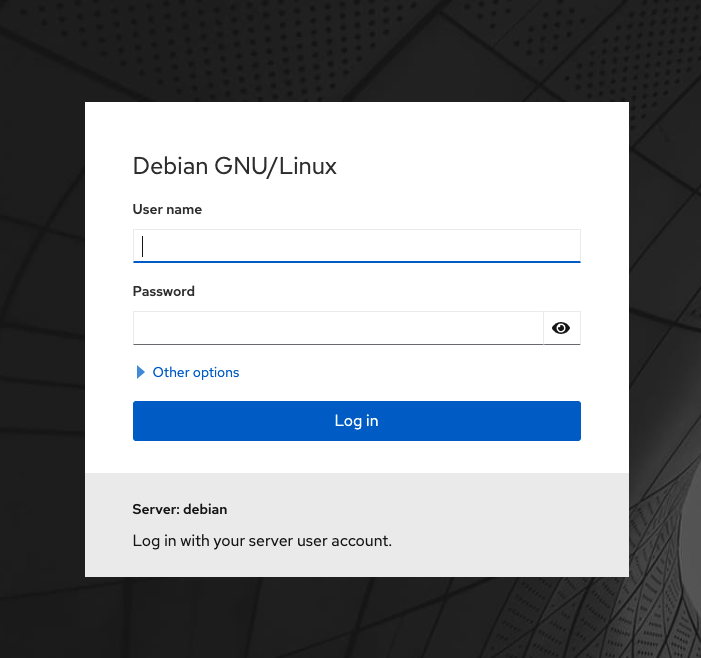
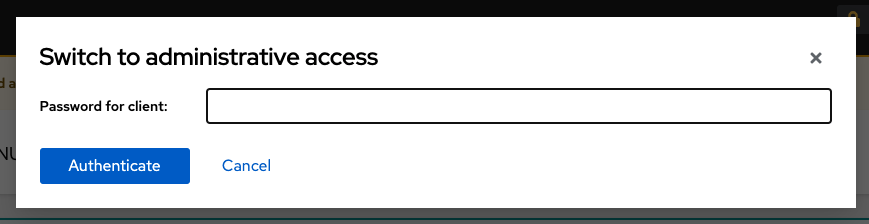
Enter the password to switch to administrative privileges.
2.2 Configure Bridge
Select Networking -> Add bridge.
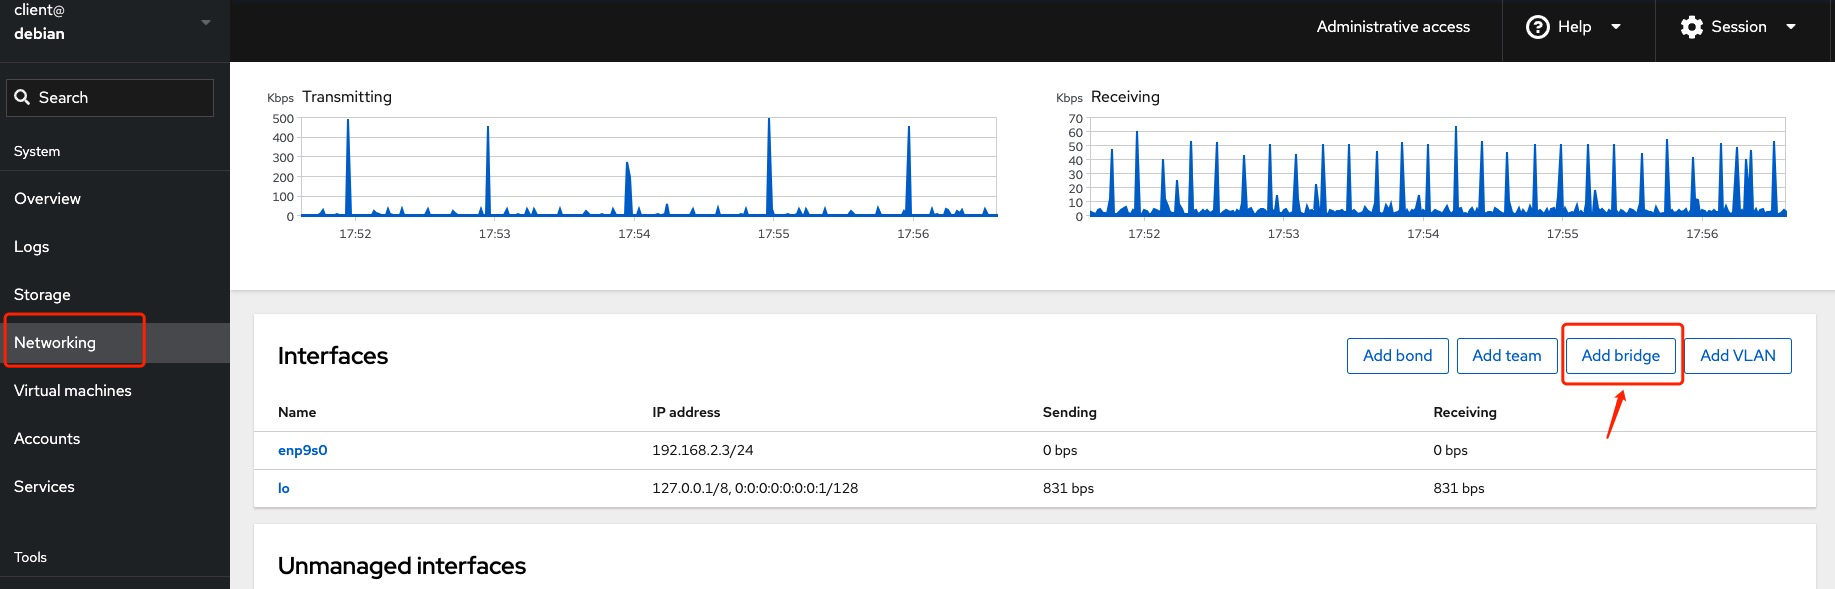
Add a bridge. If there are multiple physical network interfaces, you can select multiple ones.
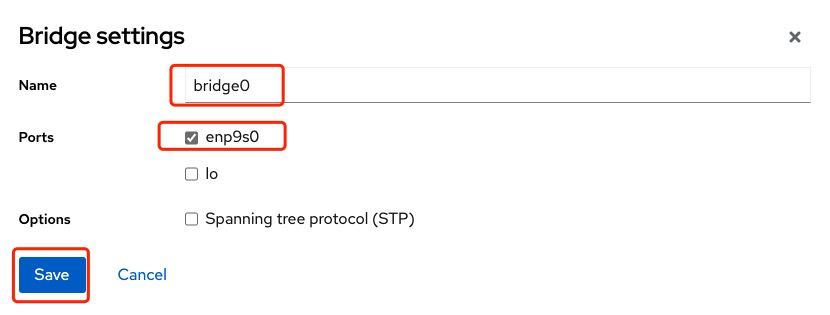
After adding, verify the bridge configuration.

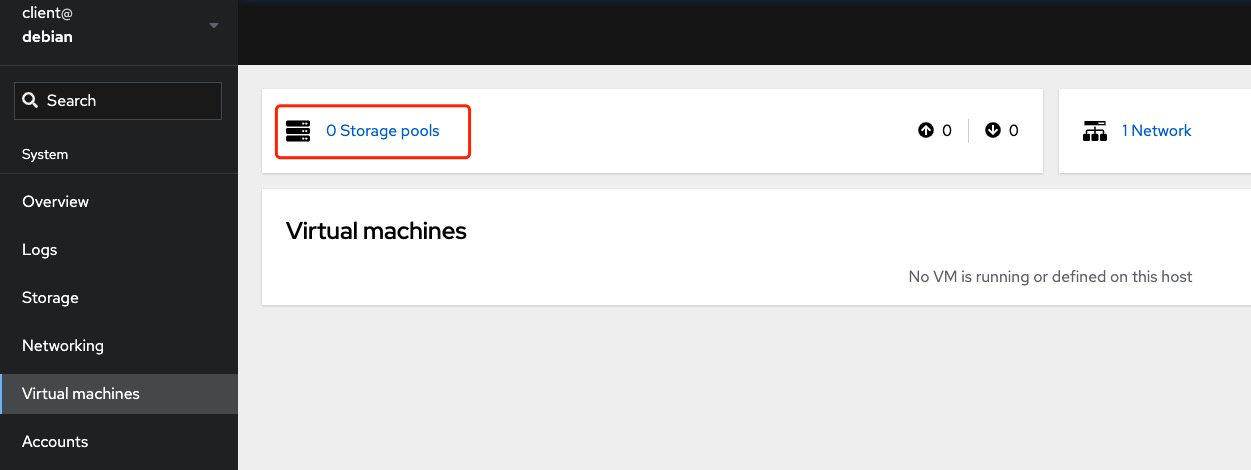
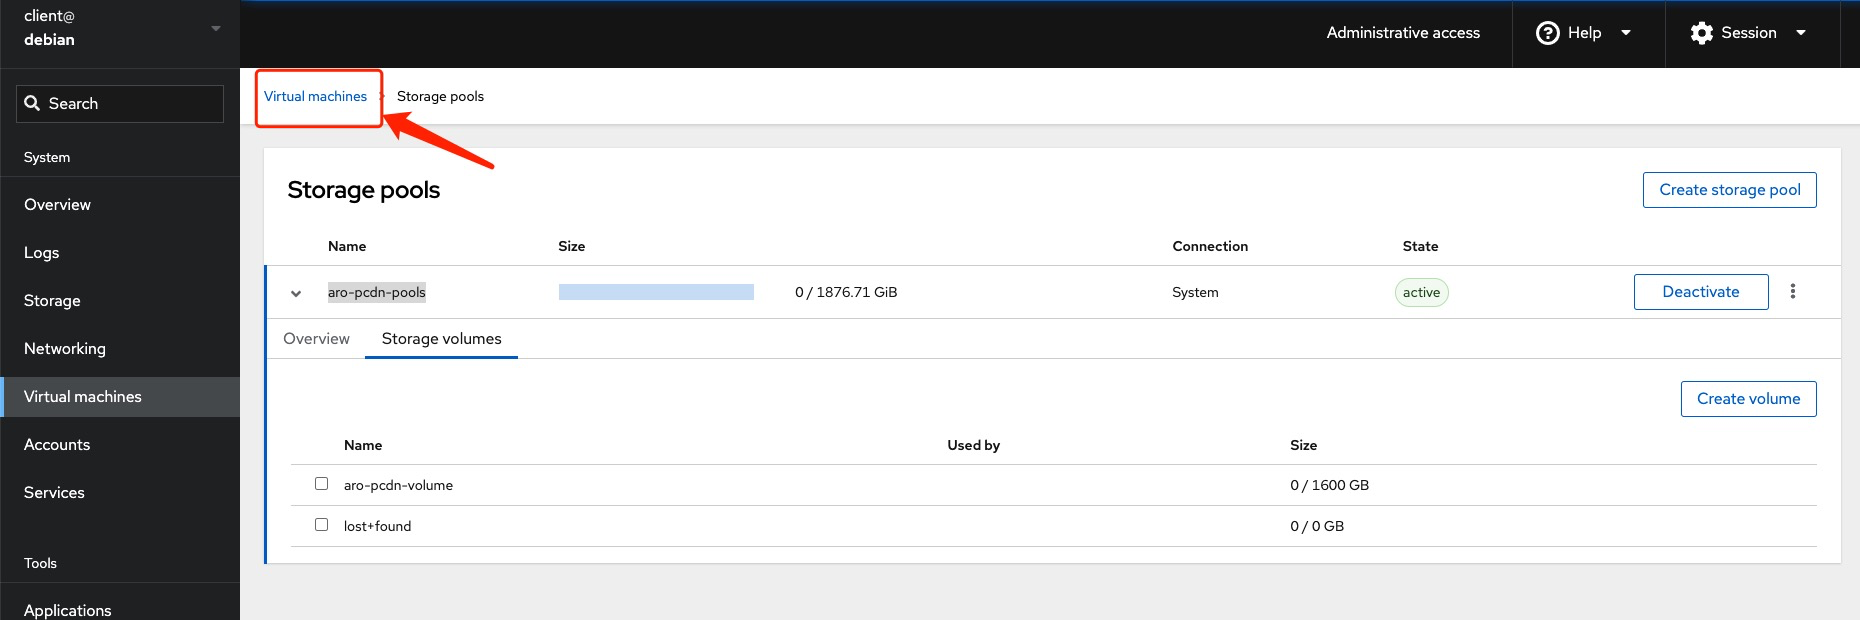
2.3 Configure Storage Pool
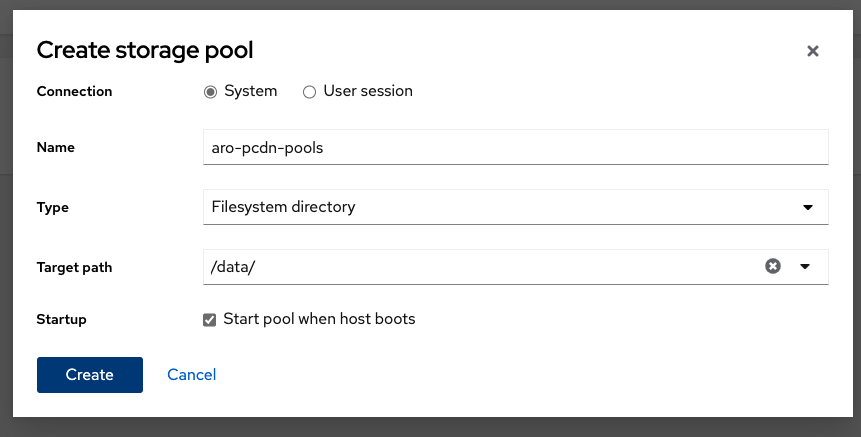
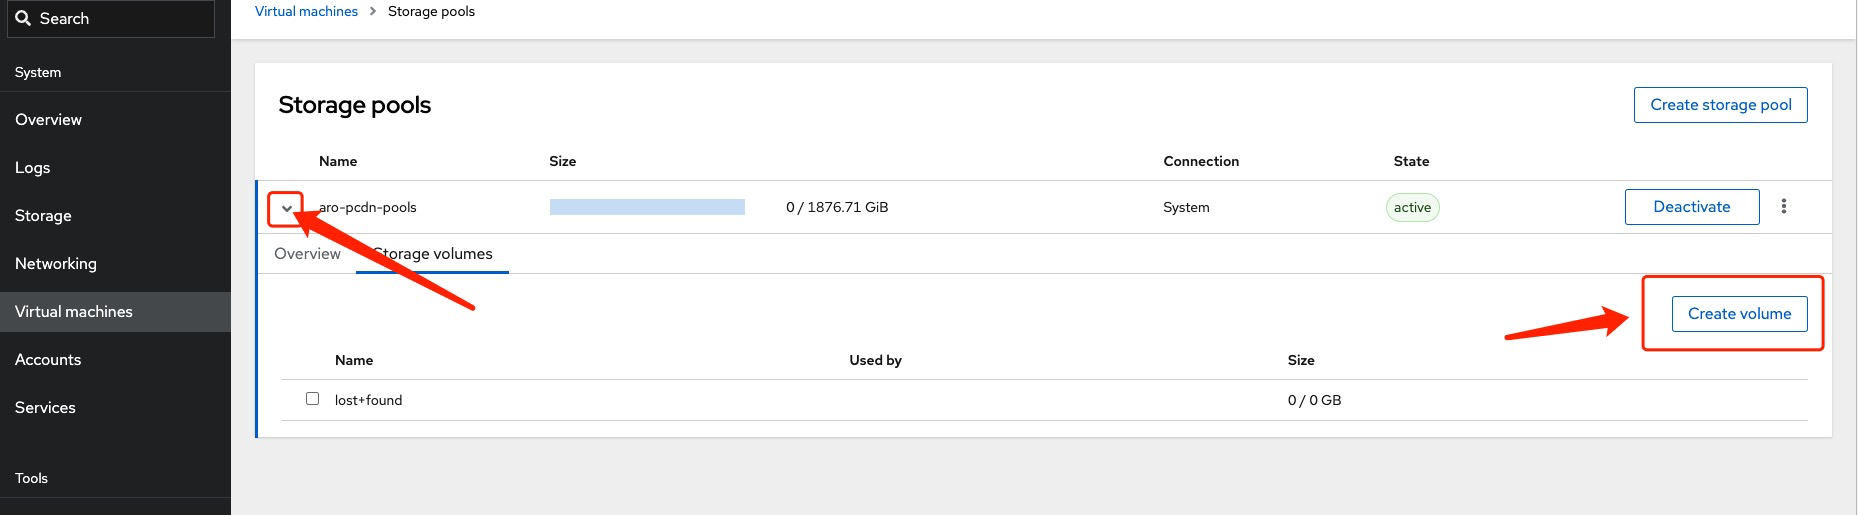
2.3.1 Create a Storage Pool
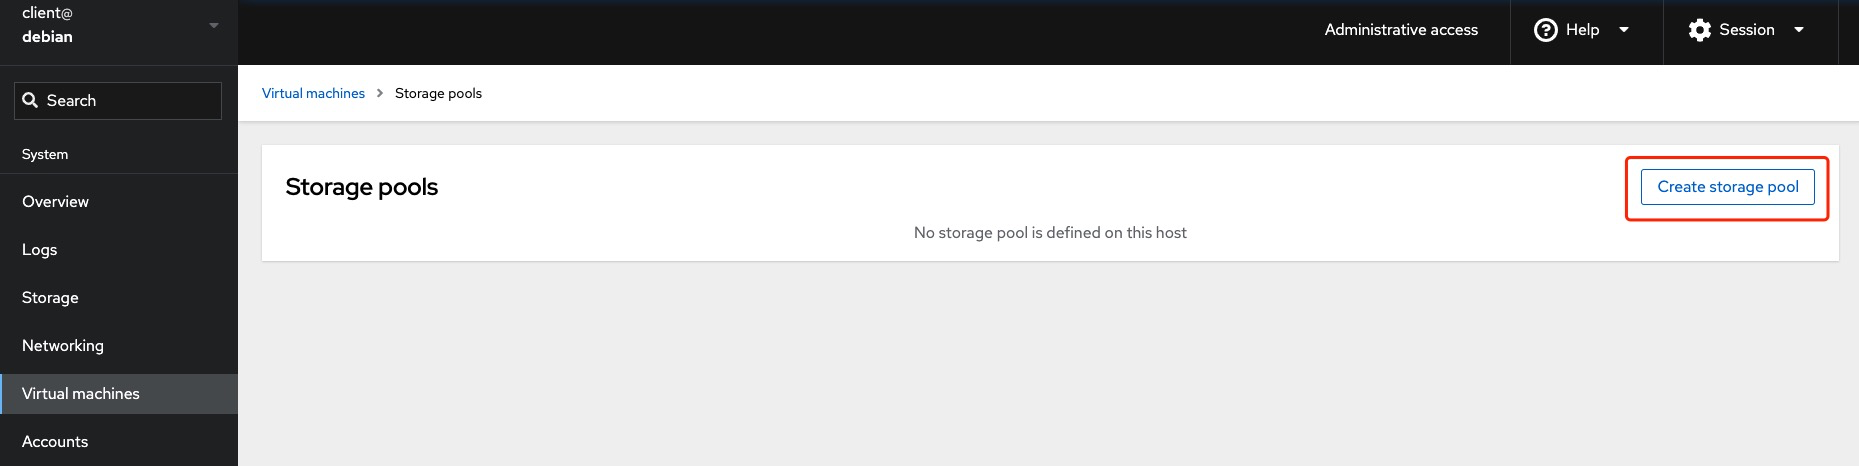
When creating a storage pool, ensure you select the /data directory.
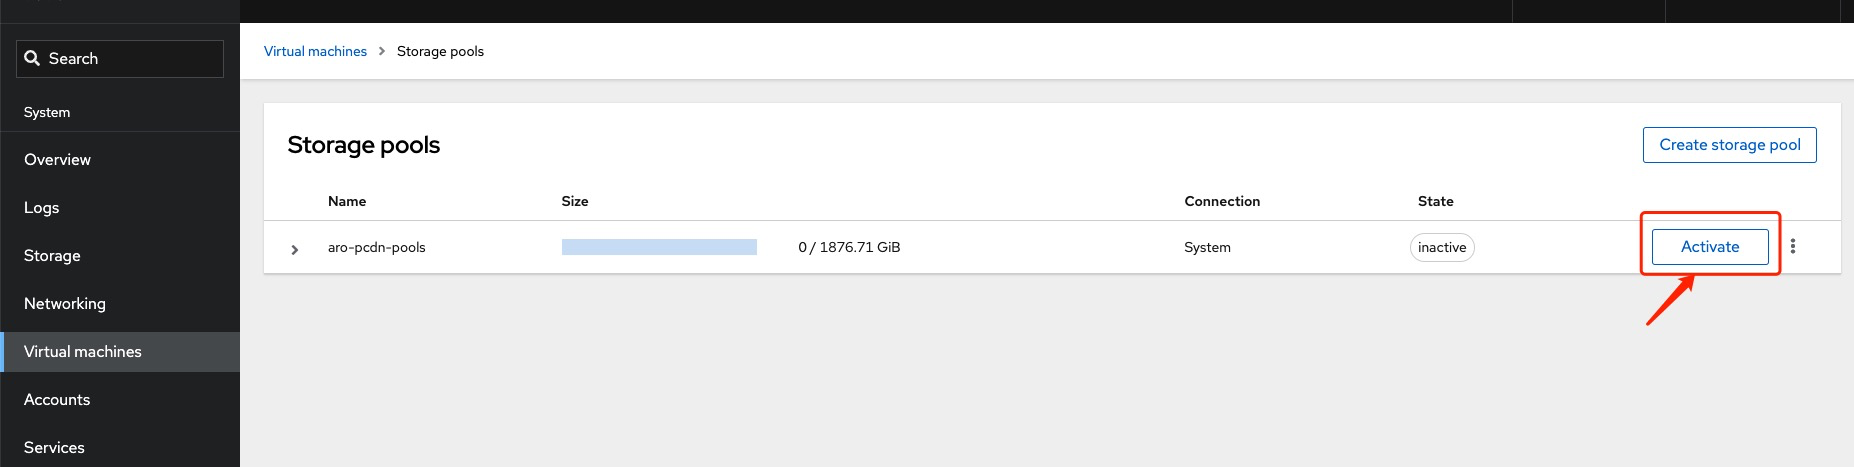
Activate the storage pool.
Select aro-pcdn-pools -> Storage volumes, then click Create volume.
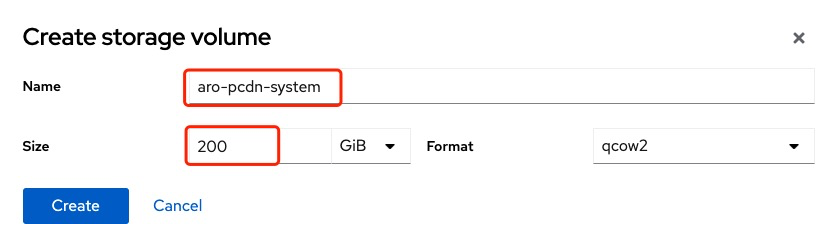
2.3.2 Create System Disk Volume
For any bandwidth level, we recommend to allocate more than 200 GB SSD for System Disk.
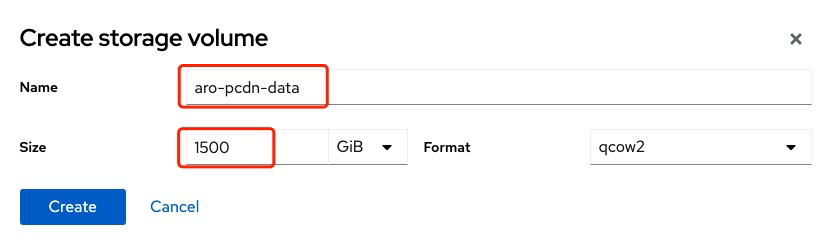
2.3.3 Create Data Disk Volume
Please refer to the table below for recommended Data Disk allocation.
| Bandwidth | CPU threads | RAM | Data Disk |
|---|---|---|---|
| 100 Mbps | 4 | 4 GB | ≥ 200 GB SSD |
| 500 Mbps | 6 | 12 GB | ≥ 500 GB SSD |
| 800 Mbps | 7 | 16 GB | ≥ 1 TB SSD |
| 2 Gbps | 32 | 32 GB | ≥ 2 TB SSD |
| 5 Gbps | 48 | 64 GB | ≥ 5 TB SSD |
| 10 Gbps | 96 | 128 GB | ≥ 10 TB SSD |
| 20 Gbps | 192 | 256 GB | ≥ 20 TB SSD |
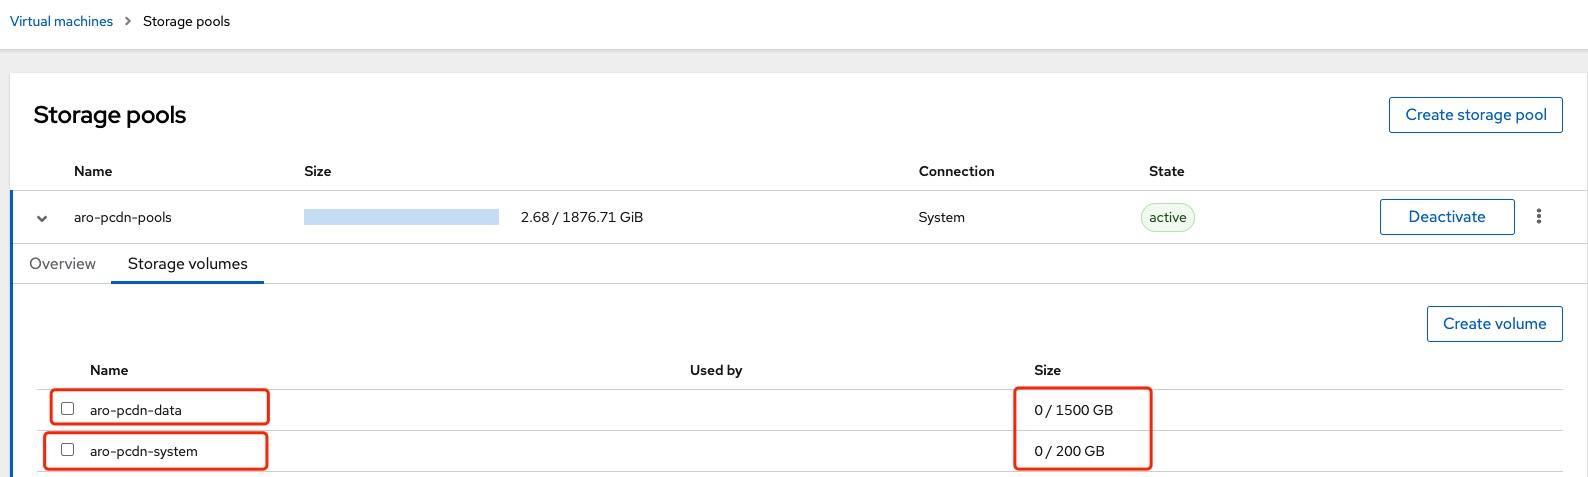
2.3.4 View The Created Volumes
You can view the Volumes in the Storage Pool to make sure they are successfully created.
2.4 Download the PCDN Worker Software Image
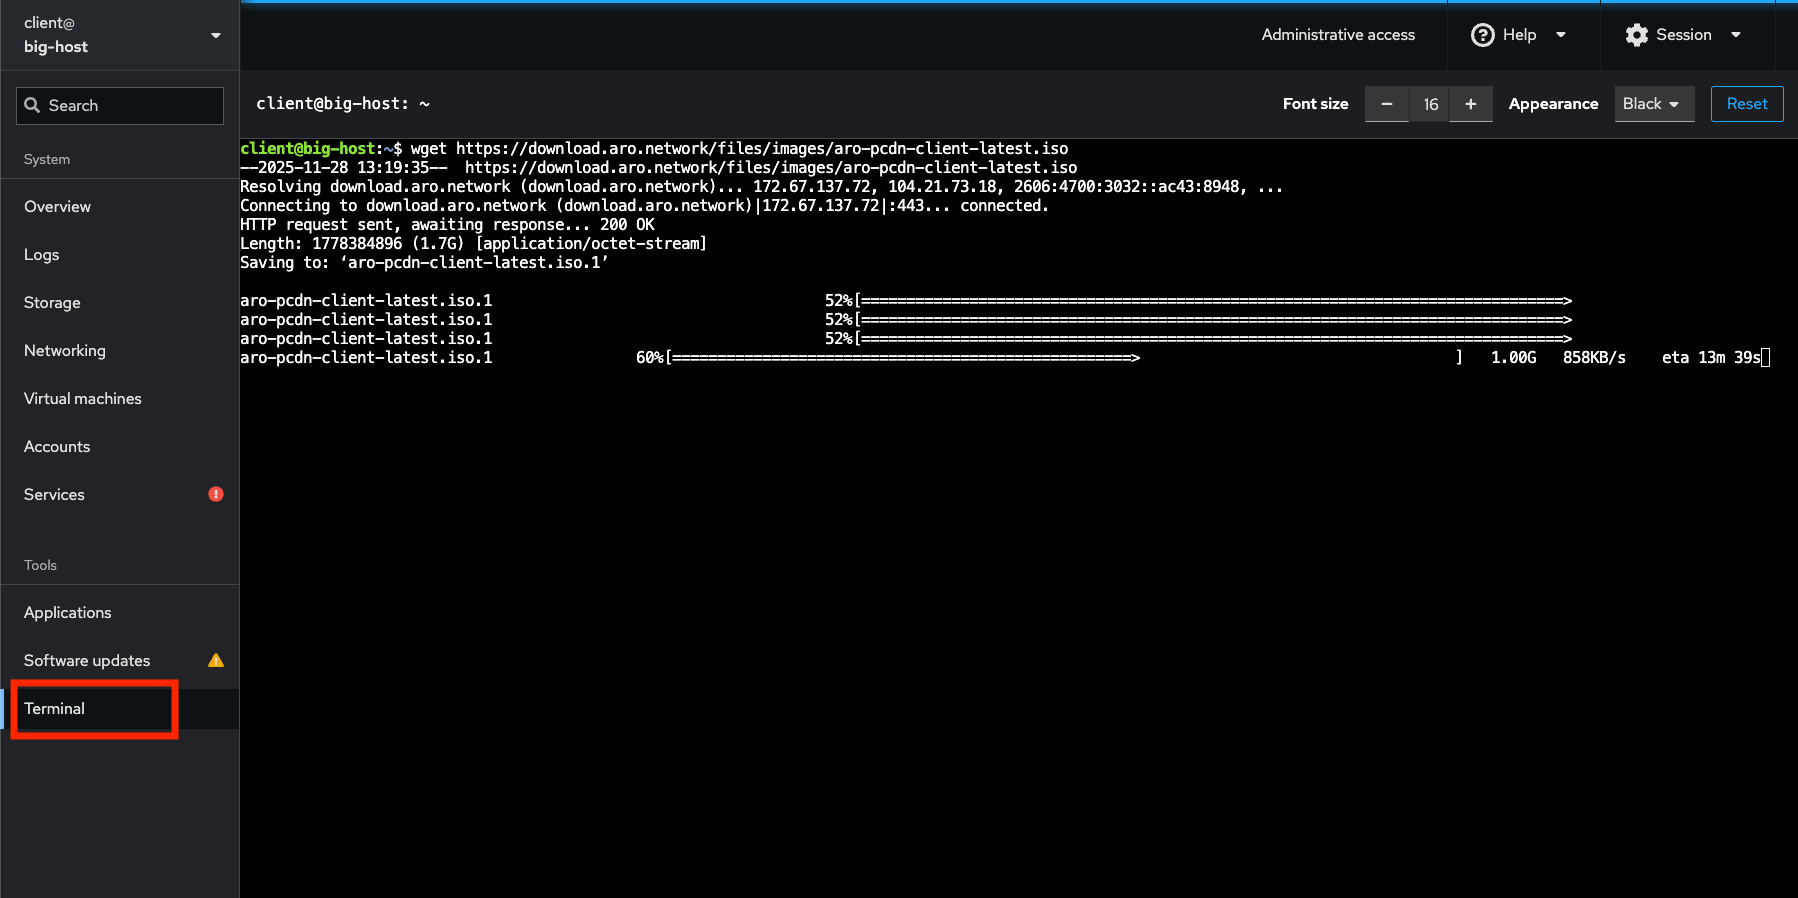
Downloading the ISO file and execute the following commands in the terminal:
wget https://download.aro.network/files/images/aro-pcdn-client-latest.iso
sudo mv /home/client/aro-pcdn-client-latest.iso /var/lib/libvirt/images/
sudo chown libvirt-qemu:libvirt-qemu /var/lib/libvirt/images/aro-pcdn-client-latest.iso
3. PCDN Worker Configuration
3.1 Configure Basic Information
Fill in the virtual machine information with the following key details:
- Name: Must be
aro-pcdn-client-1 - Installation type: Local Install media
- Installation source:
/var/lib/libvirt/images/aro-pcdn-client-latest.iso. - Storage: Select the Storage Pool created in the previous step.
- Volume: Select the System Disk Volume created in the previous step within the pool.
- Memory: Set to 80% of the available memory capacity.
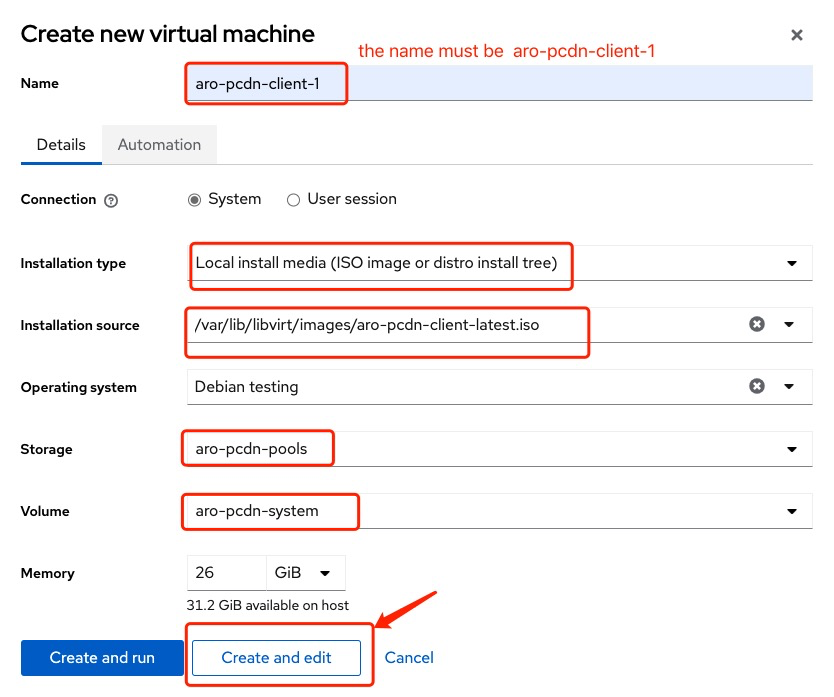
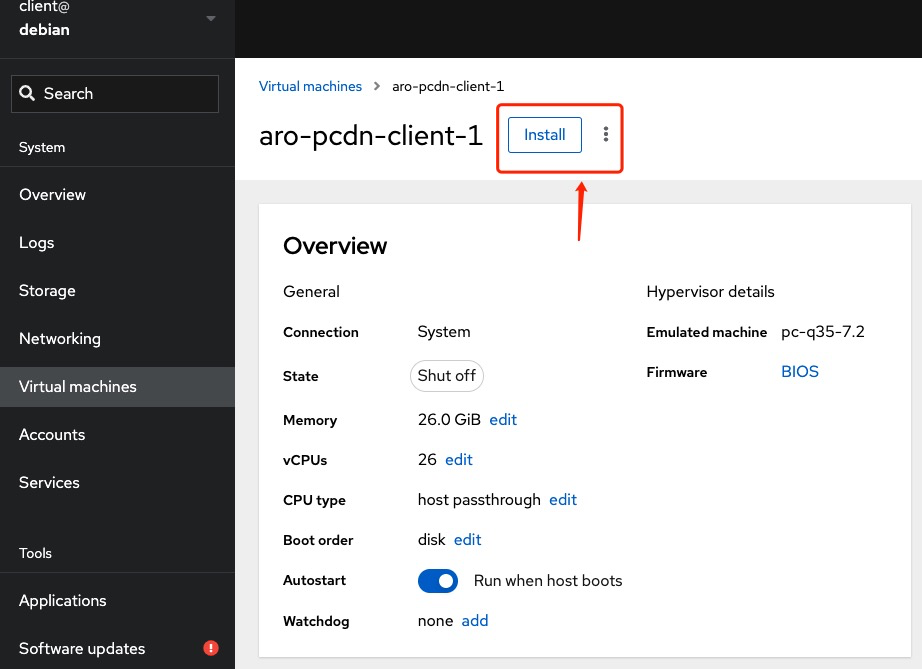
After filling in the details, select Create and edit to enter the detailed configuration page.
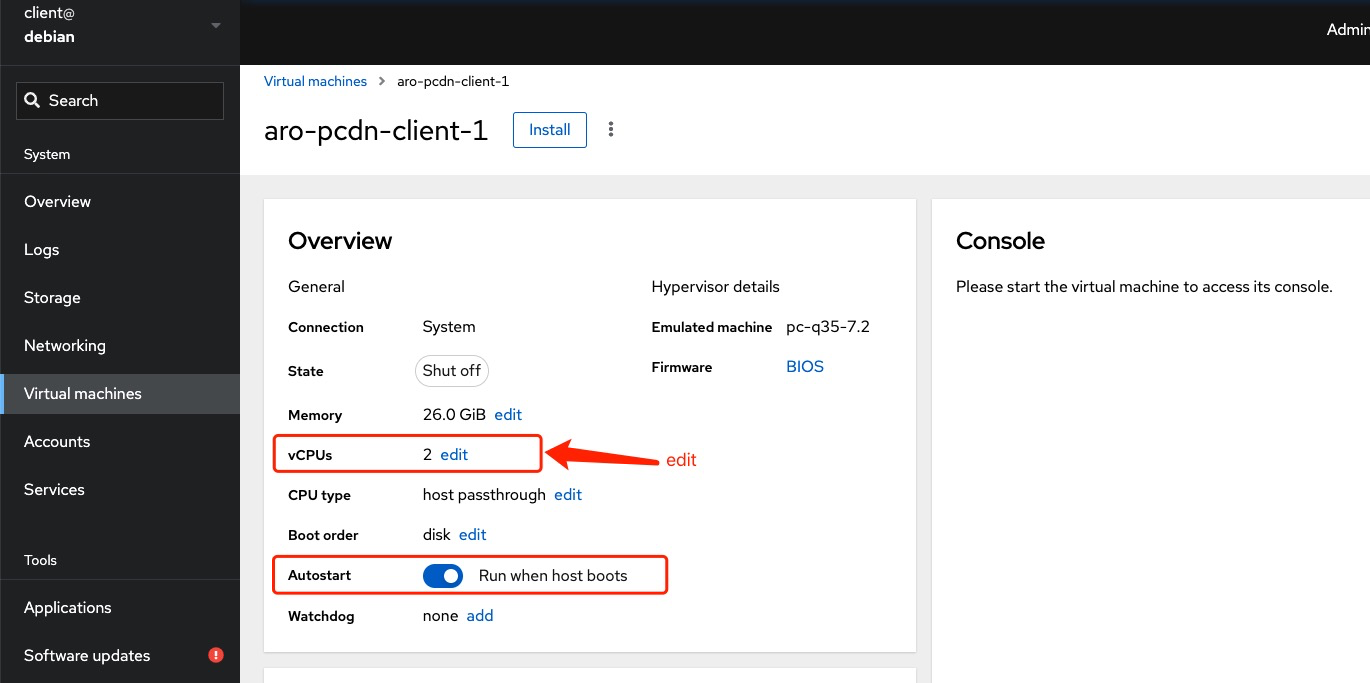
Enable Autostart and edit the vCPUs.
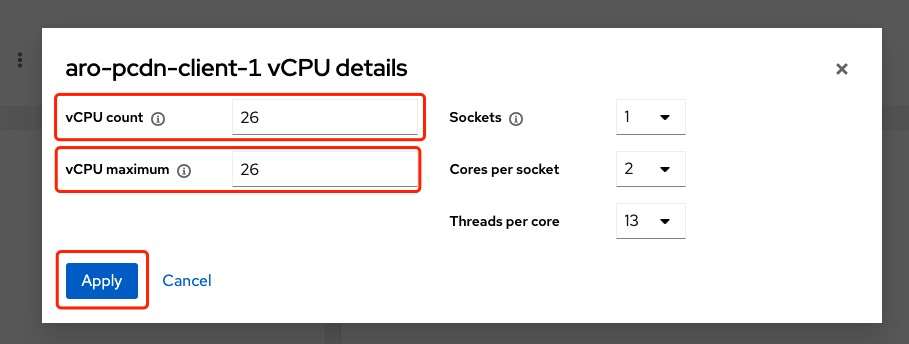
Set the vCPUs and RAM according to your bandwidth level. Reference:
| Bandwidth | CPU threads | RAM |
|---|---|---|
| 100 Mbps | 4 | 4 GB |
| 500 Mbps | 6 | 12 GB |
| 800 Mbps | 7 | 16 GB |
| 2 Gbps | 32 | 32 GB |
| 5 Gbps | 48 | 64 GB |
| 10 Gbps | 96 | 128 GB |
| 20 Gbps | 192 | 256 GB |
Please pay extra attention to the CPU threads (vCPU) allocated to the VM. If you are running a node with < 1 Gbps bandwidth, allocate no more than 7 CPU threads to your VM. If you are running a node with > 1 Gbps bandwidth, allocate at least 32 CPU threads to your VM. This is due to the difference in the scheduling strategy for the entry-level nodes (< 1 Gbps) and professional-level nodes (> 1 Gbps).
3.2 Configure Network Interface
Click on edit button for the Network interfaces settings:
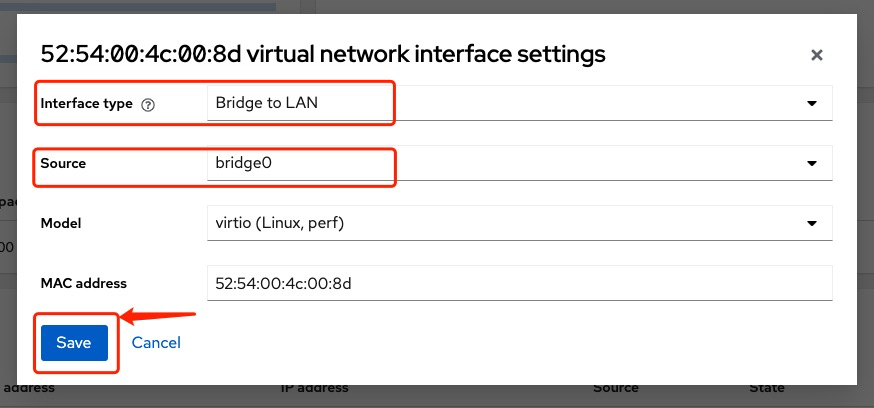
Step 1. Select Bridge to LAN in the Interface Type field
Step 2. Select the Bridge that you have set up in the Step #2.2
Step 3. Save and return
Important Note: make sure you are running your node with the valid PPPoE Dialing method:
- PPPoE Dialing on your ONT (Optical Network Terminal) or Router device, and enable UPnP. This is the default way. If you don't know how to enable UPnP, here is a tutorial
- Do NOT dial on your bare-metal machine (the host machine that runs Debian system).
- PPPoE Dial on your PCDN Worker VM environment is an alternative way for "Pro users" that provides improved stability and performance. Contact technical support if you are interested.
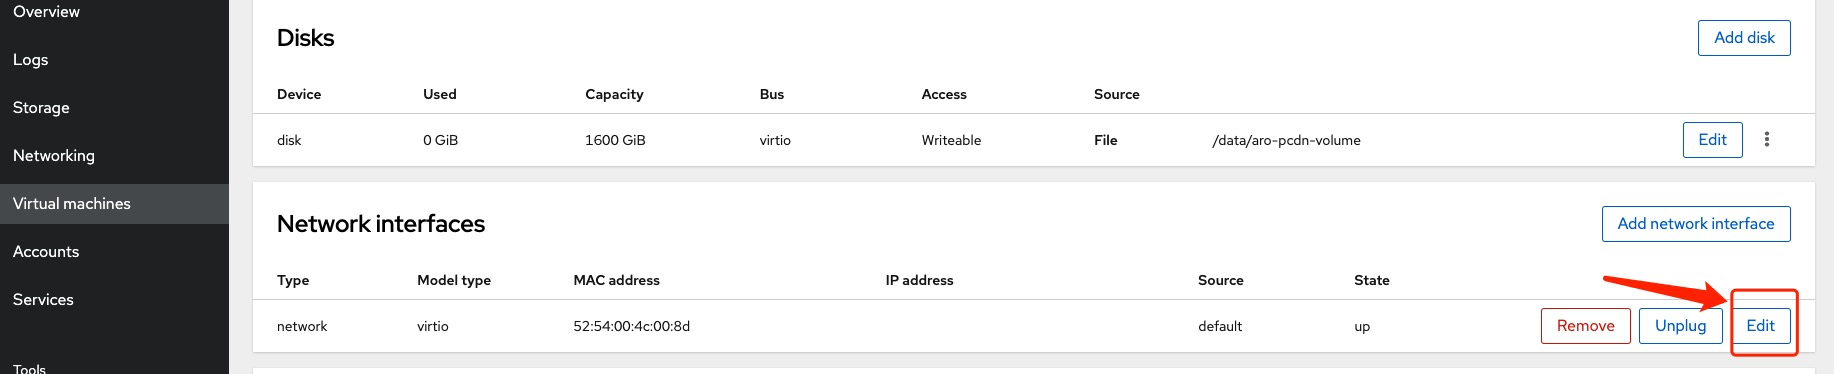
3.3 Configure Data Disk
Configure Data Disks:

Set Pool and Volume that you have created:

View the disks configuration:

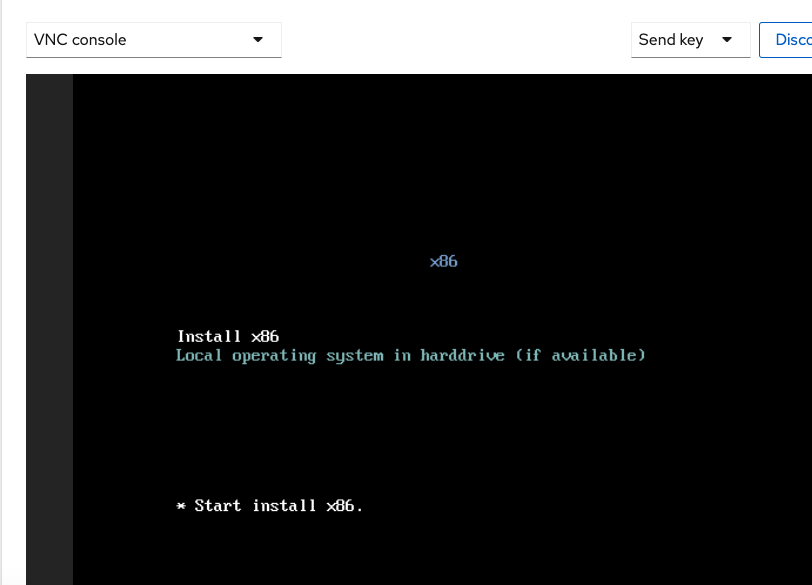
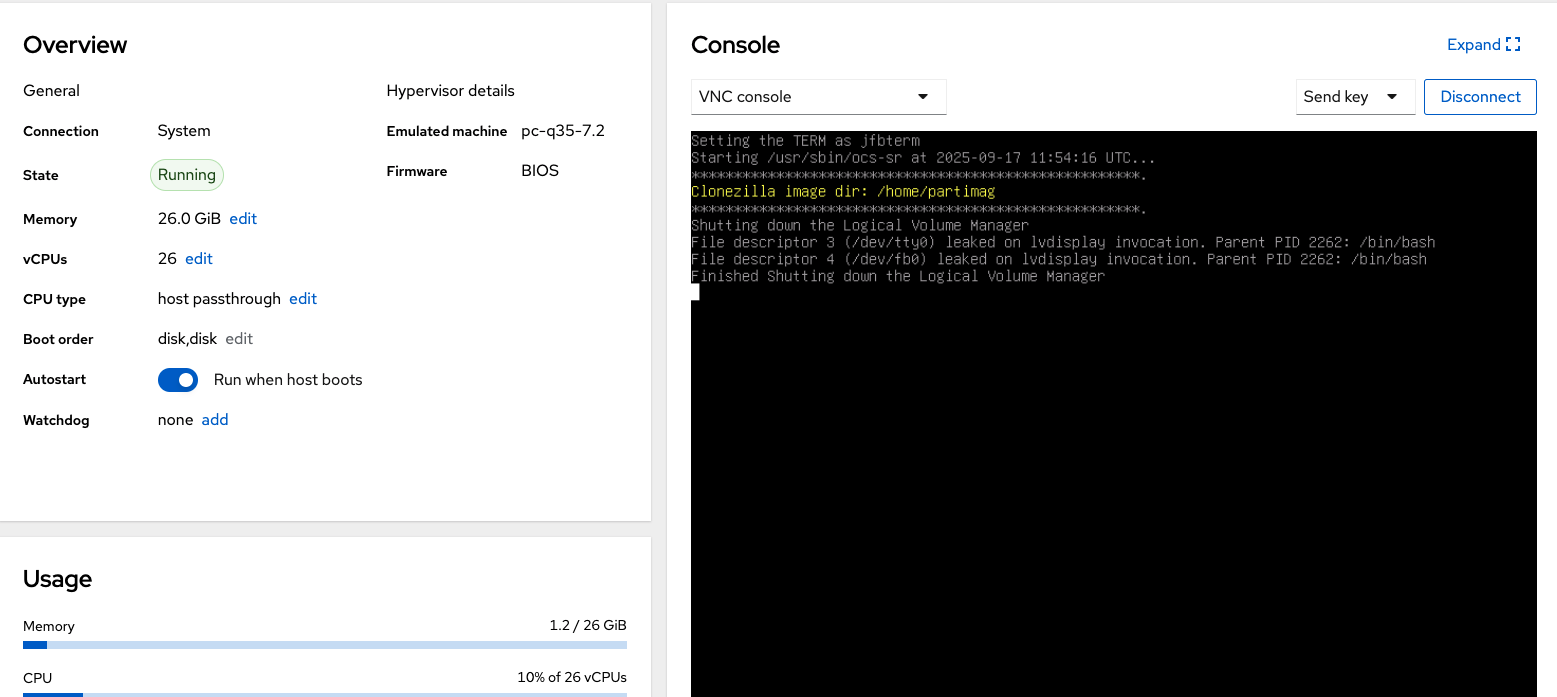
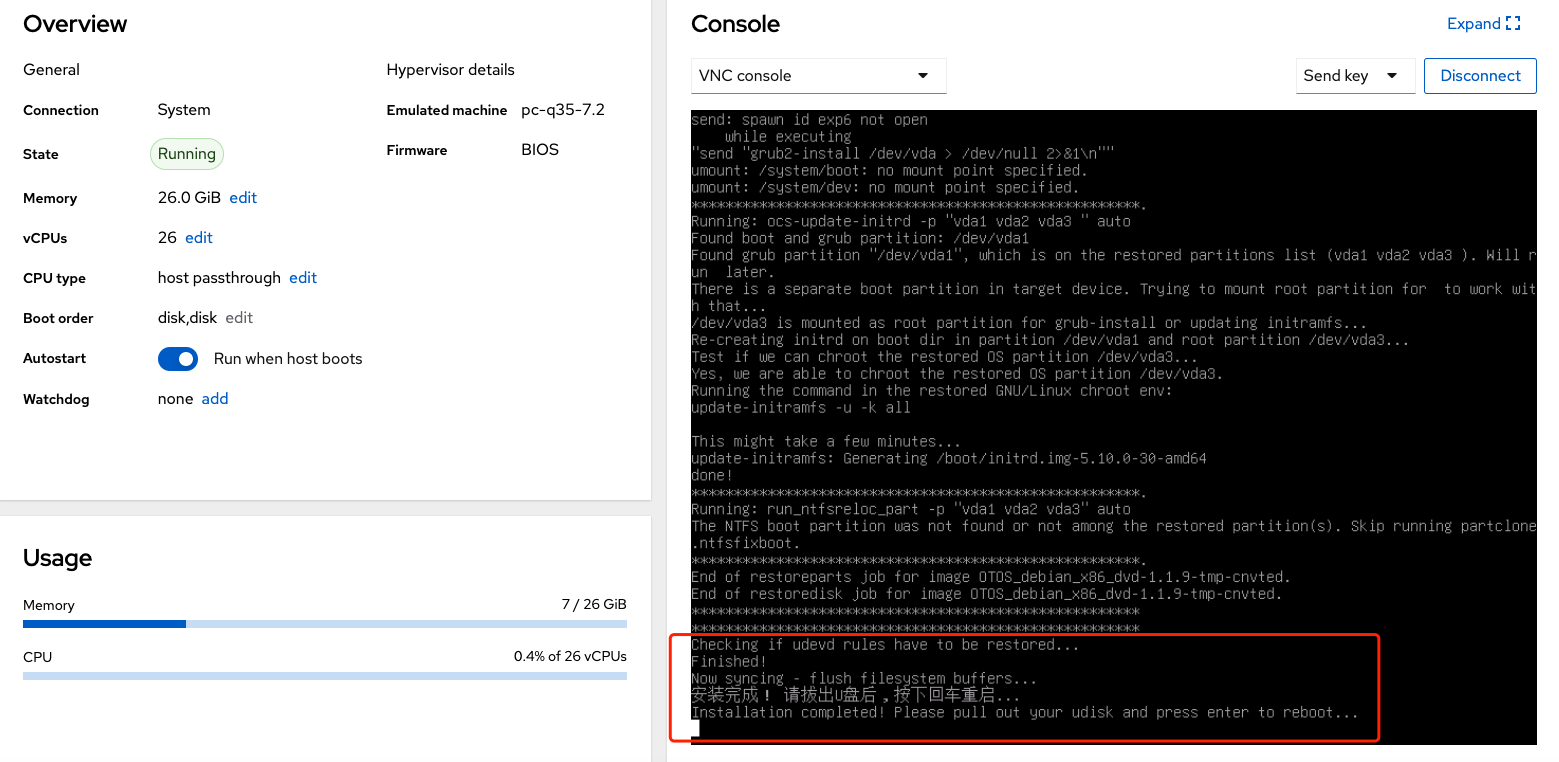
3.4 Complete Image Installation
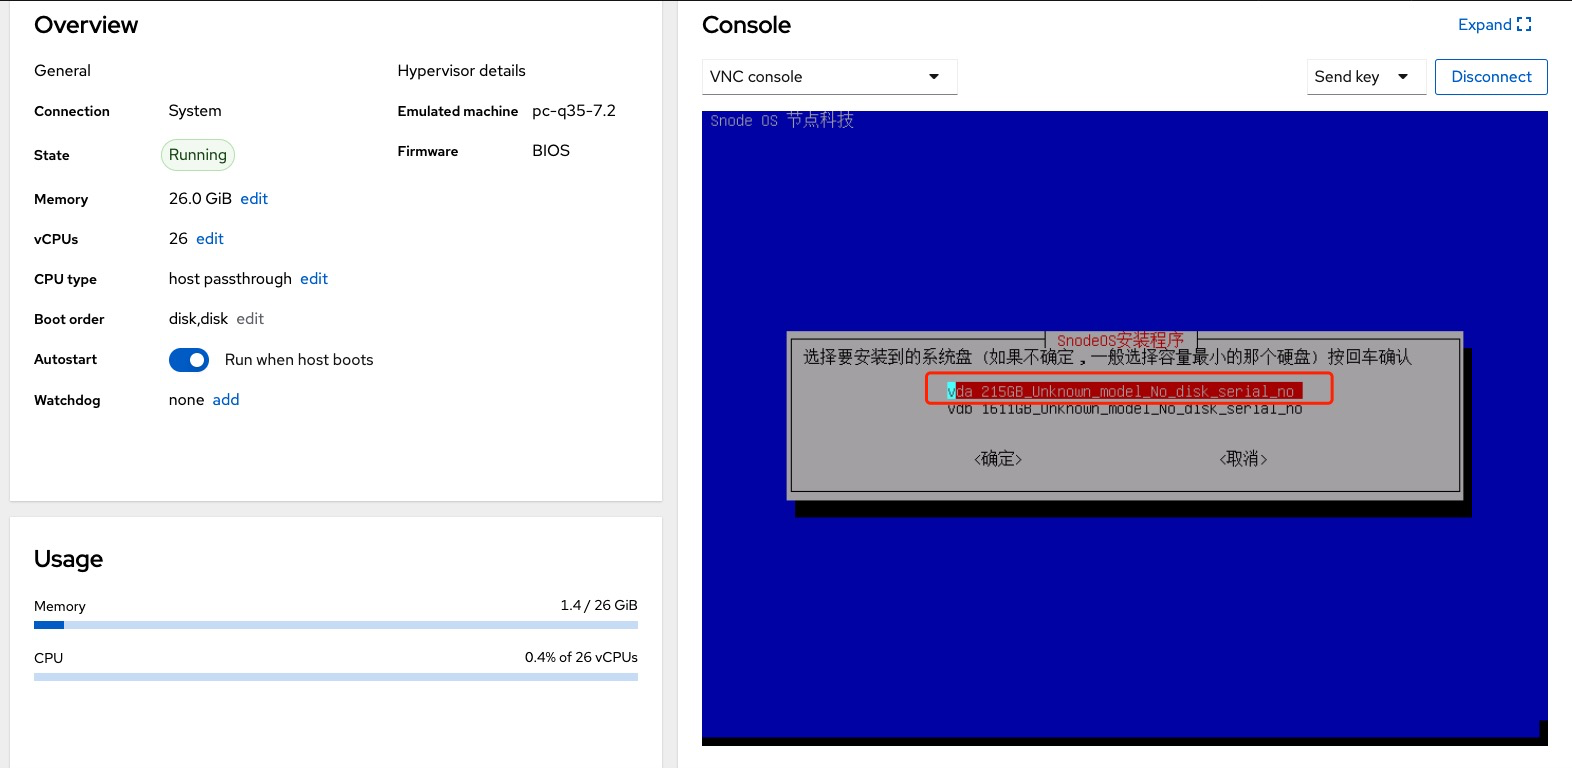
The system enters the installation phase.
Select the System Disk (the smaller one).
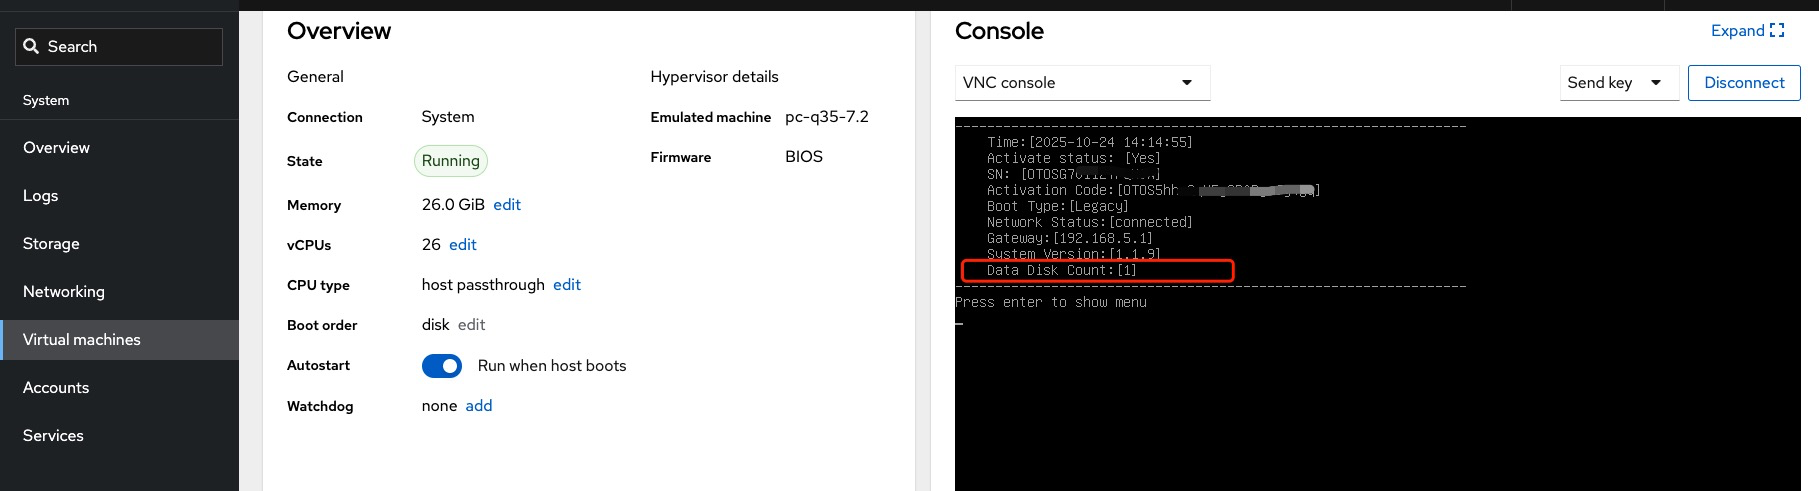
After installation completes, enter the console and press Enter.
Make sure the you have one Data Disk.
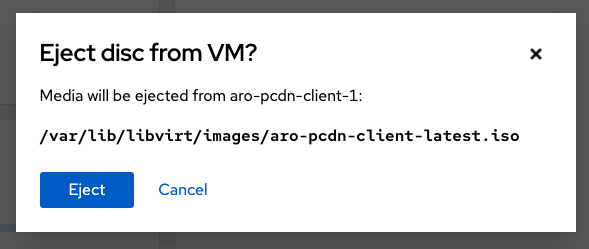
Once the installation is complete, shut down the PCDN Worker client and eject the CDROM.
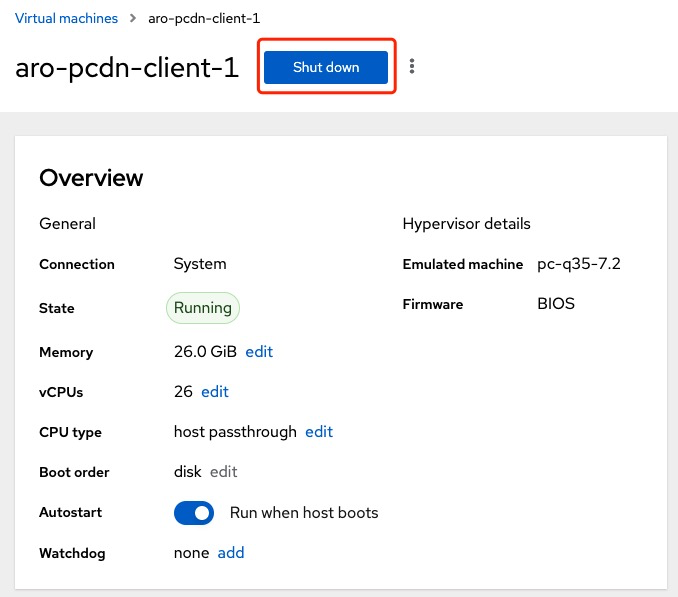
After shutting down the PCDN Worker client, eject and delete the CDROM.


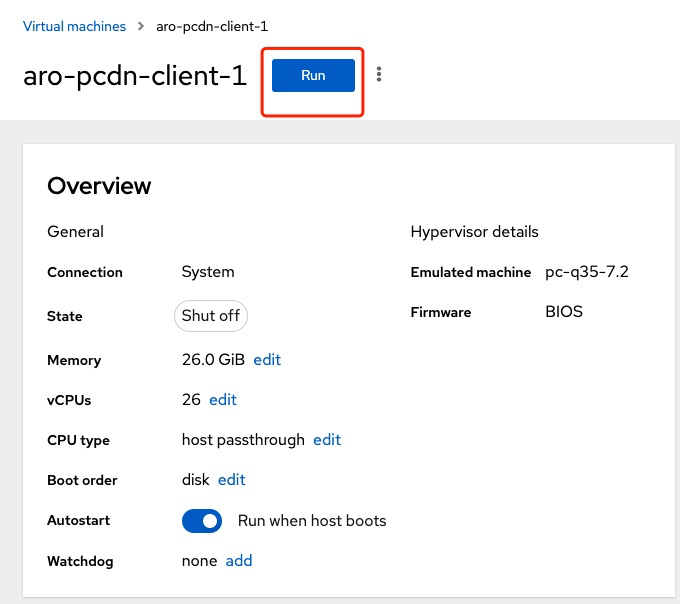
Start the PCDN Worker client.
At this point, the PCDN Worker client installation is complete.
3.5 Enable Port 8080
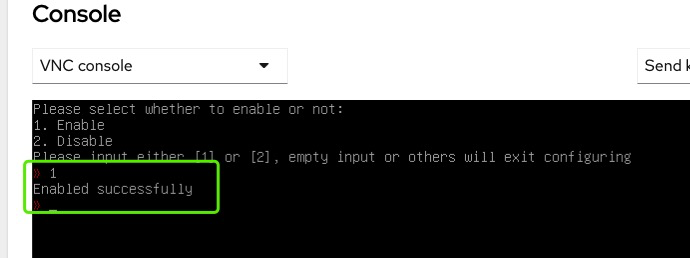
PCDN Worker requires the Port 8080 (the management port) to be open and exposed while running.
Go to the console menu page and execute command 8 to enable Port 8080:
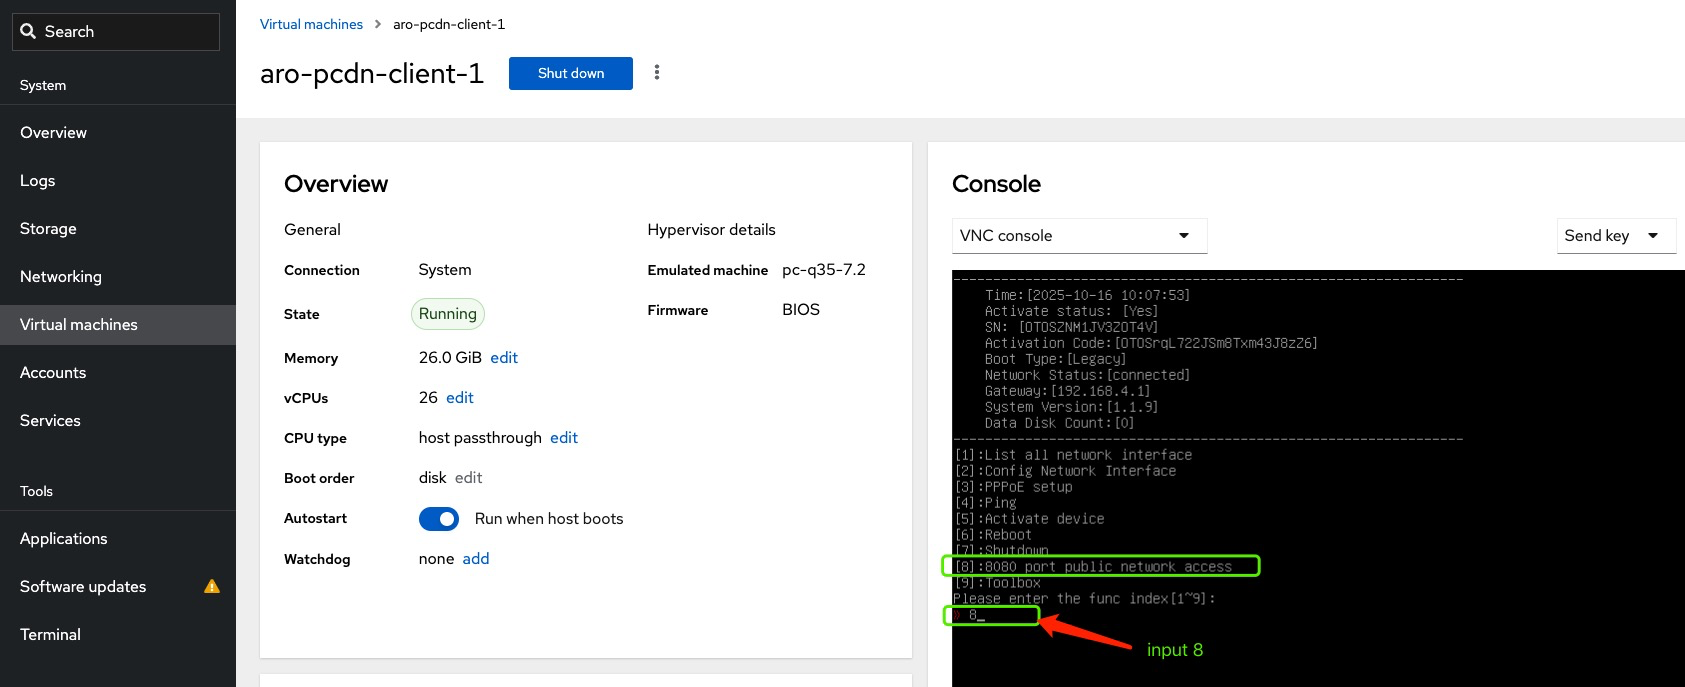
After enabled, a success message should be displayed: