Debian Installation Tutorial
This tutorial guides you through the process of installing Debian operating system, which is a prerequisite for installing ARO Client software image installer.
The tutorial also guides you through the multi-disk configuration. Please do make sure you have followed the tutorial if you have multiple data disks for your ARO Client (which is usually the case).
Note:
Debian 11and above versions are supported.
If you already have a required operating system running on your machine, you can skip this tutorial.
1. Pre-Installation Preparation
Note: Ensure the computer is connected to the internet before proceeding.
1.1 Download the System Imaging Software Rufus
Rufus 4.9 Download link: https://github.com/pbatard/rufus/releases/download/v4.9/rufus-4.9.exe
1.2 Download the Official Debian Image
Debian 12.11.0 amd64 Image URL:https://get.debian.org/images/archive/12.11.0/amd64/iso-dvd/debian-12.11.0-amd64-DVD-1.iso
After downloading the image, use an md5sum verification tool to compare the file's checksum with the official md5sum value to ensure the download is complete and intact.
1.3 Prepare a USB Drive
Prepare a USB drive with at least 8GB capacity.
1.4 Prepare Hardware
Prepare a physical host, monitor, and keyboard.
2. Creating a Bootable USB Drive on Windows
2.1 Launch the Rufus Application
Double-click rufus-4.9.exe to start the Rufus application.
![]()
2.2 Burn the System Image
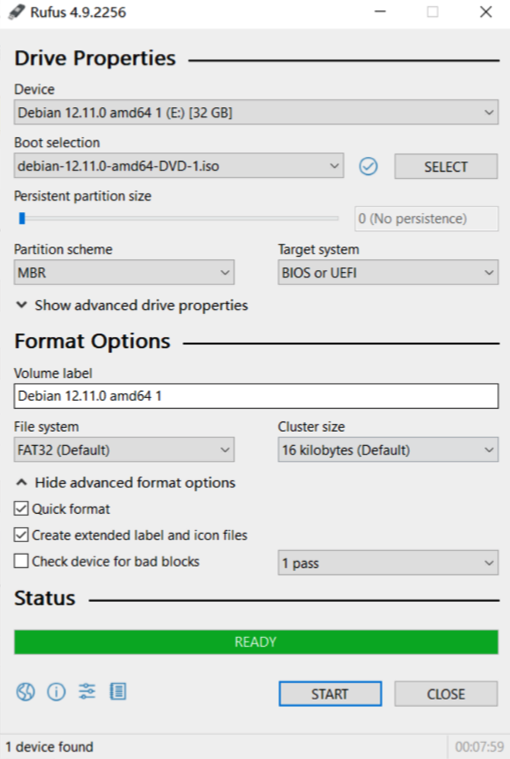
In the "Device" dropdown, select the USB drive to be used for the system installation. For the boot selection, click the "Select" button and choose the downloaded system image debian-12.11.0-amd64-DVD-1.iso. Other settings can remain as shown in the default configuration below.
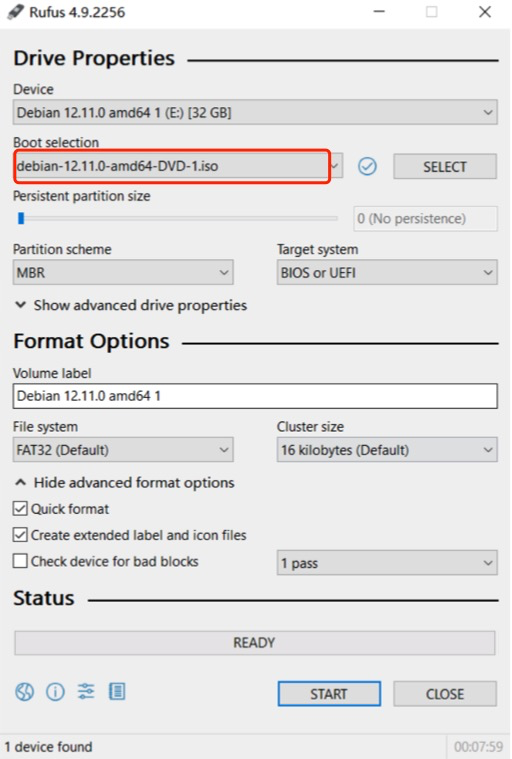
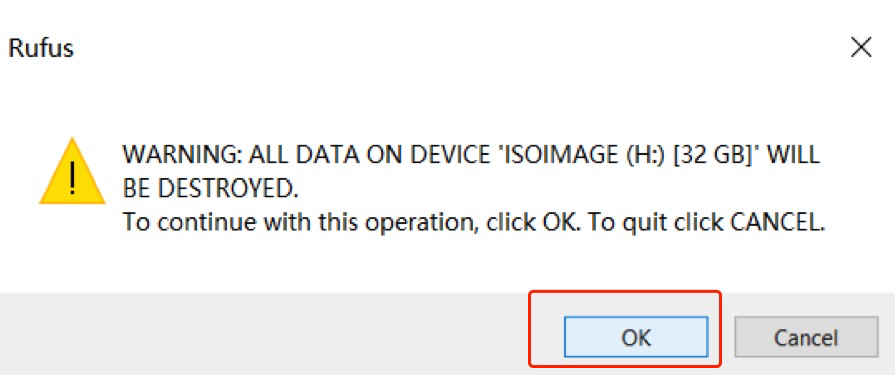
Warning: The imaging process will erase all data on the USB drive. If the USB contains important data, please back it up before proceeding.
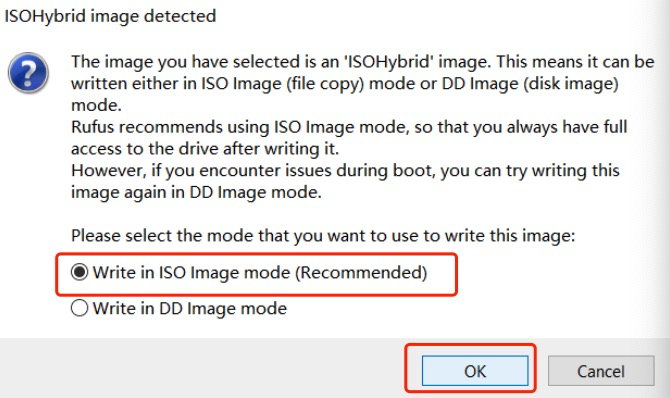
Select "Write in ISO Image mode" and click "OK" to start the imaging process.
After the imaging process is complete, safely eject the USB drive.
3. Debian System Installation
Warning: The physical host for the installation must be connected to the internet via an Ethernet cable.
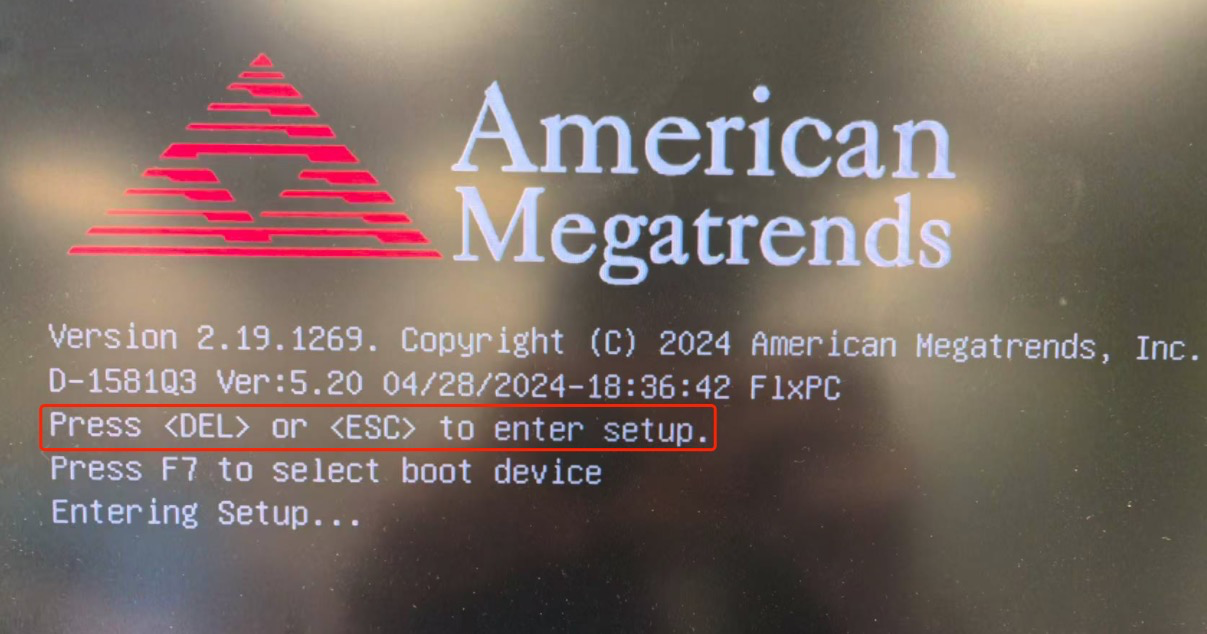
3.1 Configure USB Boot and Boot Mode
Enter the BIOS setup interface to configure the boot settings. The method to access the BIOS varies slightly depending on the x86 device (check the boot screen for prompts; common keys include F2, F12, ESC, Enter, or Delete). In this guide, press DEL or ESC to enter the setup interface.
3.1.1 Set Boot Mode
Set the Boot Mode to UEFI + LEGACY.

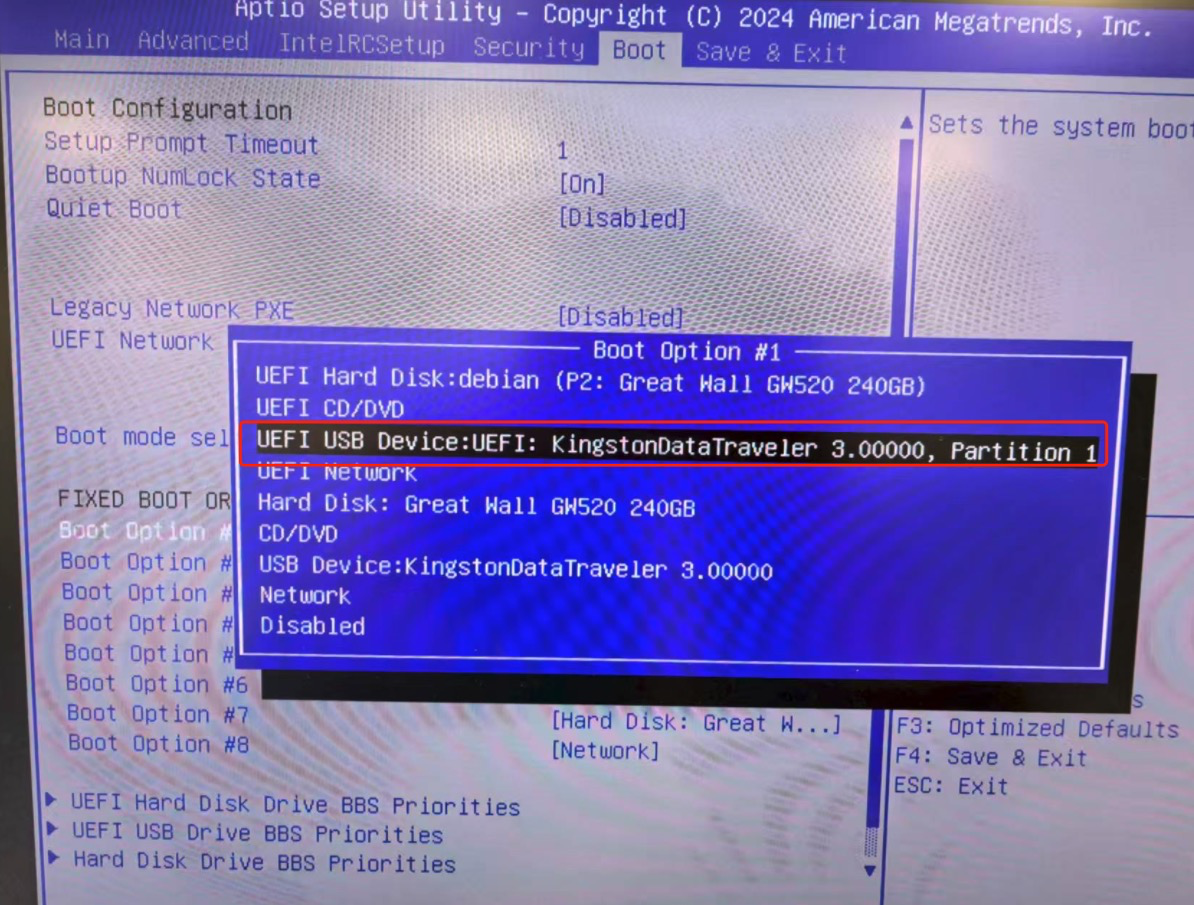
3.1.2 Set USB as the First Boot Device
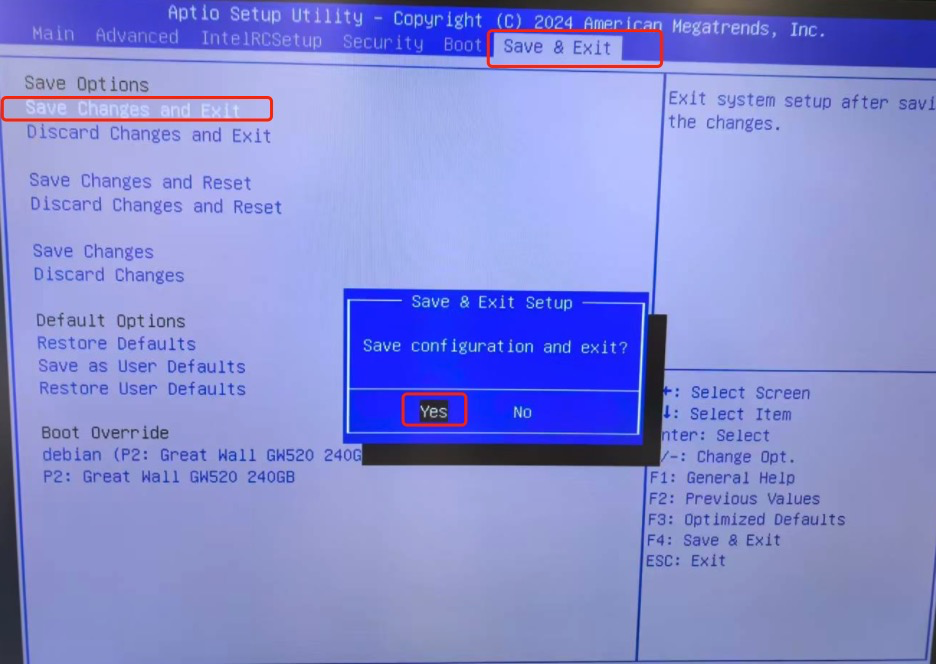
3.1.3 Save Settings and Exit
3.2 Image Installation
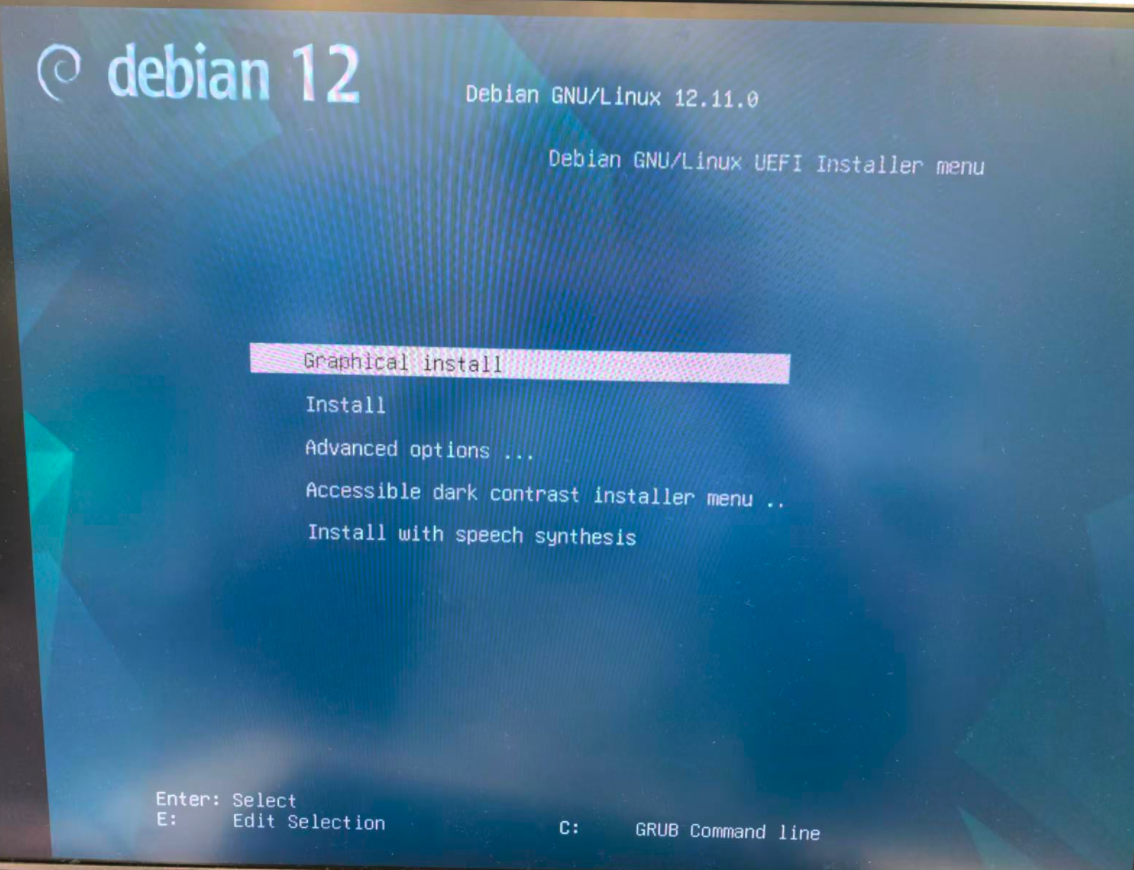
3.2.1 Enter the Installation Interface
After completing the BIOS setup, the system will restart and enter the installation interface. Select Graphical install and press Enter to begin the system installation.
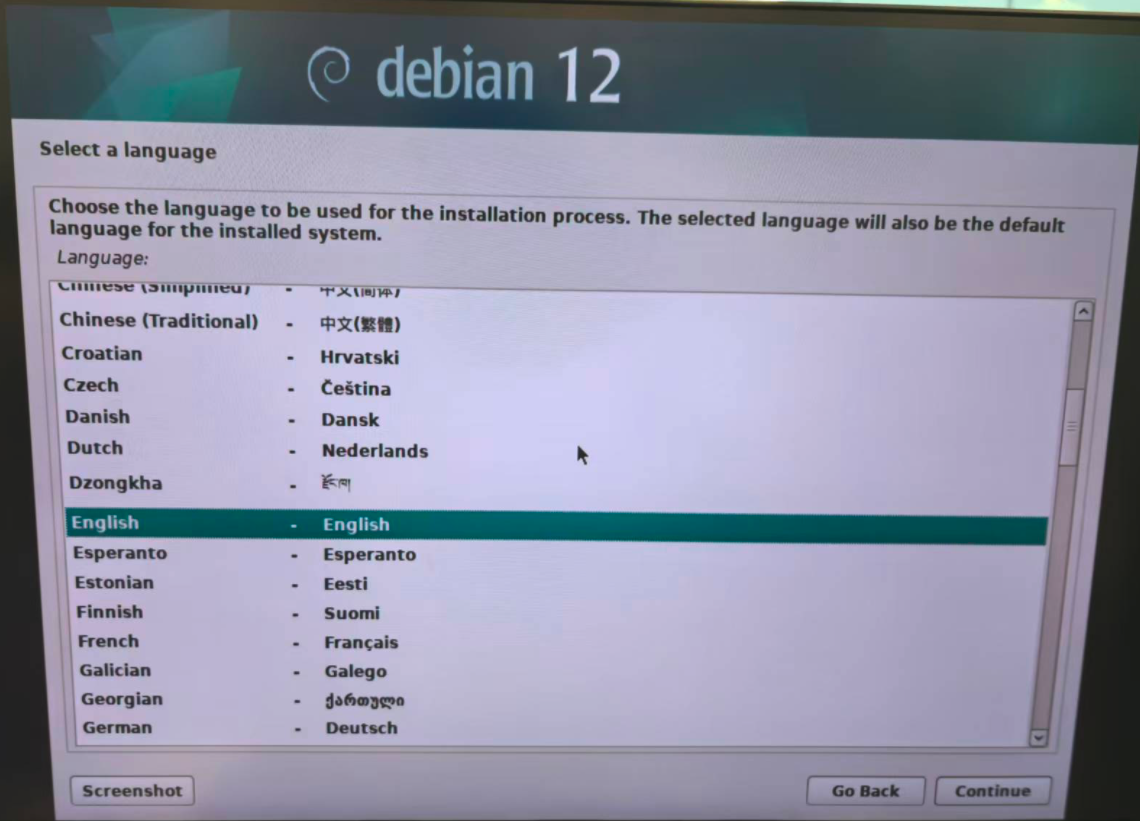
3.2.2 Select Language
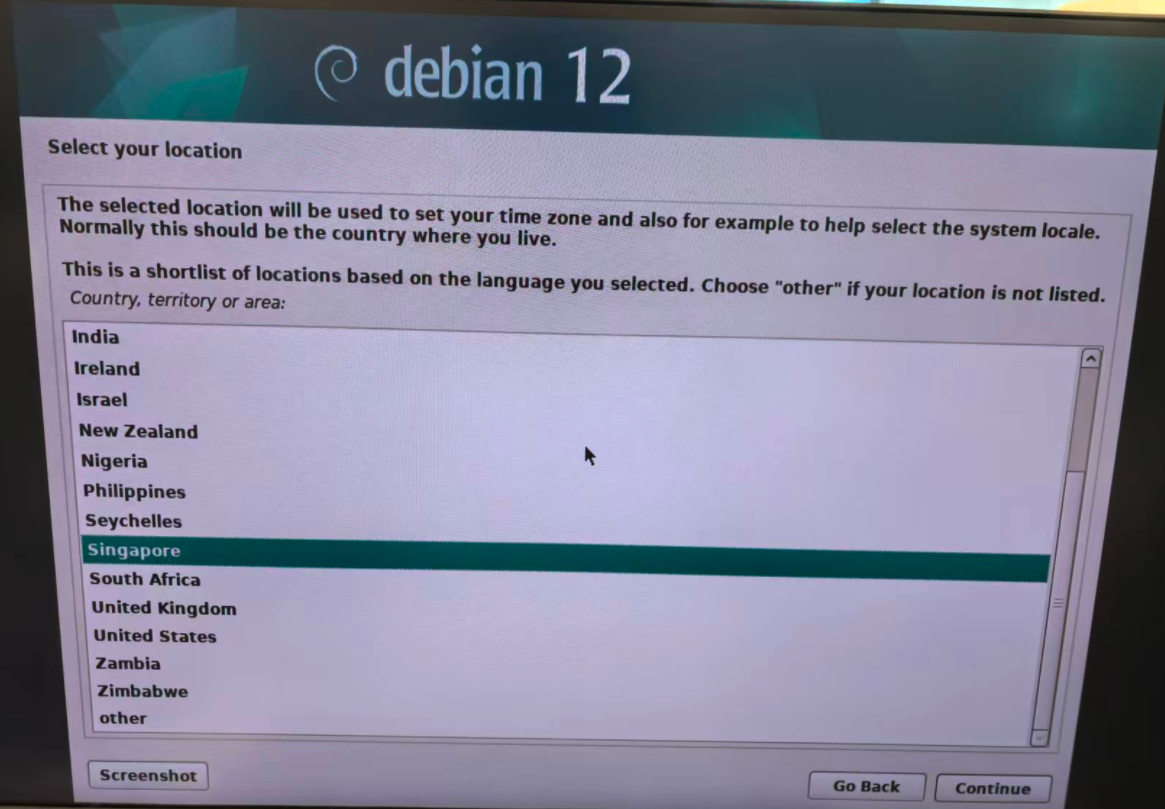
3.2.3 Select Your Location
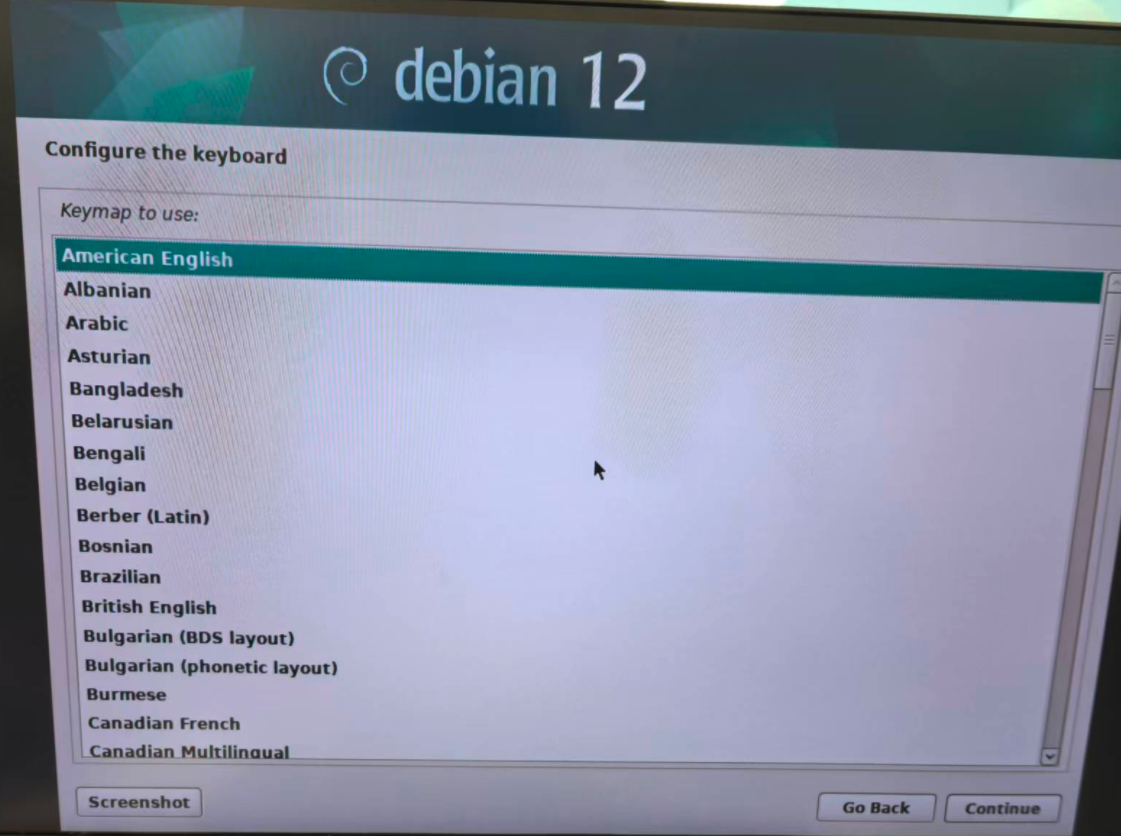
3.2.4 Configure the Keyboard
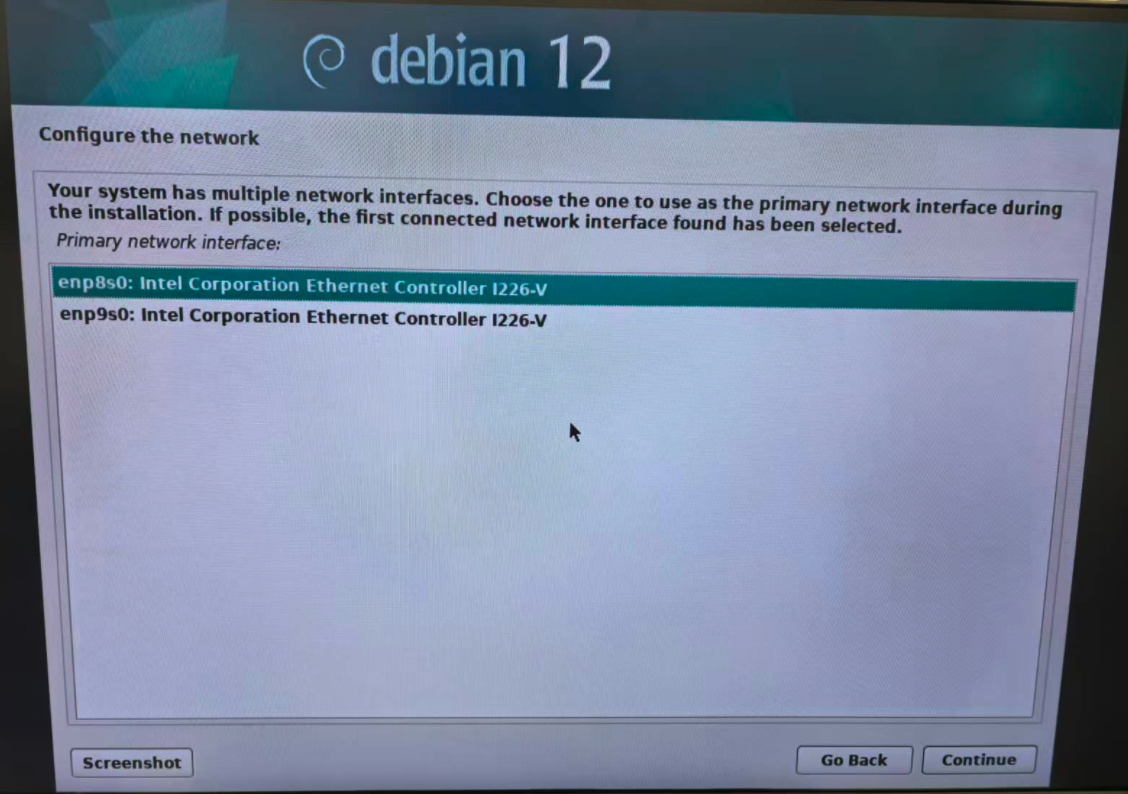
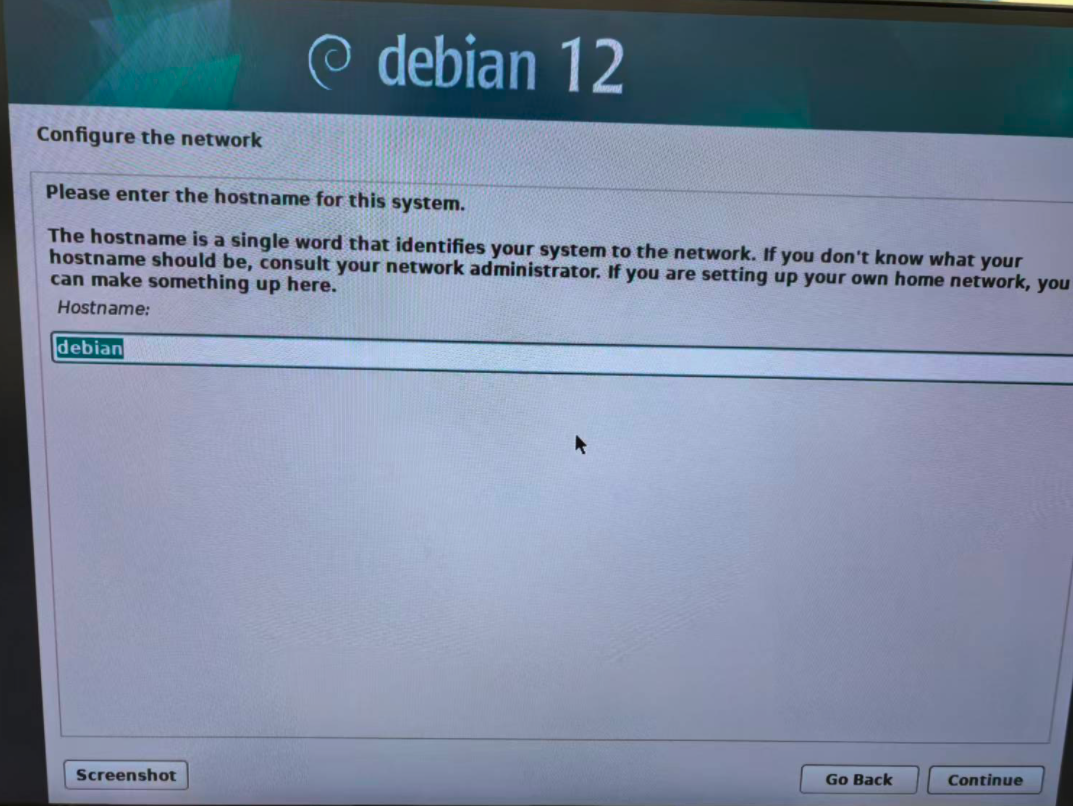
3.2.5 Configure the Network

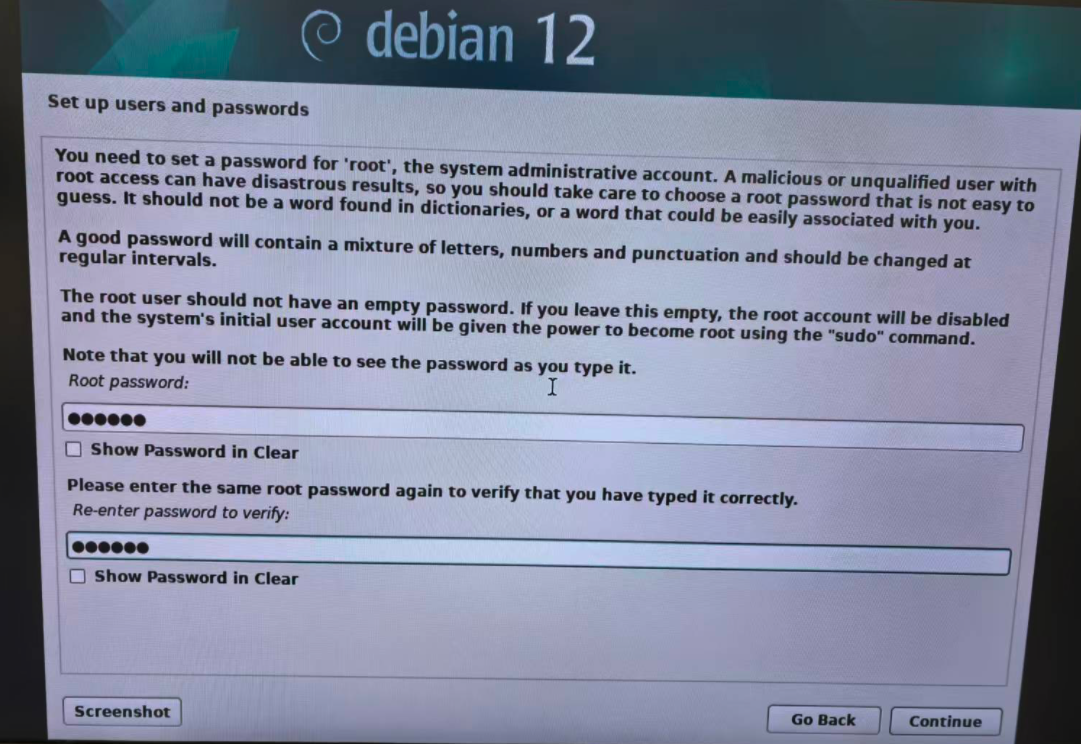
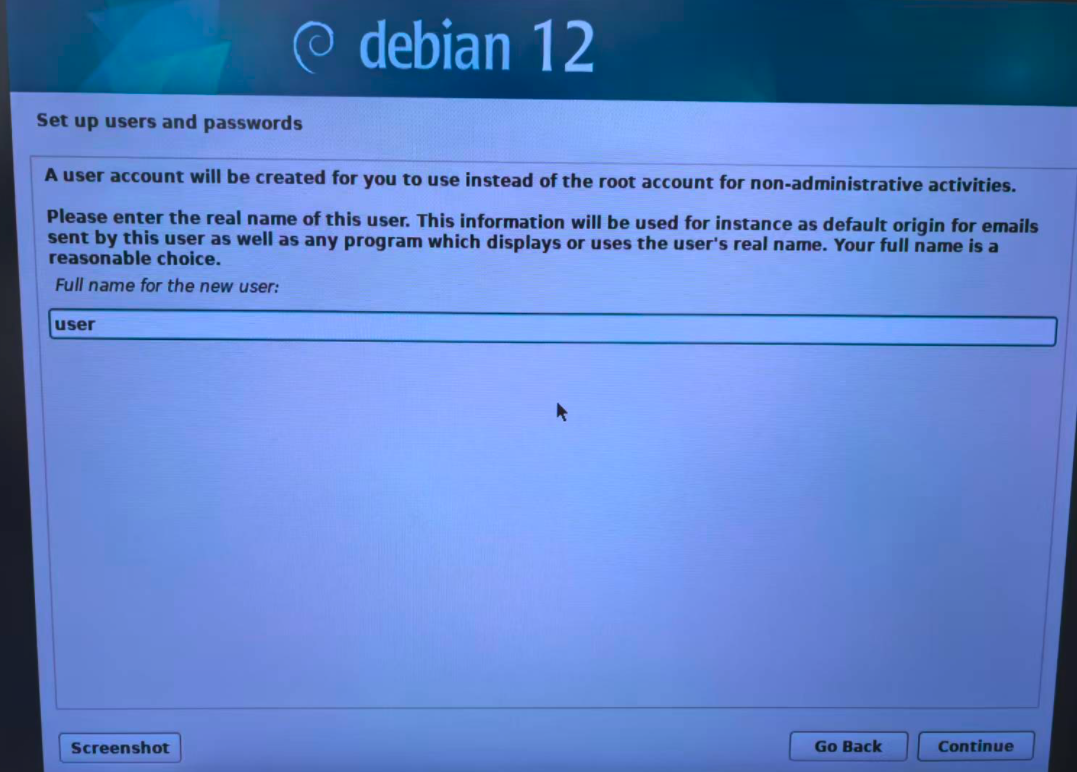
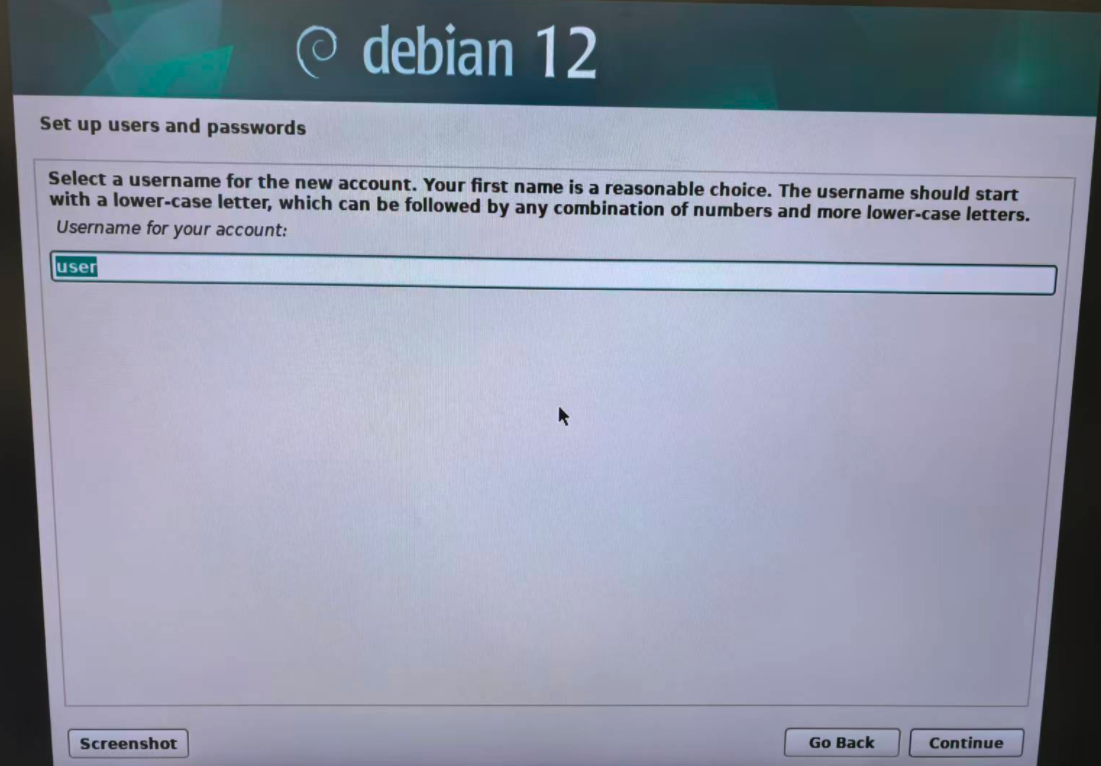
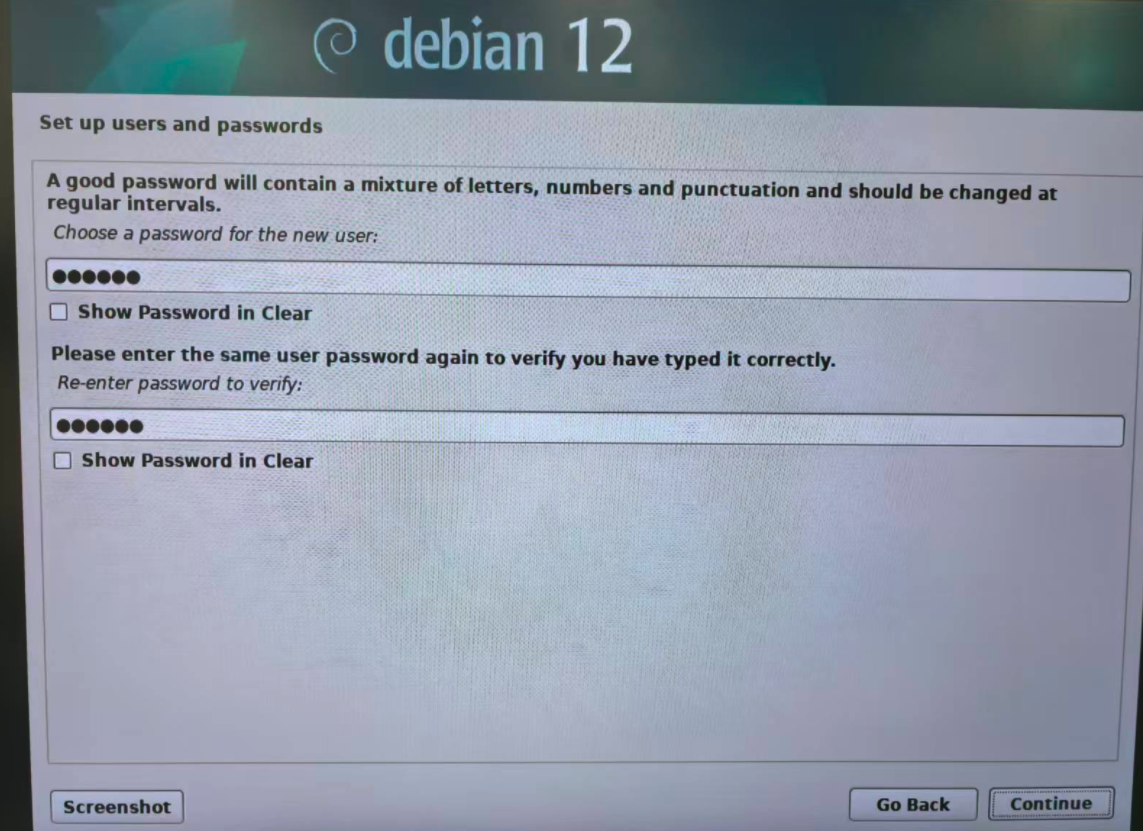
3.2.6 Set Up Users and Passwords
Set the root user password:
Add a new user:
Set the new user password:
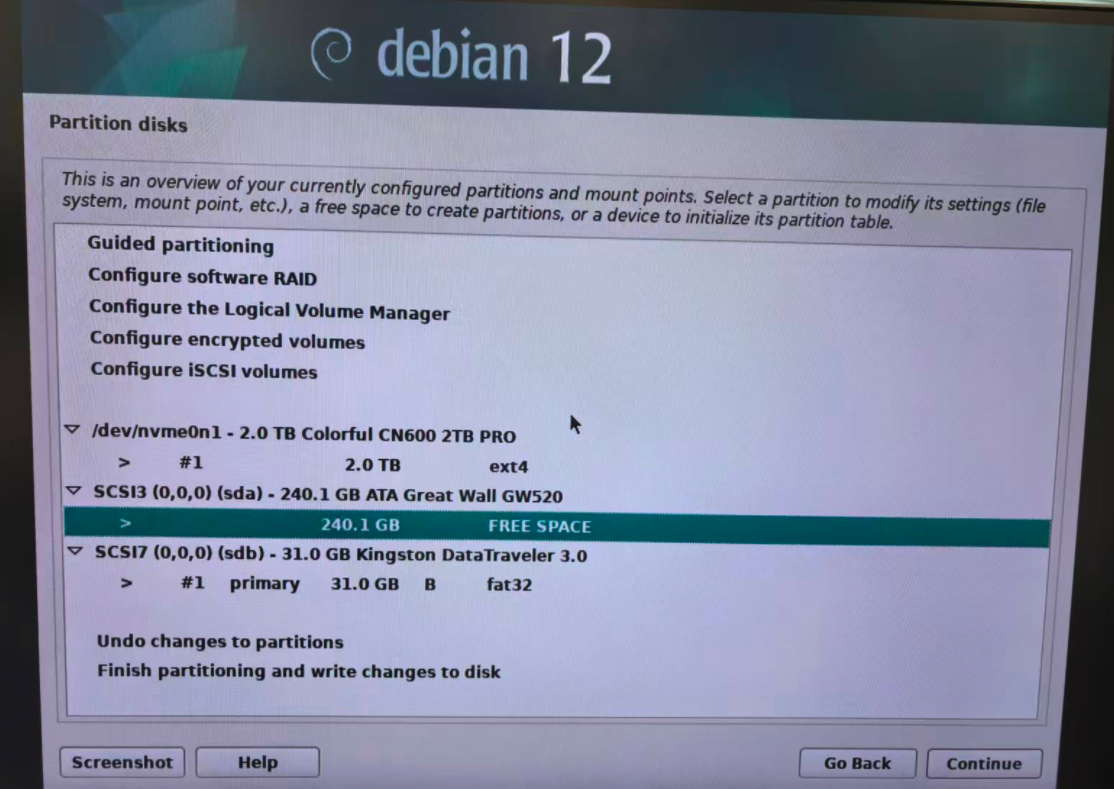
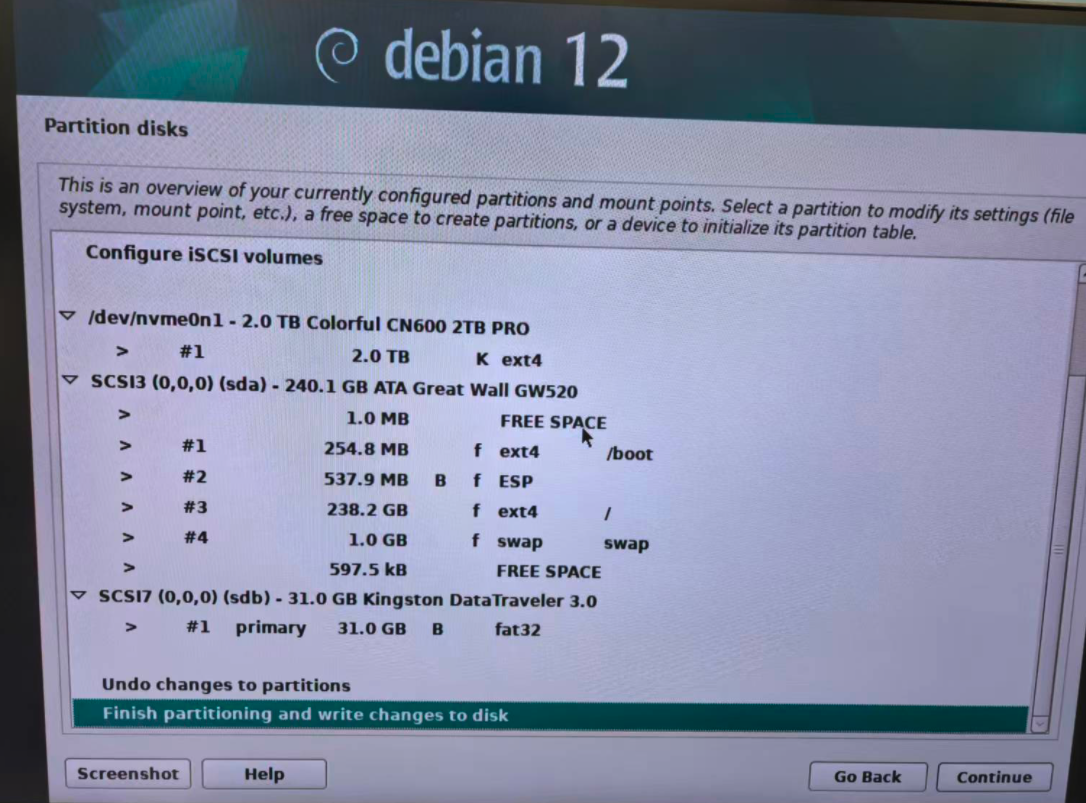
3.2.7 Select Disk
During installation, select a smaller disk as the system disk and leave other disks unconfigured for now.
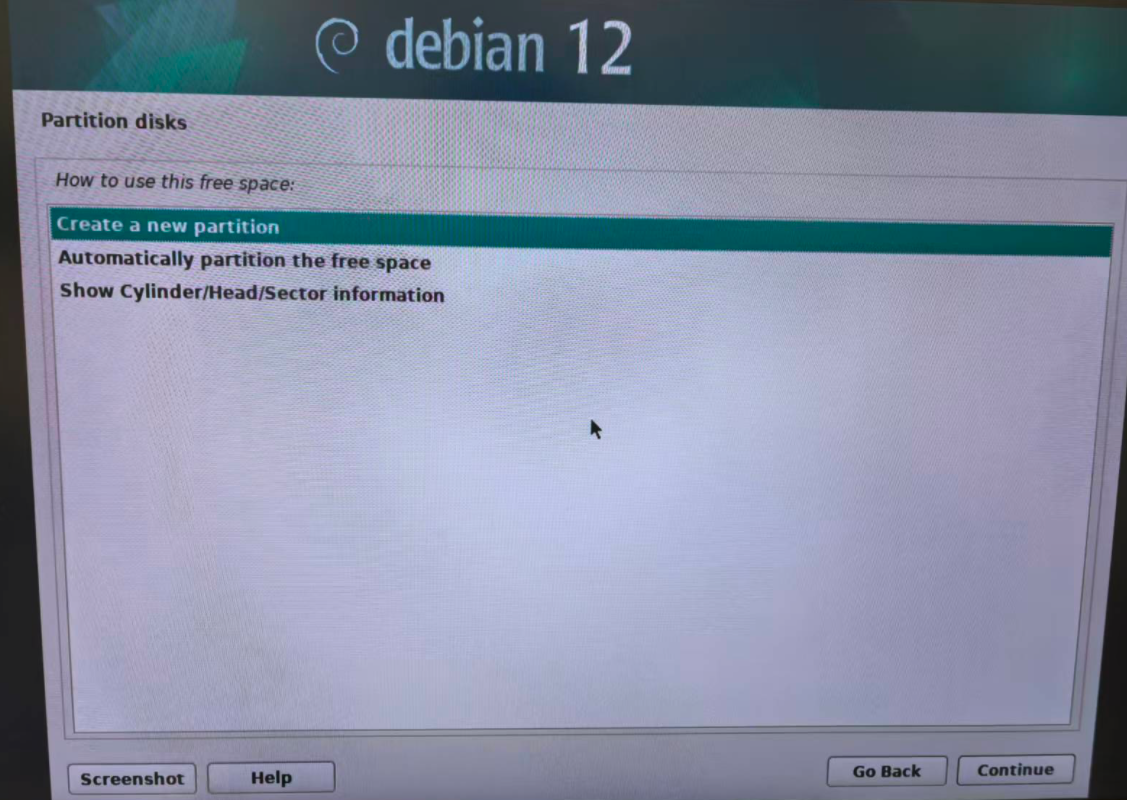
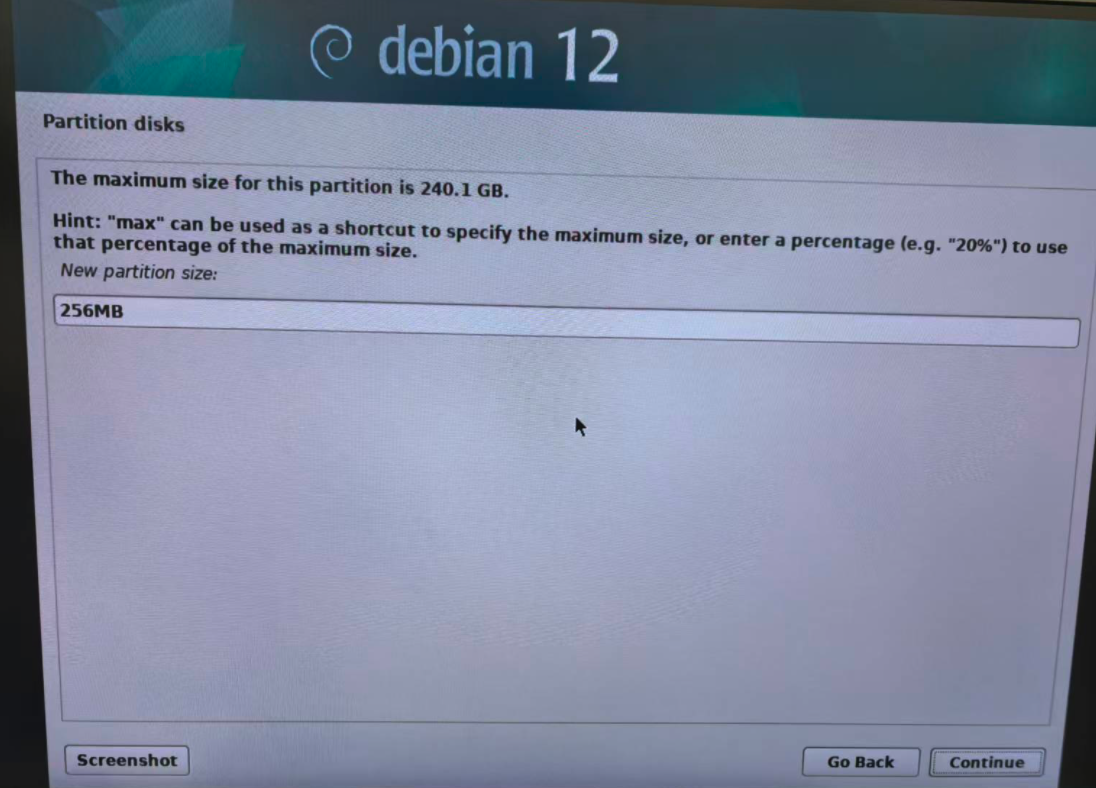
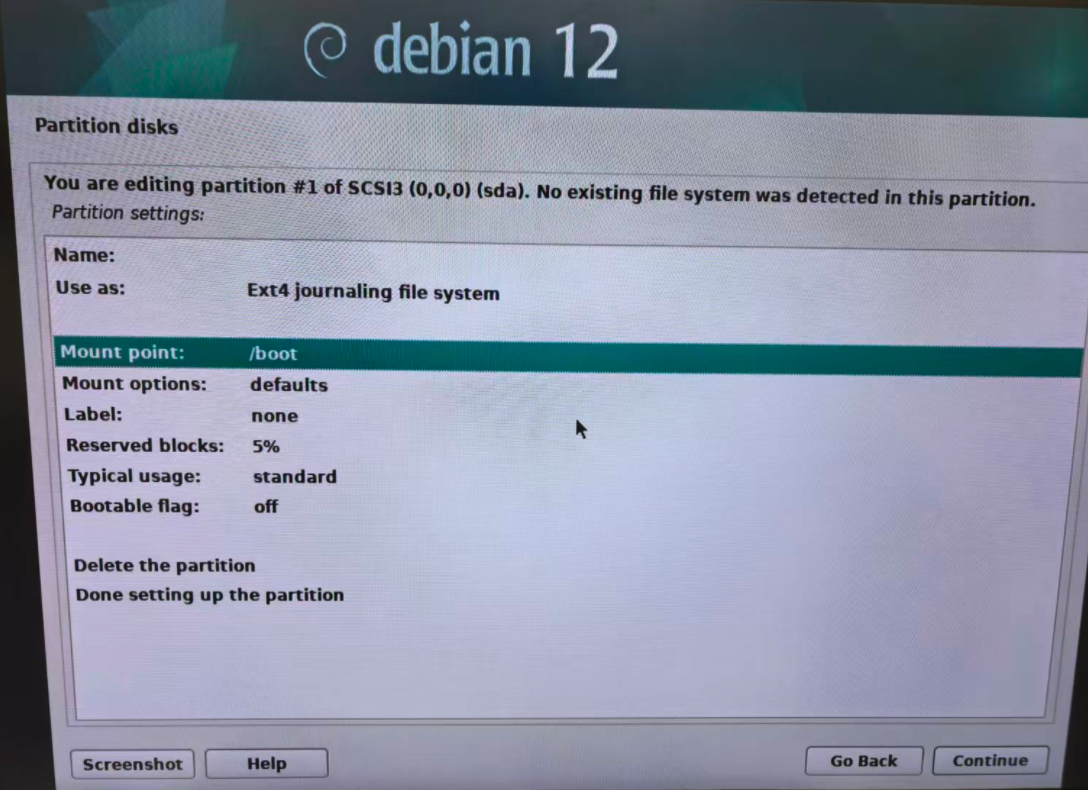
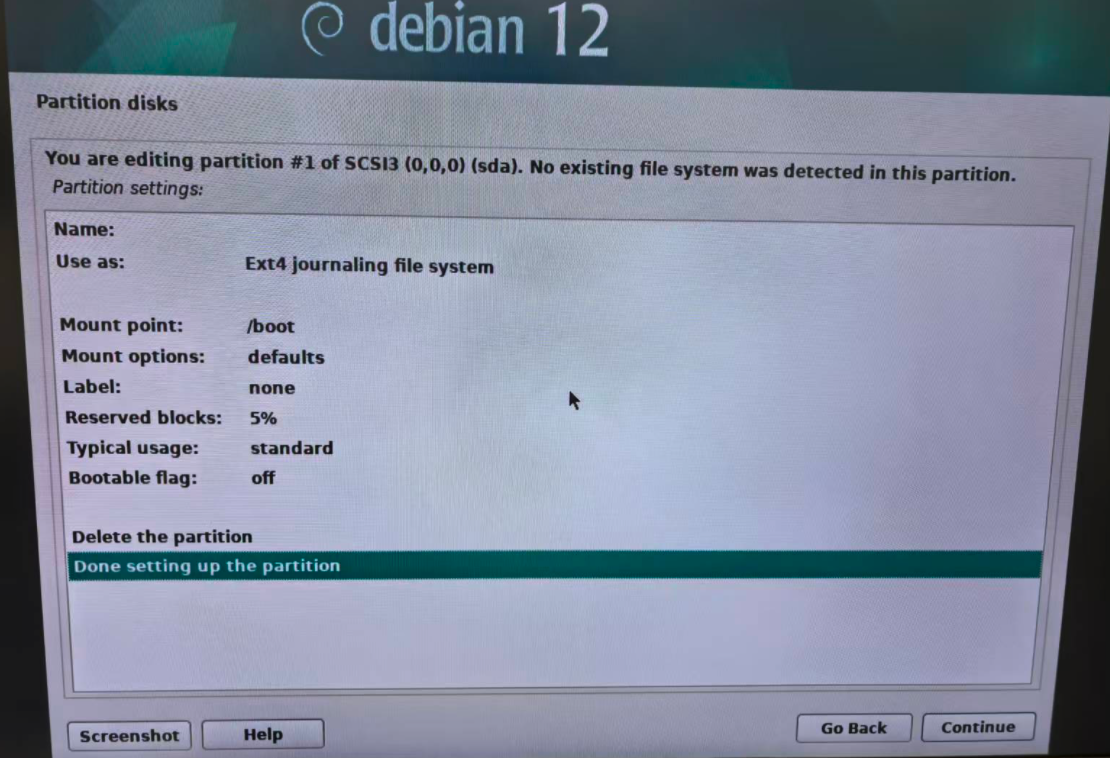
Create a boot partition on the system disk with a size of 256MB:
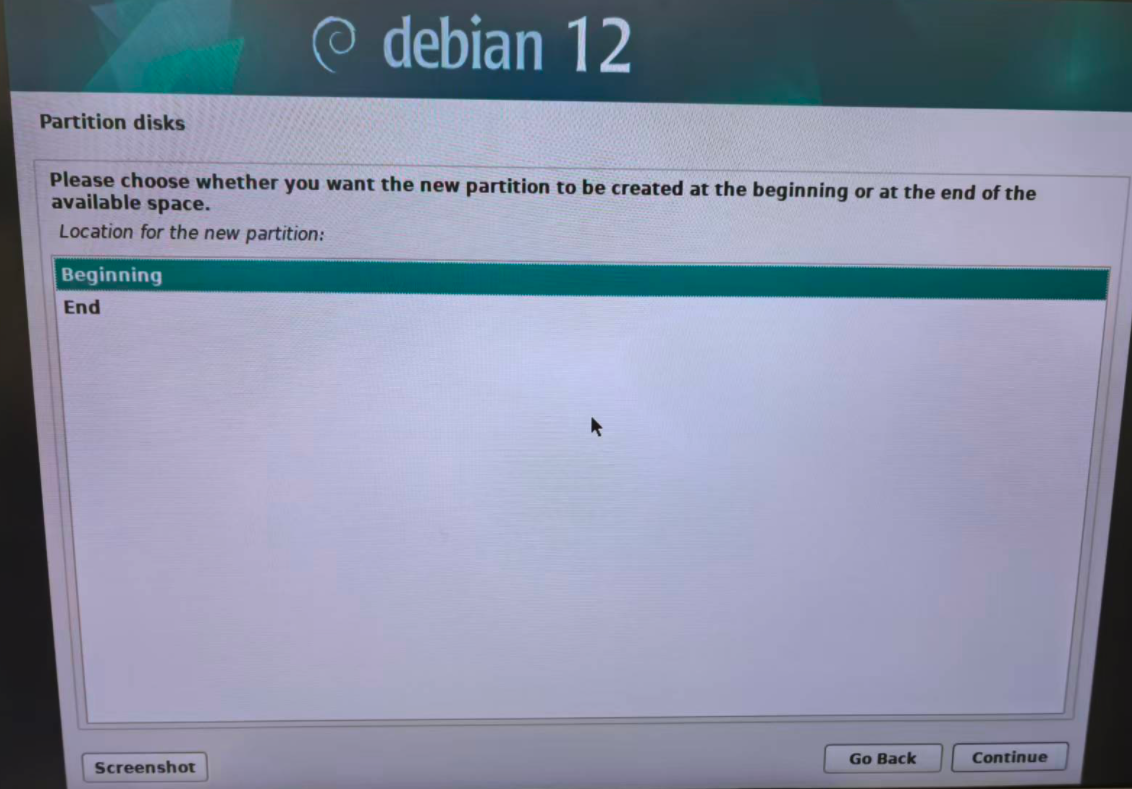
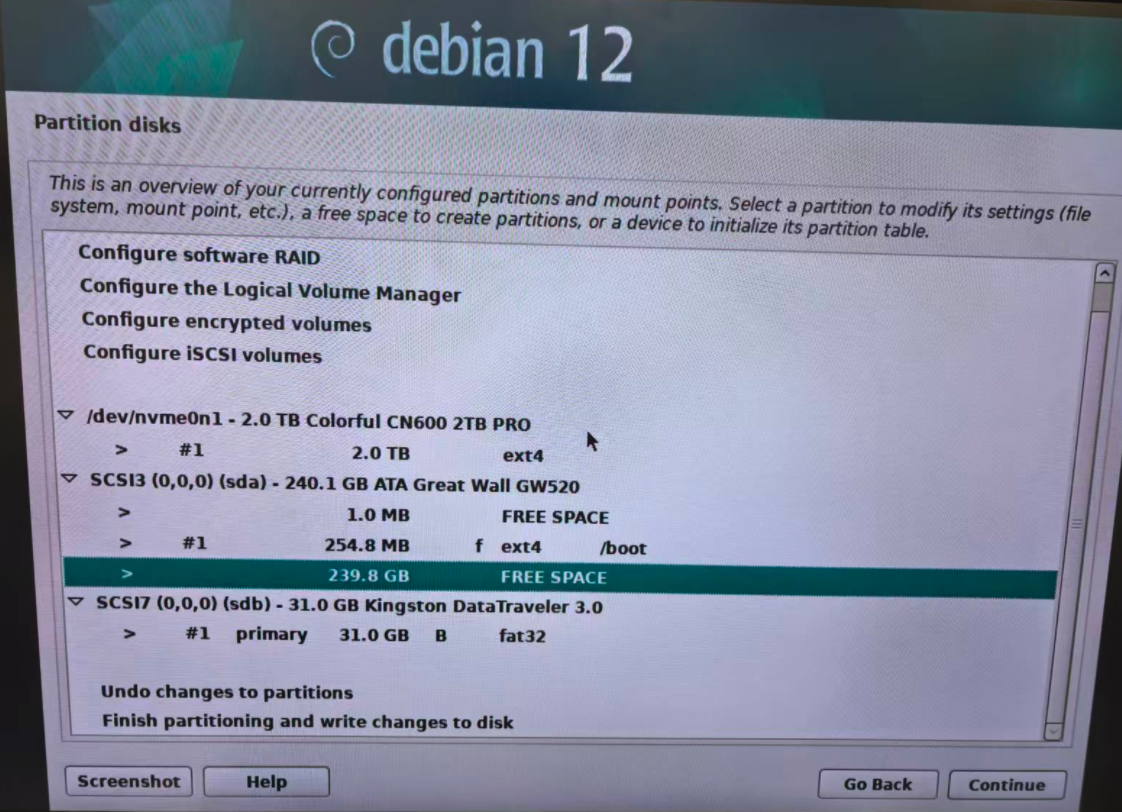
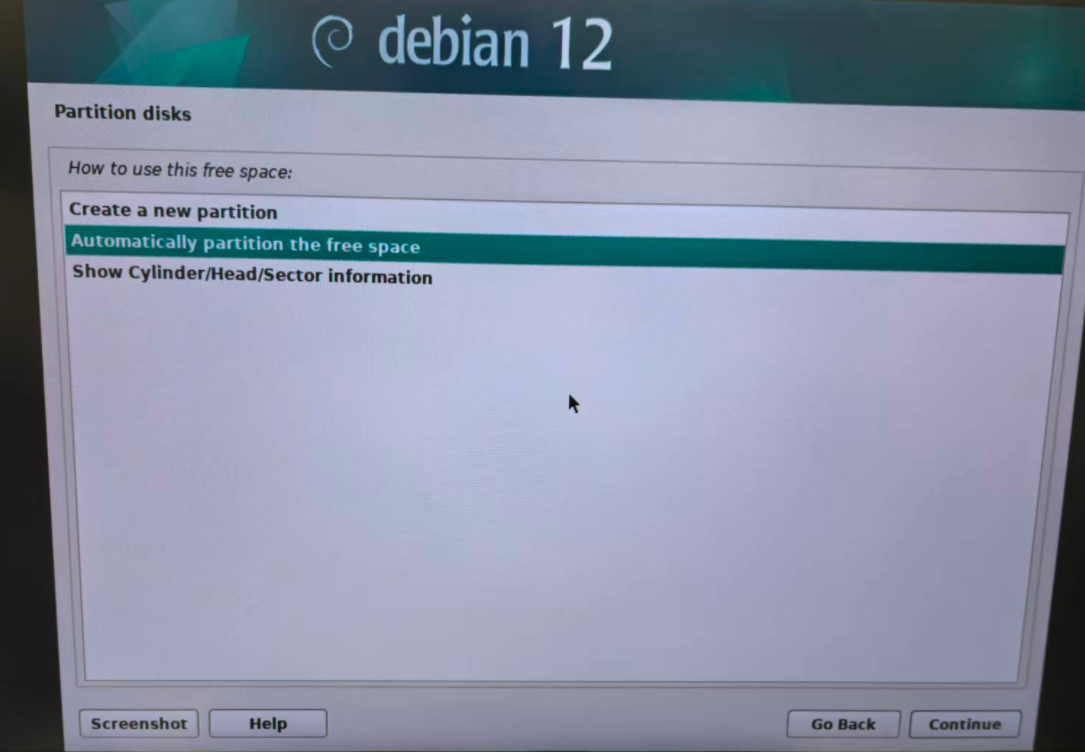
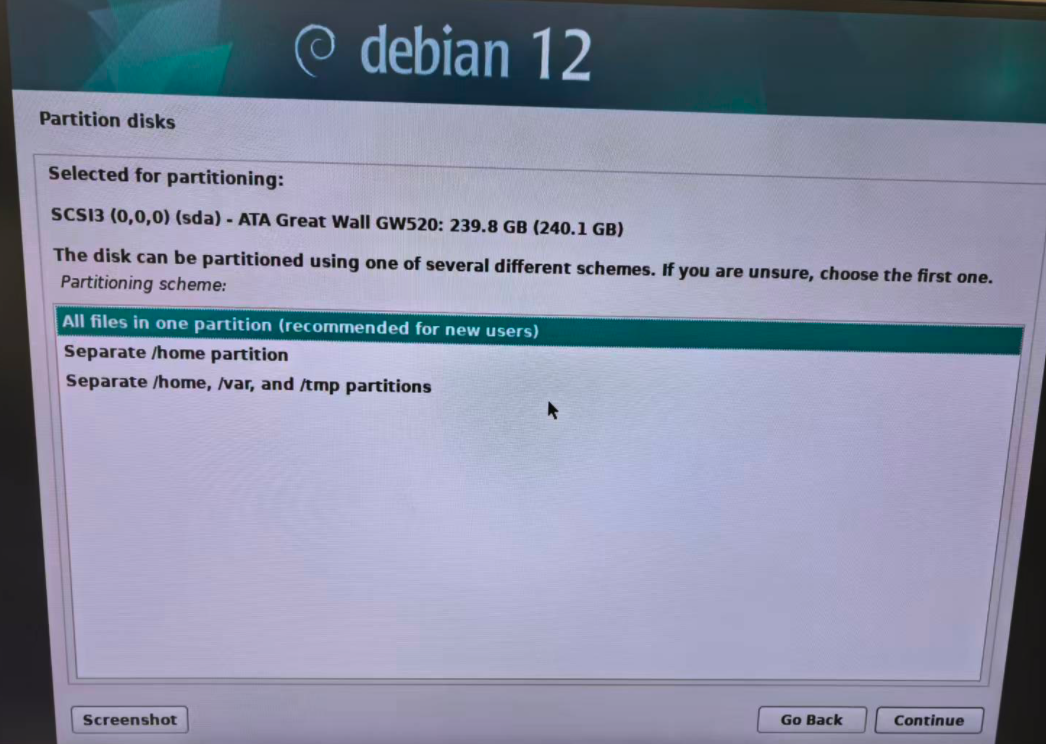
Automatically partition the remaining capacity of the system disk:
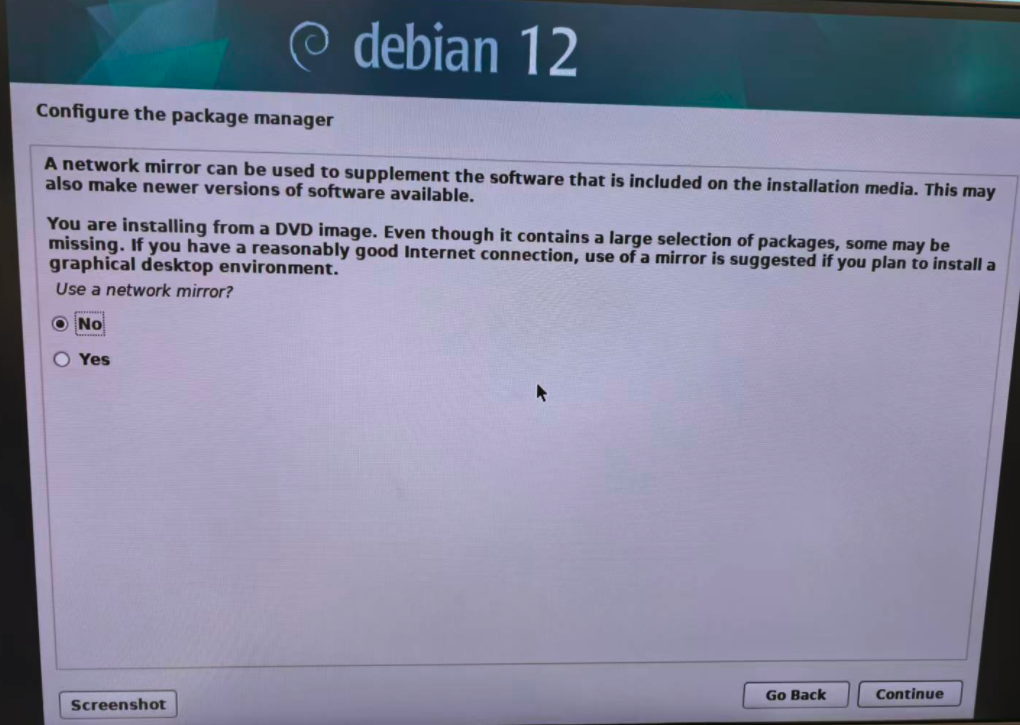
3.2.8 Configure the Package Manager

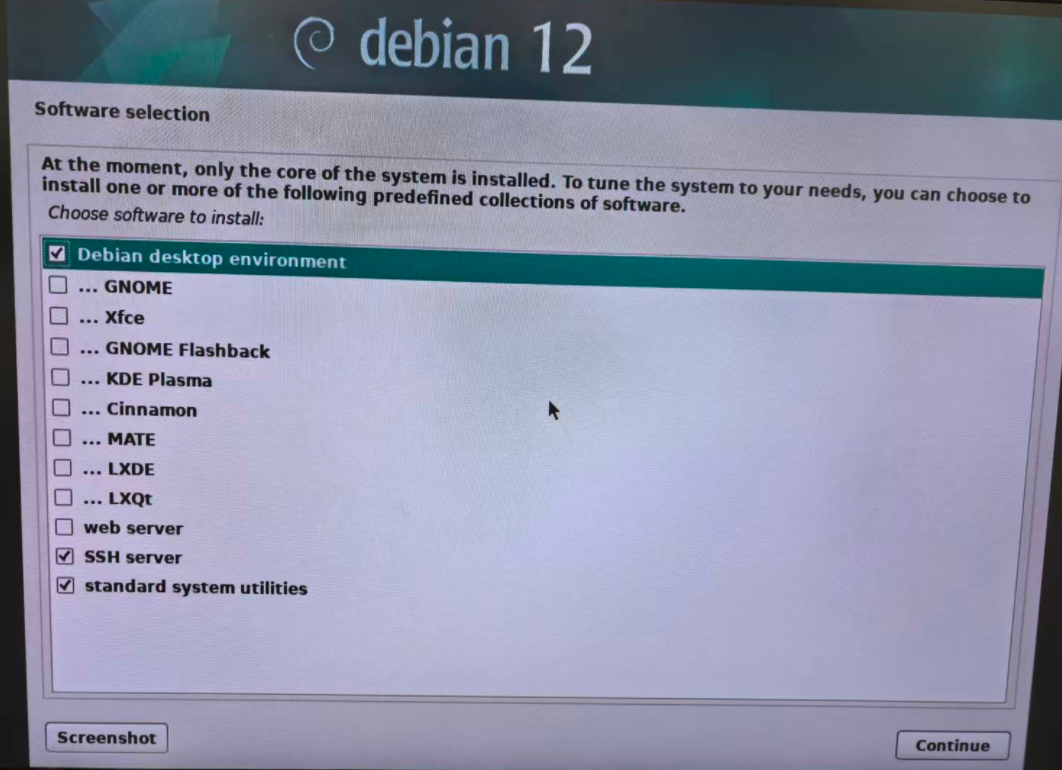
3.2.9 Software Selection
Select Debian desktop environment, SSH server, and Standard system utilities.
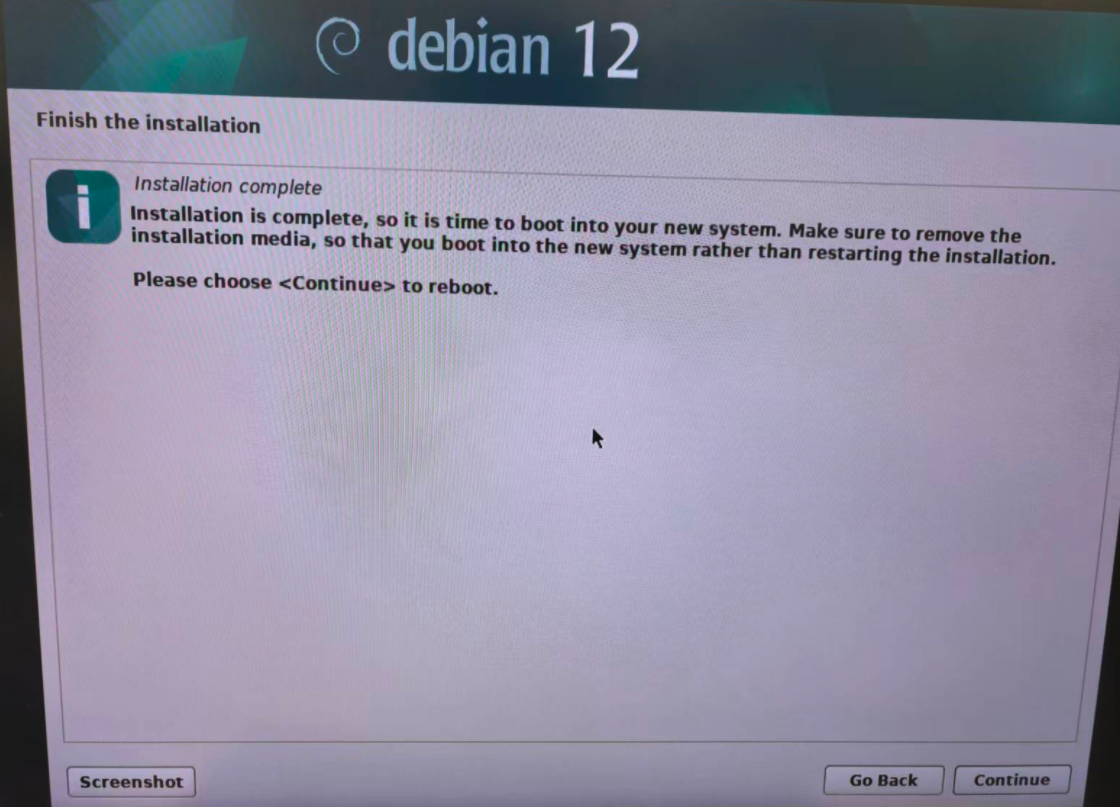
3.2.10 Installation Completion
Select Continue to automatically restart the system.
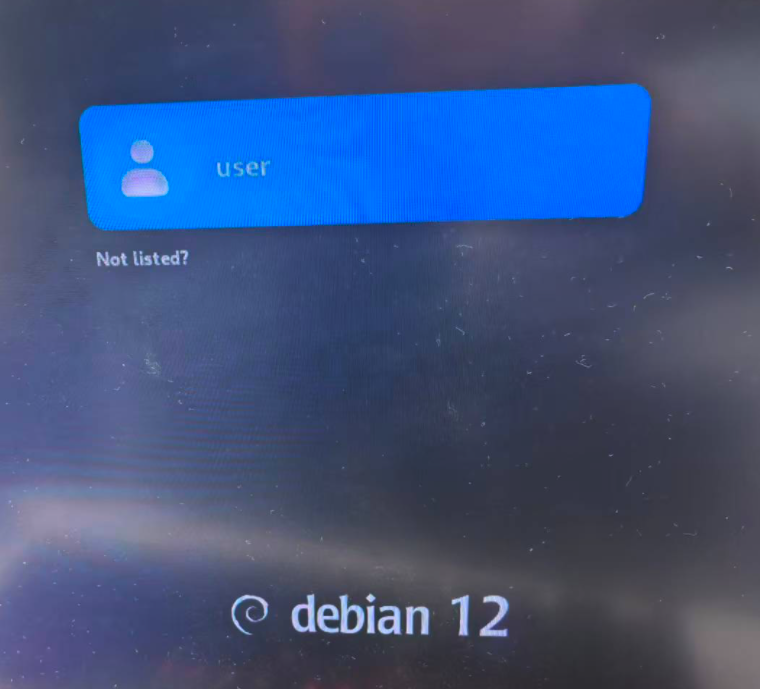
After rebooting, the system will display the login screen.
4. Multiple Data Disk Configuration
Important Note: Choose either the LVM approach or the Raid approach. You don't need to complete both approaches.
4.1 Approach 1 - LVM Configuration
Log in using the created user, switch to the root user in the terminal, and run the following command to view the data disk list:
Do make sure you are viewing the data disk, not the system disk.
fdisk -l
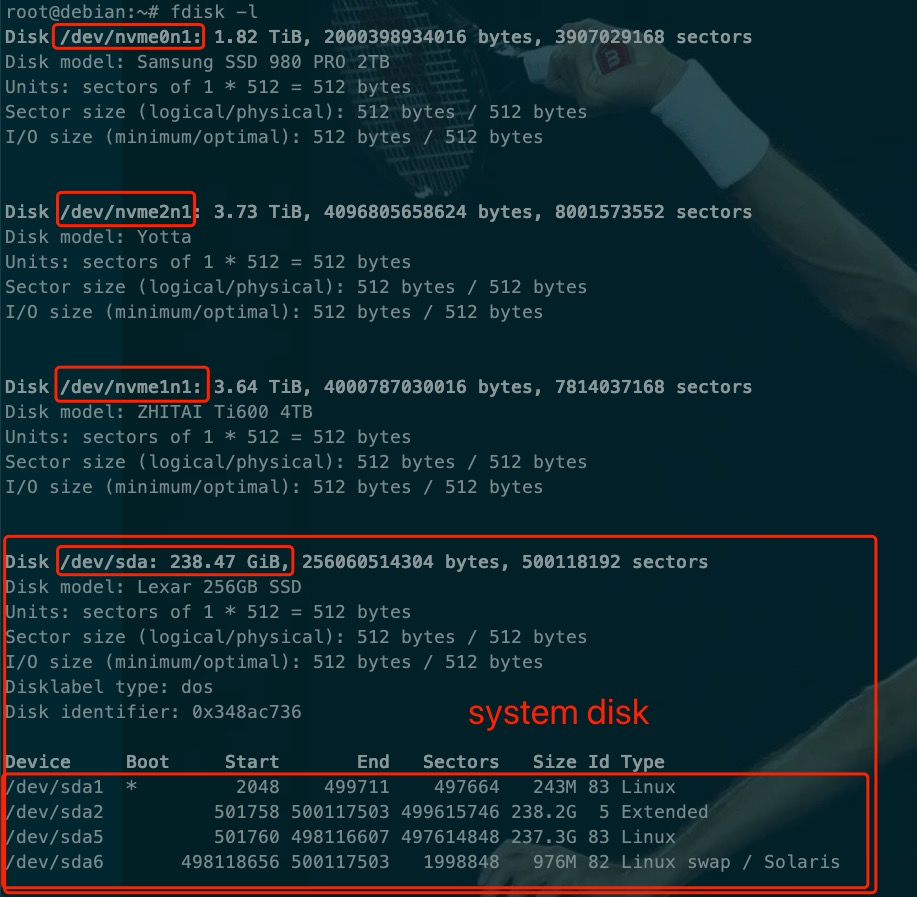
As shown in this example, you have /dev/nvme0n1, /dev/nvme1n1 and /dev/nvme2n1.
If disk partition exists (as shown below) in your data disks, you need to remove the existing partition.
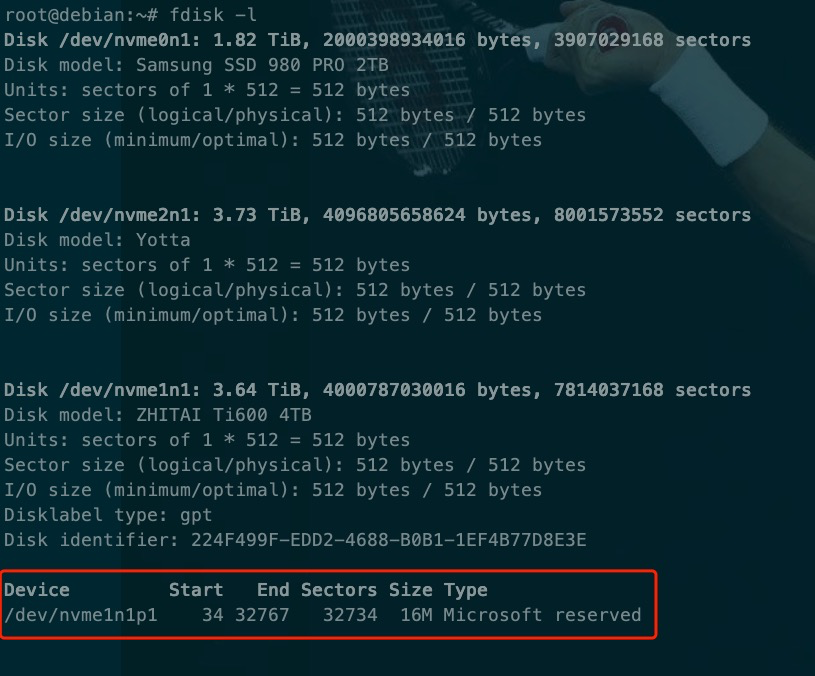
Execute wipefs command to remove the partition. If you don't have existing partition, your may directly go to the next step.
wipefs -a /dev/nvme1n1

In this example we are using three data disks /dev/nvme0n1, /dev/nvme1n1 and /dev/nvme2n1. When you are operating on your machine, please follow the actual data disk configurations on your machine.
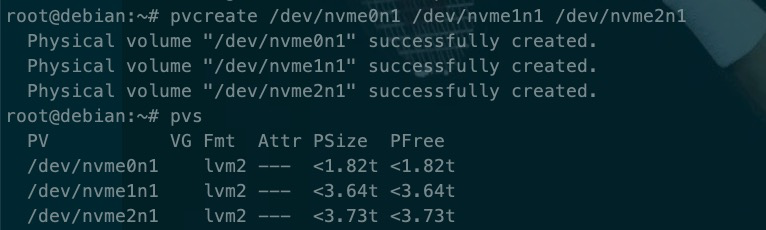
Create physical volume (pv):
pvcreate /dev/nvme0n1 /dev/nvme1n1 /dev/nvme2n1
pvs
Create Volume Group (vg):
vgcreate vg_data /dev/nvme0n1 /dev/nvme1n1 /dev/nvme2n1
vgs

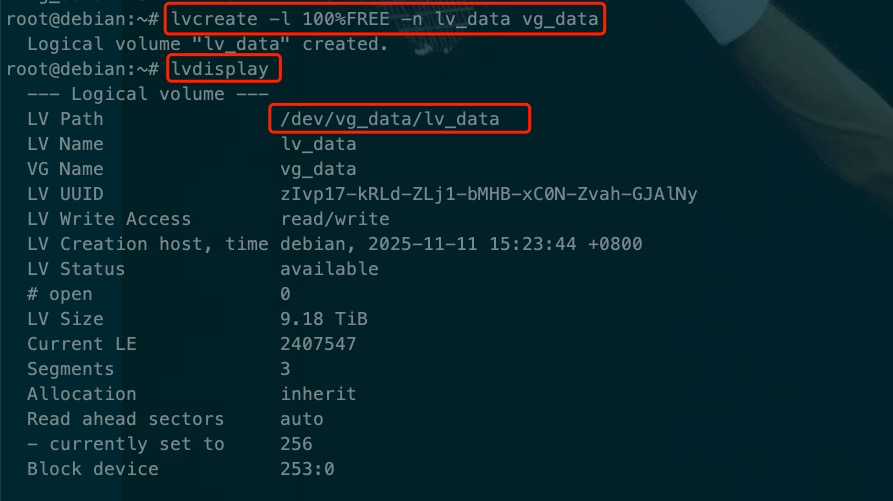
Create Logical Volume (lv):
lvcreate -l 100%FREE -n lv_data vg_data
lvdisplay
Format Logical Volume:
mkfs.ext4 /dev/vg_data/lv_data
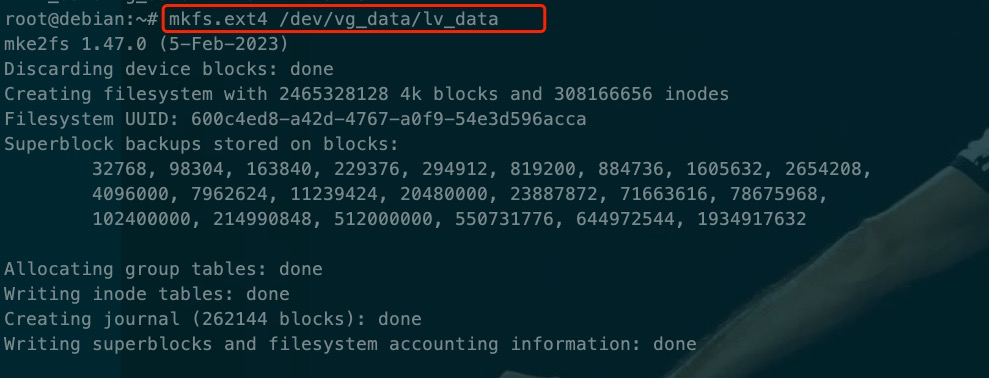
View lv_data UUID and copy UUID:
blkid

Edit /etc/fstab:
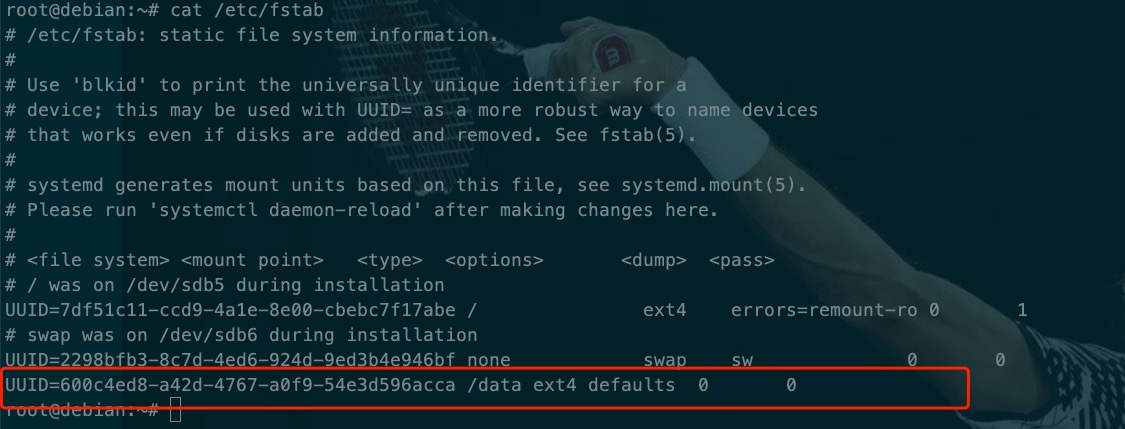
Replace the UUID in the example (600c4ed8-a42d-4767-a0f9-54e3d596acca) below with the UUID that you have just copied from the previous step.
Please do make sure you have replaced the UUID with the UUID on your disk!
echo "UUID=600c4ed8-a42d-4767-a0f9-54e3d596acca /data ext4 defaults 0 0" >> /etc/fstab
View /etc/fstab:
Check if you have successfully add the data disk config in fstab:
cat /etc/fstab
Mount the Data Disks:
systemctl daemon-reload
mount -a
df -hl
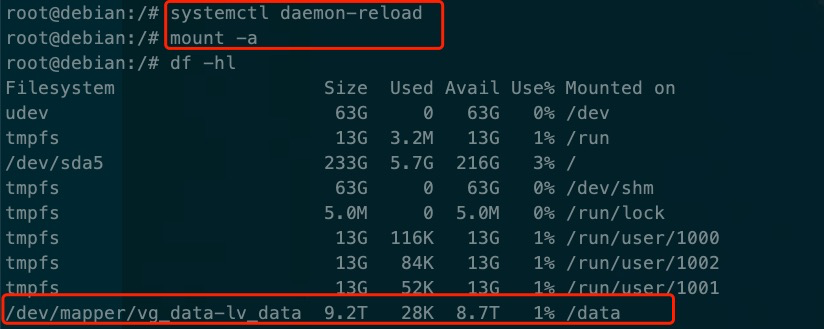
As shown above, we have successfully mounted the data disks lv_data under /data. Now we have already completed the LVM configurations.
4.2 Approach 2 - RAID Configuration
Configure the disk as a single-disk RAID 0.
The following steps demonstrate RAID 0 configuration on a Dell server. The process may vary slightly for servers from other brands.
-
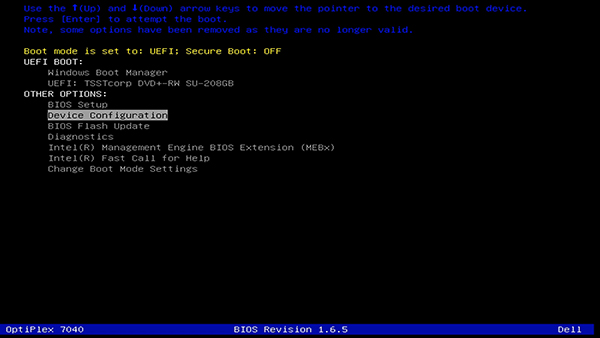
Power on the computer and repeatedly press F12 when the Dell logo appears to access the boot menu.
-
Use the arrow keys to select Device Configuration.
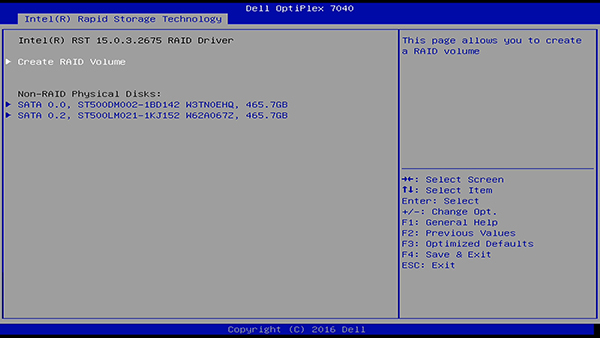
-
In the Intel RAID menu, select Create RAID.
-
Assign a name to your RAID volume. Use the arrow keys to move to the next item.

-
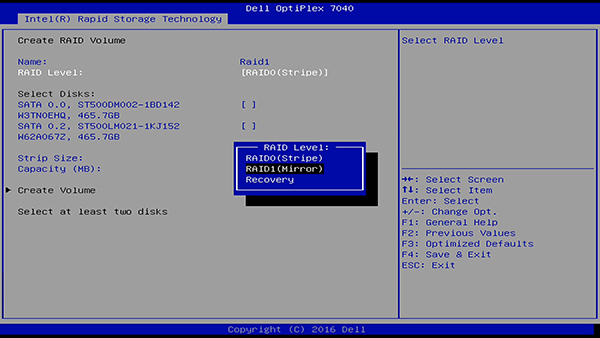
Select the desired RAID level.
-
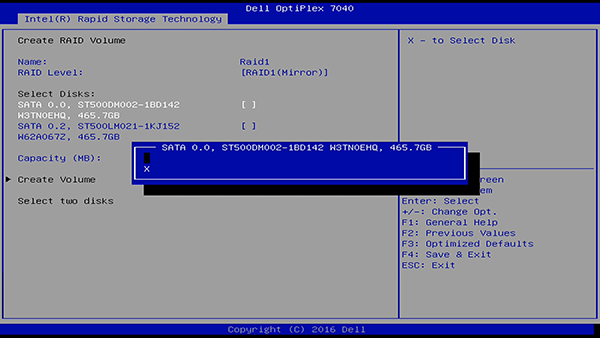
Select the disks for the RAID volume. Highlight a disk, press Space or Enter, and select X.
-
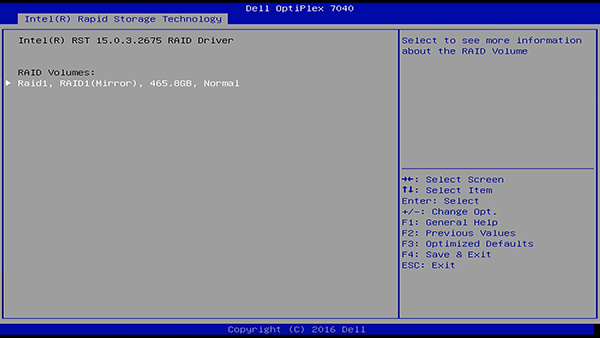
Choose the disk volume and stripe size, then select Create Volume to complete. The RAID volume will now appear on the main screen.
Note: For RAID 0, select a stripe size closest to the average file size to be stored on the RAID volume. If unknown, use the default stripe size of 128 KB.
5. Recommended Settings on Debian System
5.1 Auto-sleep, Auto-start and Power Mode Settings
We strongly recommend disabling auto-sleep, setting Power Mode to Performance, and enabling the auto-start service on your Debian system. This ensures the ARO Client runs stably and operates for an extended period without interruptions from system sleep or suboptimal power settings.
You can choose to configure the power settings from either Graphical User Interface (GUI) or Command Line Interface (CLI) on your Debian system:
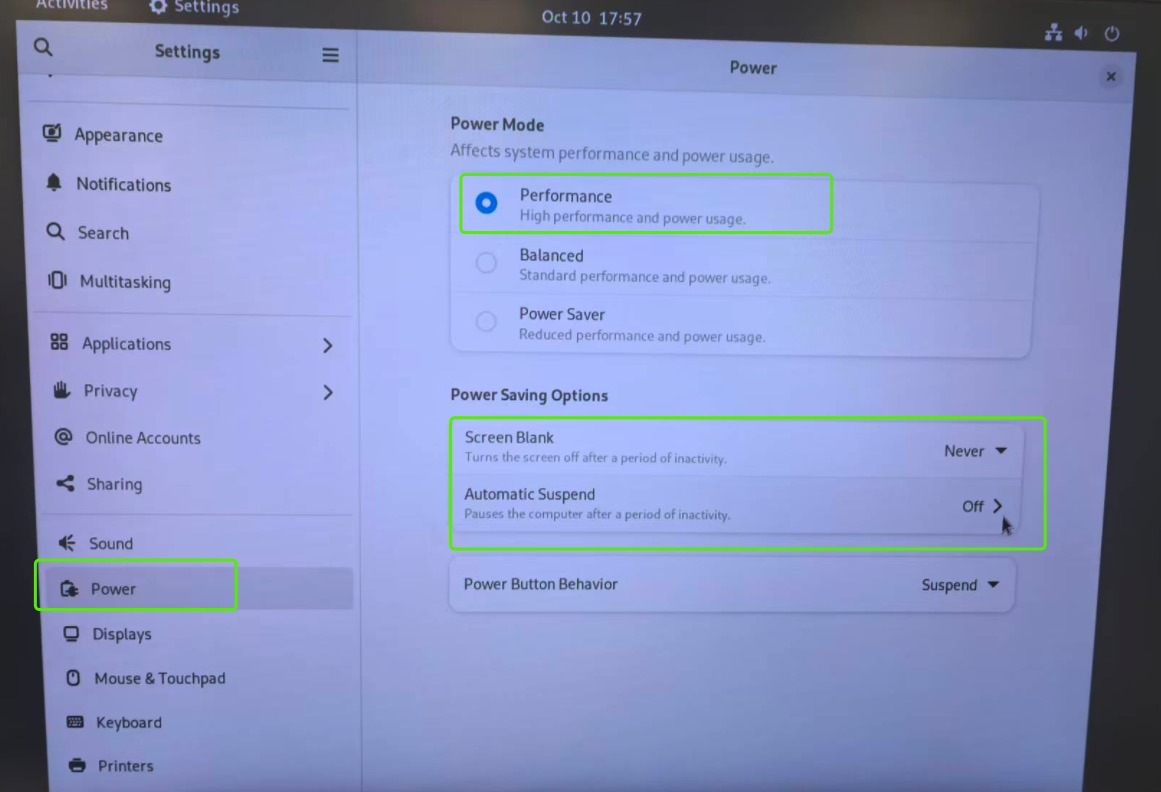
5.1.1 For Debian Graphical User Interface (GUI)
Find Power in Settings. Set Power Mode to Performance, and Set Automatic Suspend to Off.

5.1.2 For Debian Command Line Interface (CLI)
Disable Auto-sleep:
sudo systemctl mask sleep.target suspend.target hibernate.target hybrid-sleep.target
Set Power Mode to 'Performance':
sudo apt update
sudo apt install linux-cpupower
sudo cpupower frequency-set -g performance
Configure Auto-start:
Create a file at /etc/systemd/system/cpufreq-performance.service with the following texts:
[Unit]
Description=Set CPU governor to performance
After=multi-user.target

[Service]
Type=oneshot
ExecStart=/usr/bin/cpupower frequency-set -g performance
RemainAfterExit=yes

[Install]
WantedBy=multi-user.target
Execute the following commands after the file has been successfully created:
systemctl daemon-reload
systemctl enable cpufreq-performance.service
systemctl start cpufreq-performance.service