ARO Server Installation Guide
Part 1: ARO Server Deb Package Installation
1. Preparation
Before starting this tutorial, ensure that:
- You have installed
Debianversion 11 or higher on a physical machine (not a virtual machine). - You have Admin (root) user access to the system.
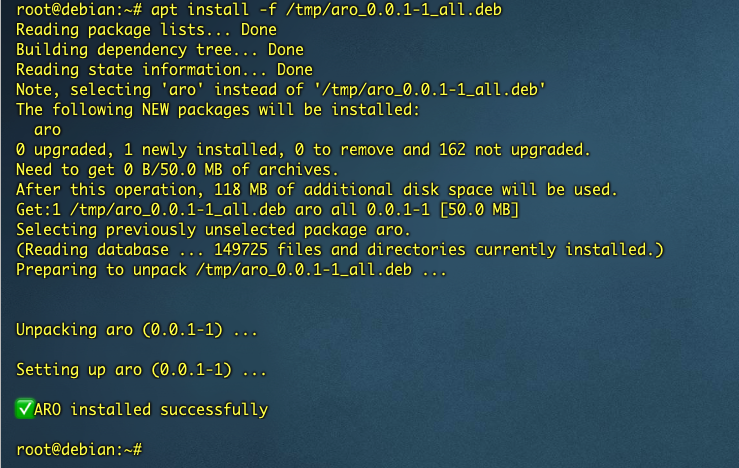
2. Install the Deb Package
Log in to the terminal, switch to the root user, and execute the following commands:
apt update

wget -O /tmp/aro-client-1.0.0.deb https://download.aro.network/files/deb/aro-client-1.0.0.deb

apt install -f /tmp/aro-client-1.0.0.deb
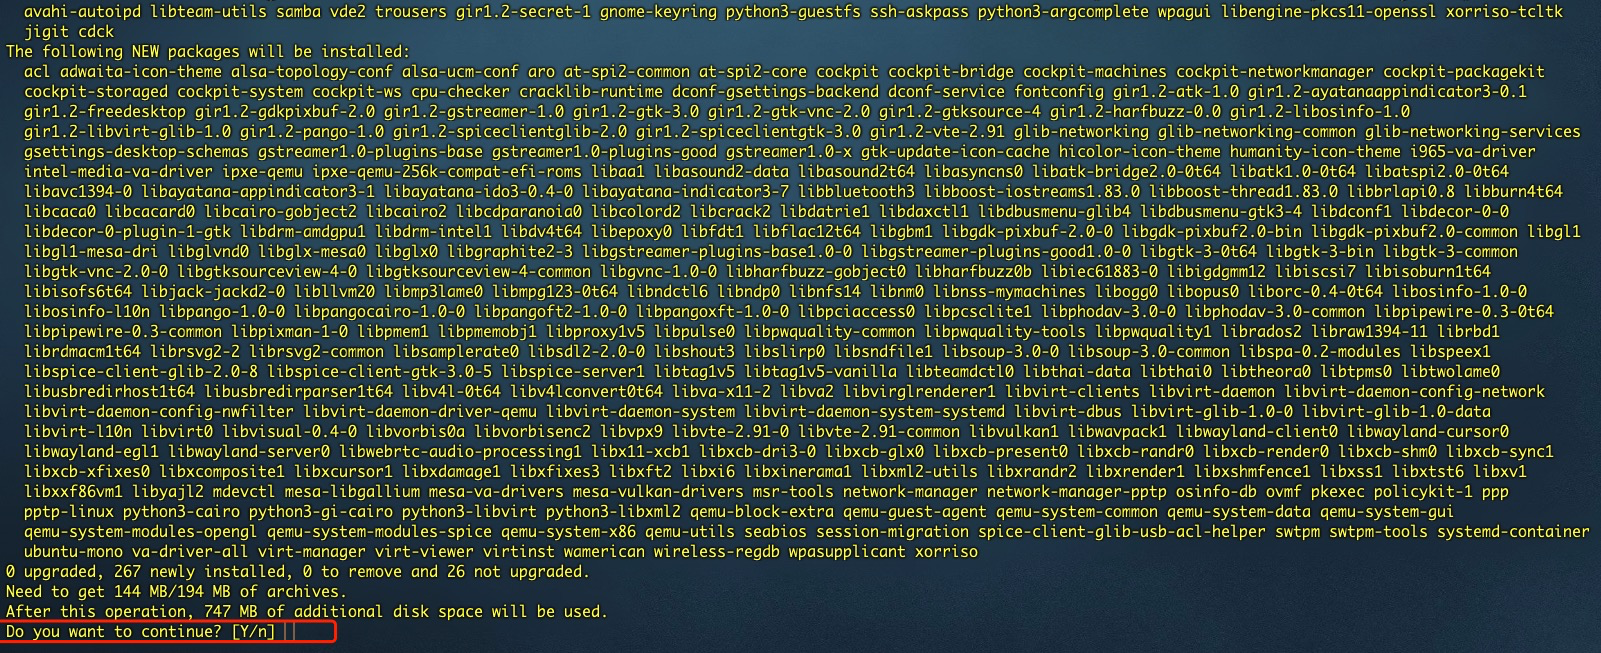
Enter Y to continue the installation.
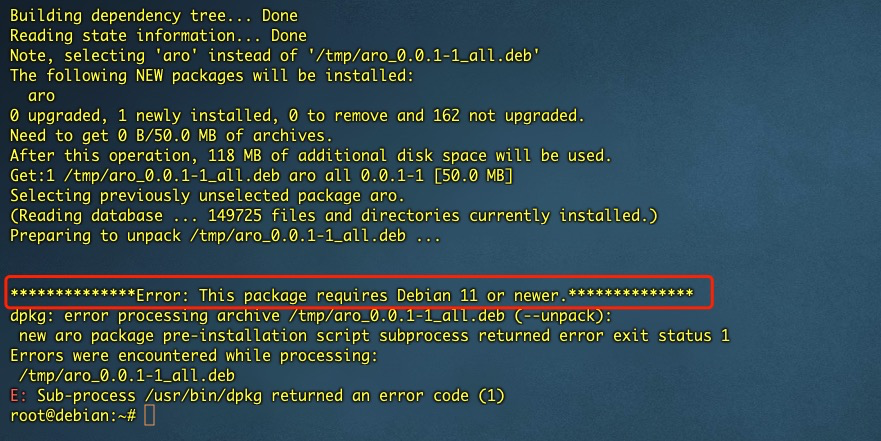
3. Installation Error Scenarios
3.1 Non-Root User Installation
Installing with a non-root user will result in an error and exit the installation.

3.2 Installation on Debian Versions Below 11
Part 2: ARO Server Node Initialization
This section explains how to register, configure, and complete the initial setup required to bring your ARO Server node into a functional state.
Make sure you have already completed the installation steps above.
-
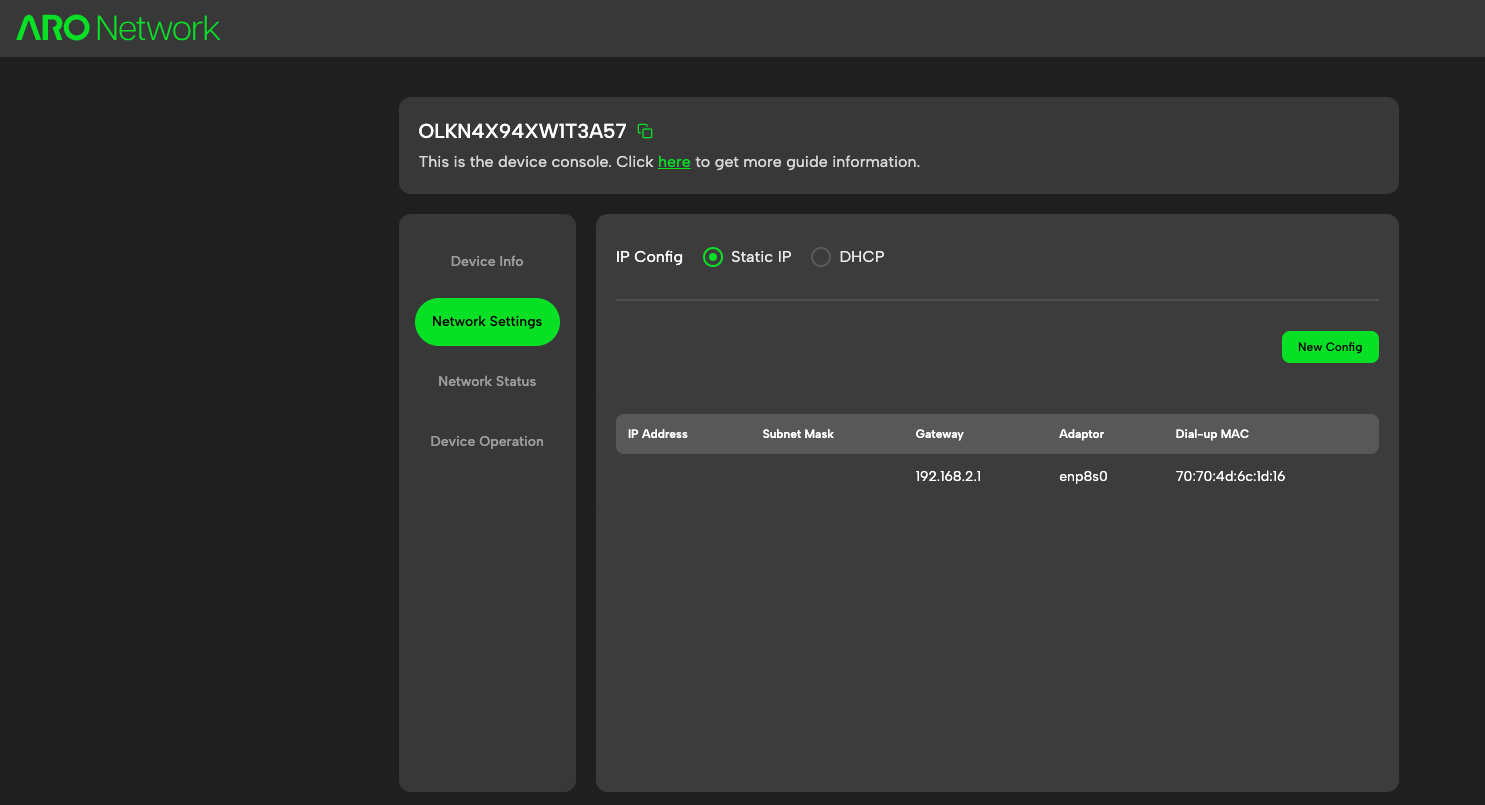
Get your ARO Server Serial Number in the Web Console. Open the ARO Server Web Console at
[Your IP:40001]. For example, if your IP is17.12.205.193, go to17.12.205.193:40001to access the Web Console. Find the 19-digit Serial Number (SN) in the top area of the Web Console.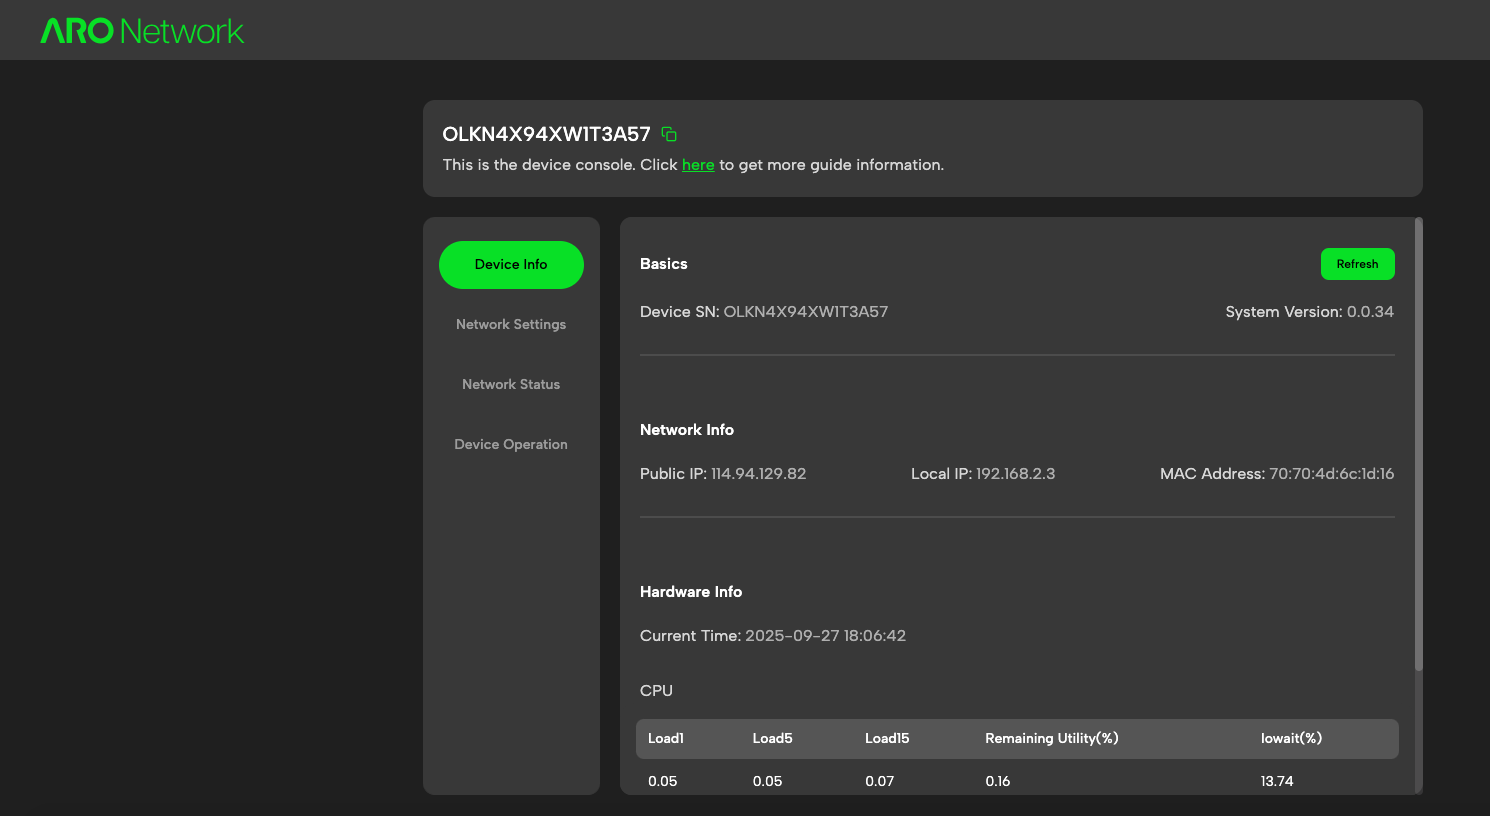
-
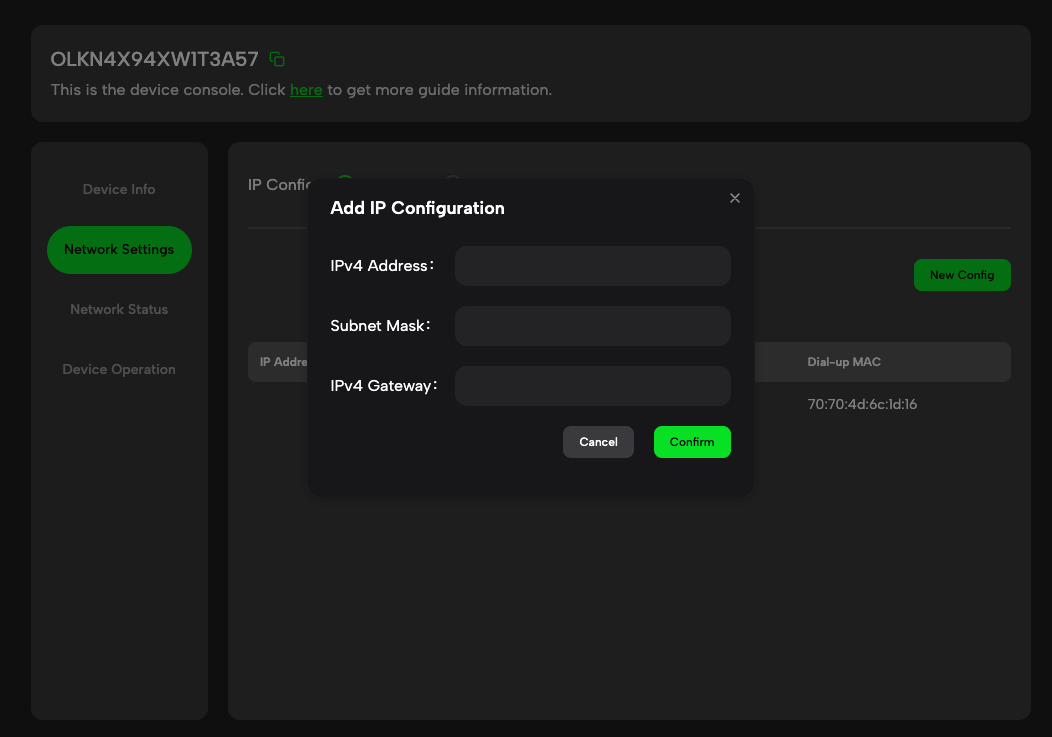
Configure your network. You can adjust the network connection settings in the Web Console if needed.
-
Initialize the activation process. Open the ARO Dashboard, go to ARO Nodes > Add an ARO Server, then follow the steps and enter the 19-digit Serial Number found in your Web Console.
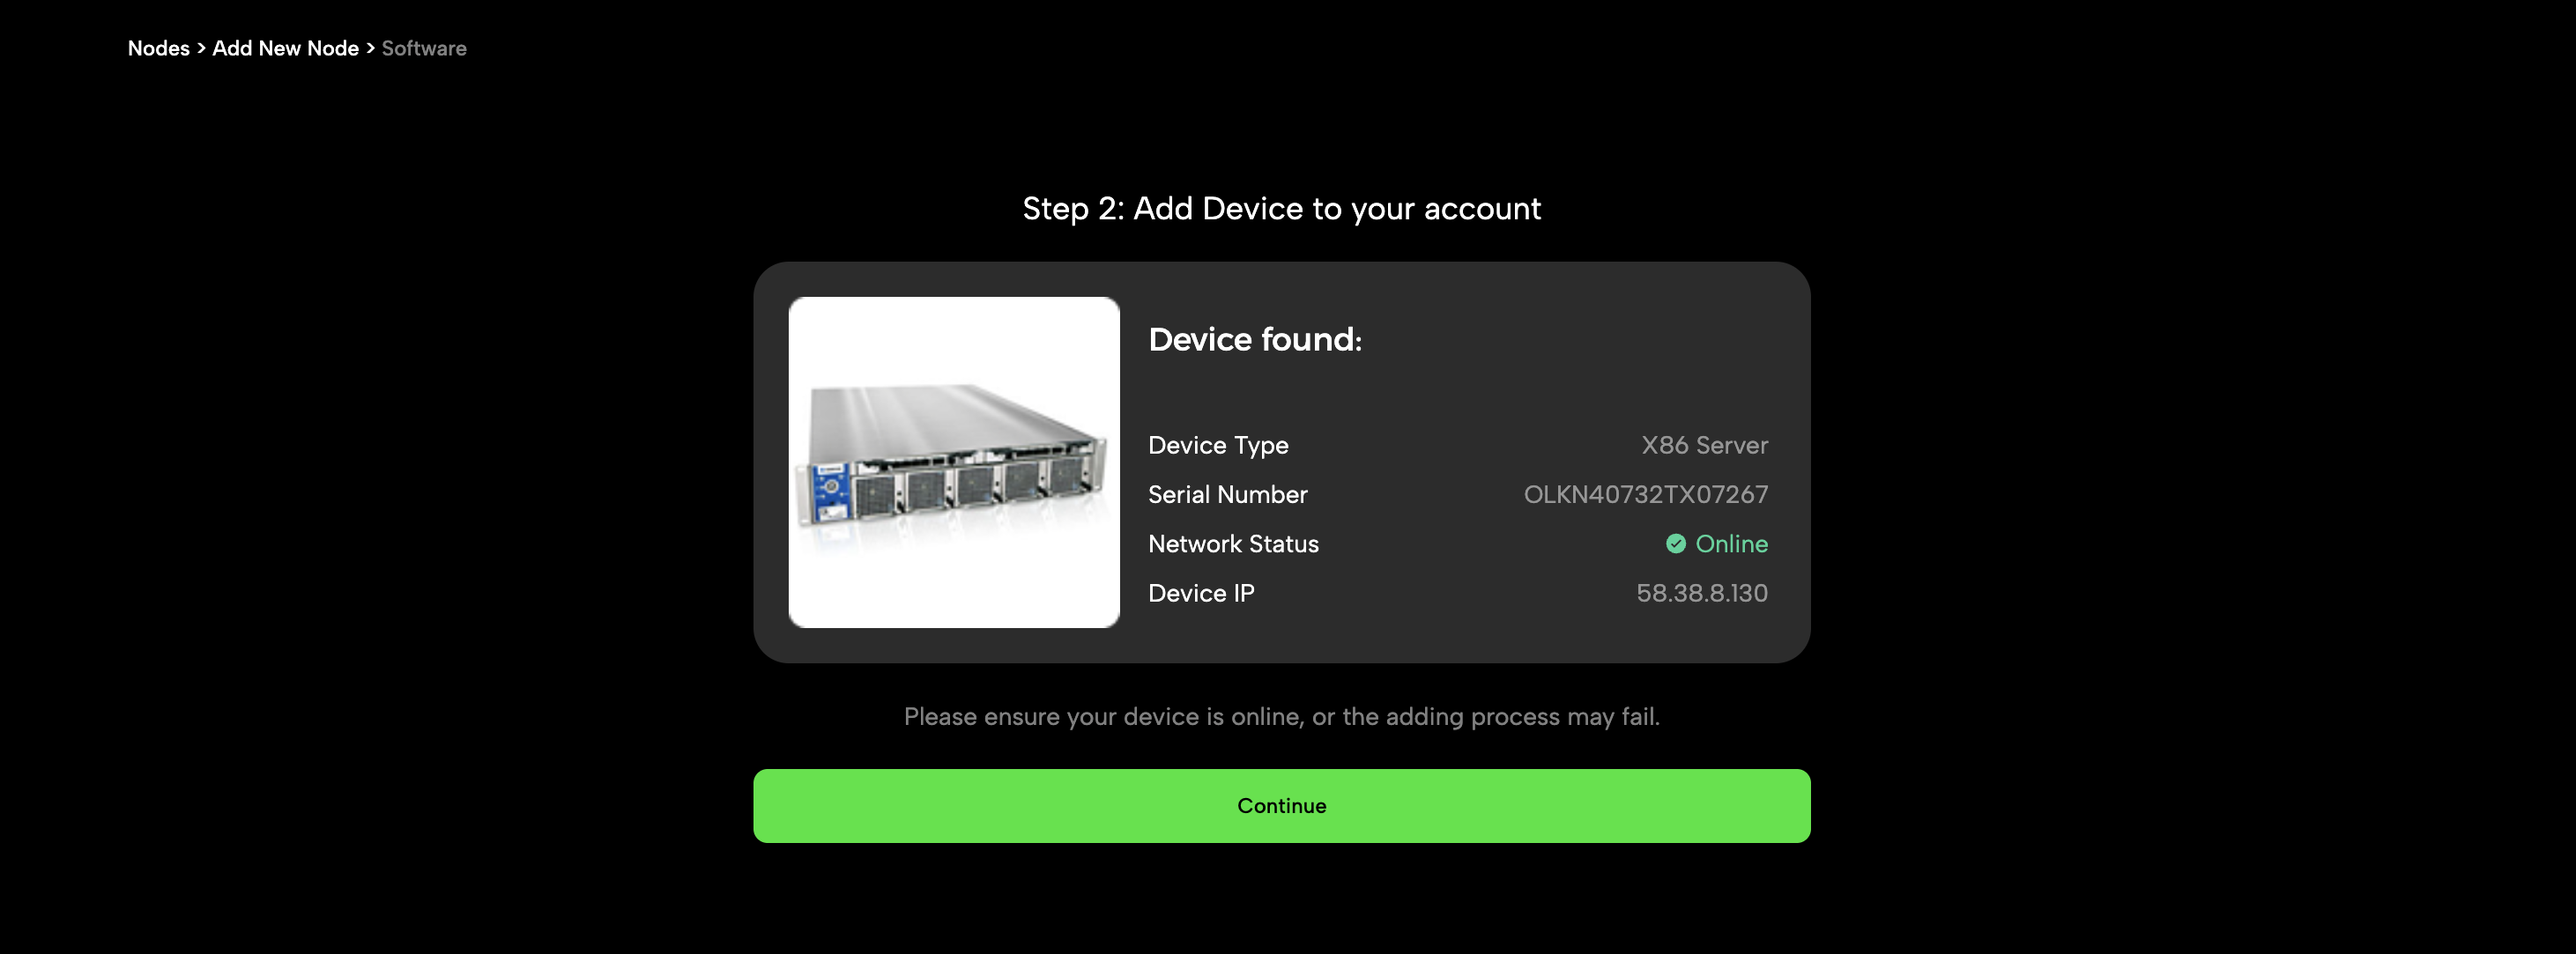
The dashboard will recognize the software image instance and display its information. Confirm to continue.
Important: Ensure your ARO Server is online during activation. If it is offline, the process may fail.
-
Complete setup. You will be guided through several simple steps to finish the initial configuration. Once the congratulations page appears, your ARO Server setup is complete.
Part 3: Uninstall the Package
Execute the following command:
dpkg -P aro