ARO Pod Installation Tutorial
Get Started with Your New ARO Pod!
This guide is for you if:
- You’ve received your new ARO Pod and want to set it up.
- You need help adding your new device to your Dashboard.
To choose the best Edge Node for your needs, see this guide.
Step 1: Plug In
We strongly recommend that you complete the device's connection and setup as described in the Step 1 tutorial. Otherwise, the device's performance may be significantly compromised.

Step 1.1: Connect ARO Pod to the Internet
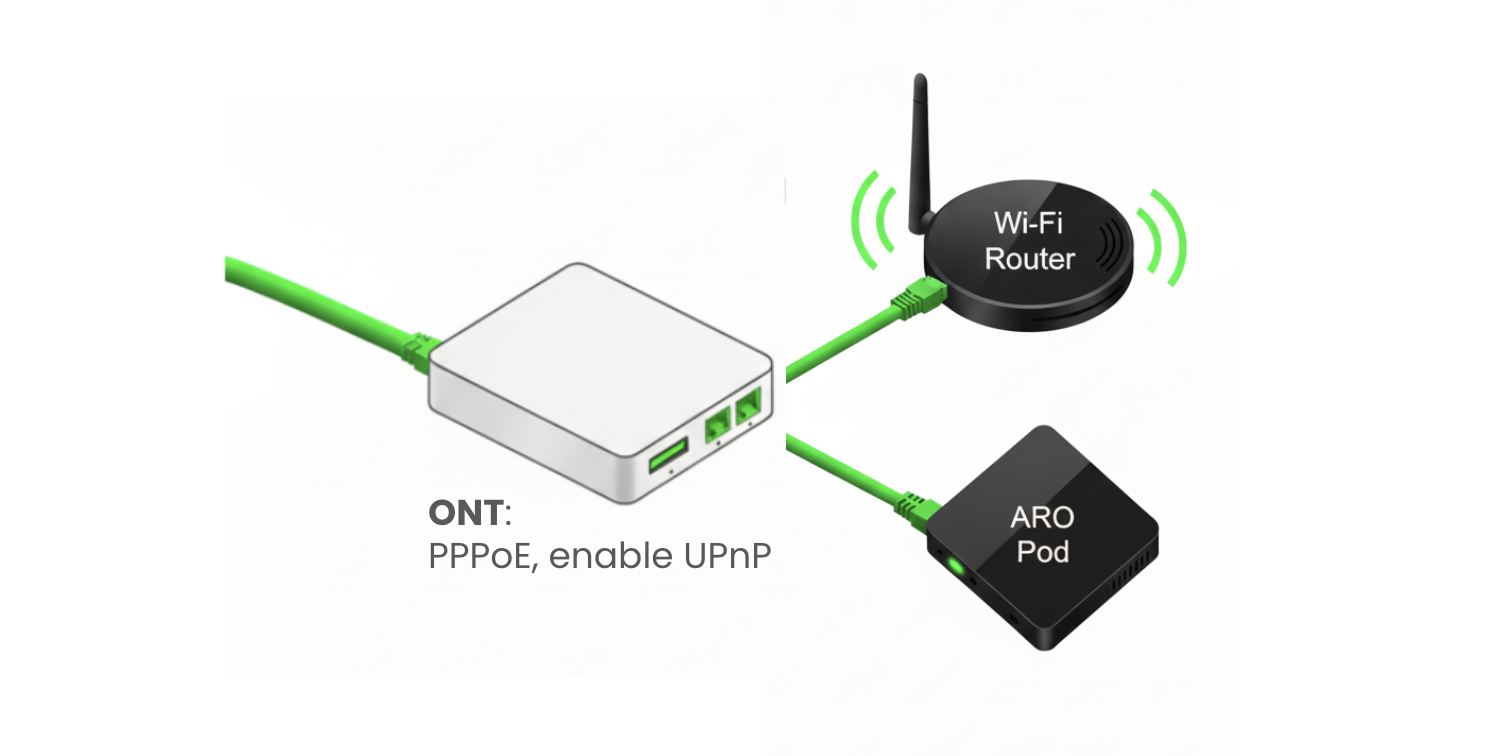
- Optical Networking Terminal (ONT) is the device at the end of a fiber optic network that converts the light signals from the fiber optic cable into signals that your devices can read, like routers and ARO Pod.
- Directly connect your ARO Pod to the ONT via Ethernet cable, as showed in the diagram above.
- DO NOT connect your ARO Pod to the Wi-Fi router!
- If you have a Wi-Fi router, connect it to the ONT from another Ethernet port so you can keep using it. If your ONT device only has one Ethernet port, you may use an extra Layer 2 Switch to extend the Ethernet port.
Step 1.2: Enable UPnP on your ONT
- Connect to Your ONT: Connect a computer to the ONT using an Ethernet cable or connect to its Wi-Fi network.
- Look for a sticker on the ONT itself or in your network documentation to find its default IP address.
- Open a web browser and type the ONT's IP address into the address bar, then press Enter.
- Once logged in, look for an advanced or network settings menu. The UPnP setting is typically in a section such as:
- Advanced > Advanced Setup > UPnP
- More Functions > Network Settings > UPnP
- Network Settings > UPnP
- Tools > Misc. > UPnP Settings
- Select or check the option to turn UPnP on. Click the "Save" or "Apply" button to confirm your changes. For some devices, you may need to restart your ONT to apply the new settings.
For more information on the general concepts and approaches of optimizing your network, please refer to this guide
Step 2: Add Device to Your Dashboard
Ensure you’ve created an ARO Account (ARO ID) and are logged in to the Dashboard.
For account creation instructions, refer to this guide.

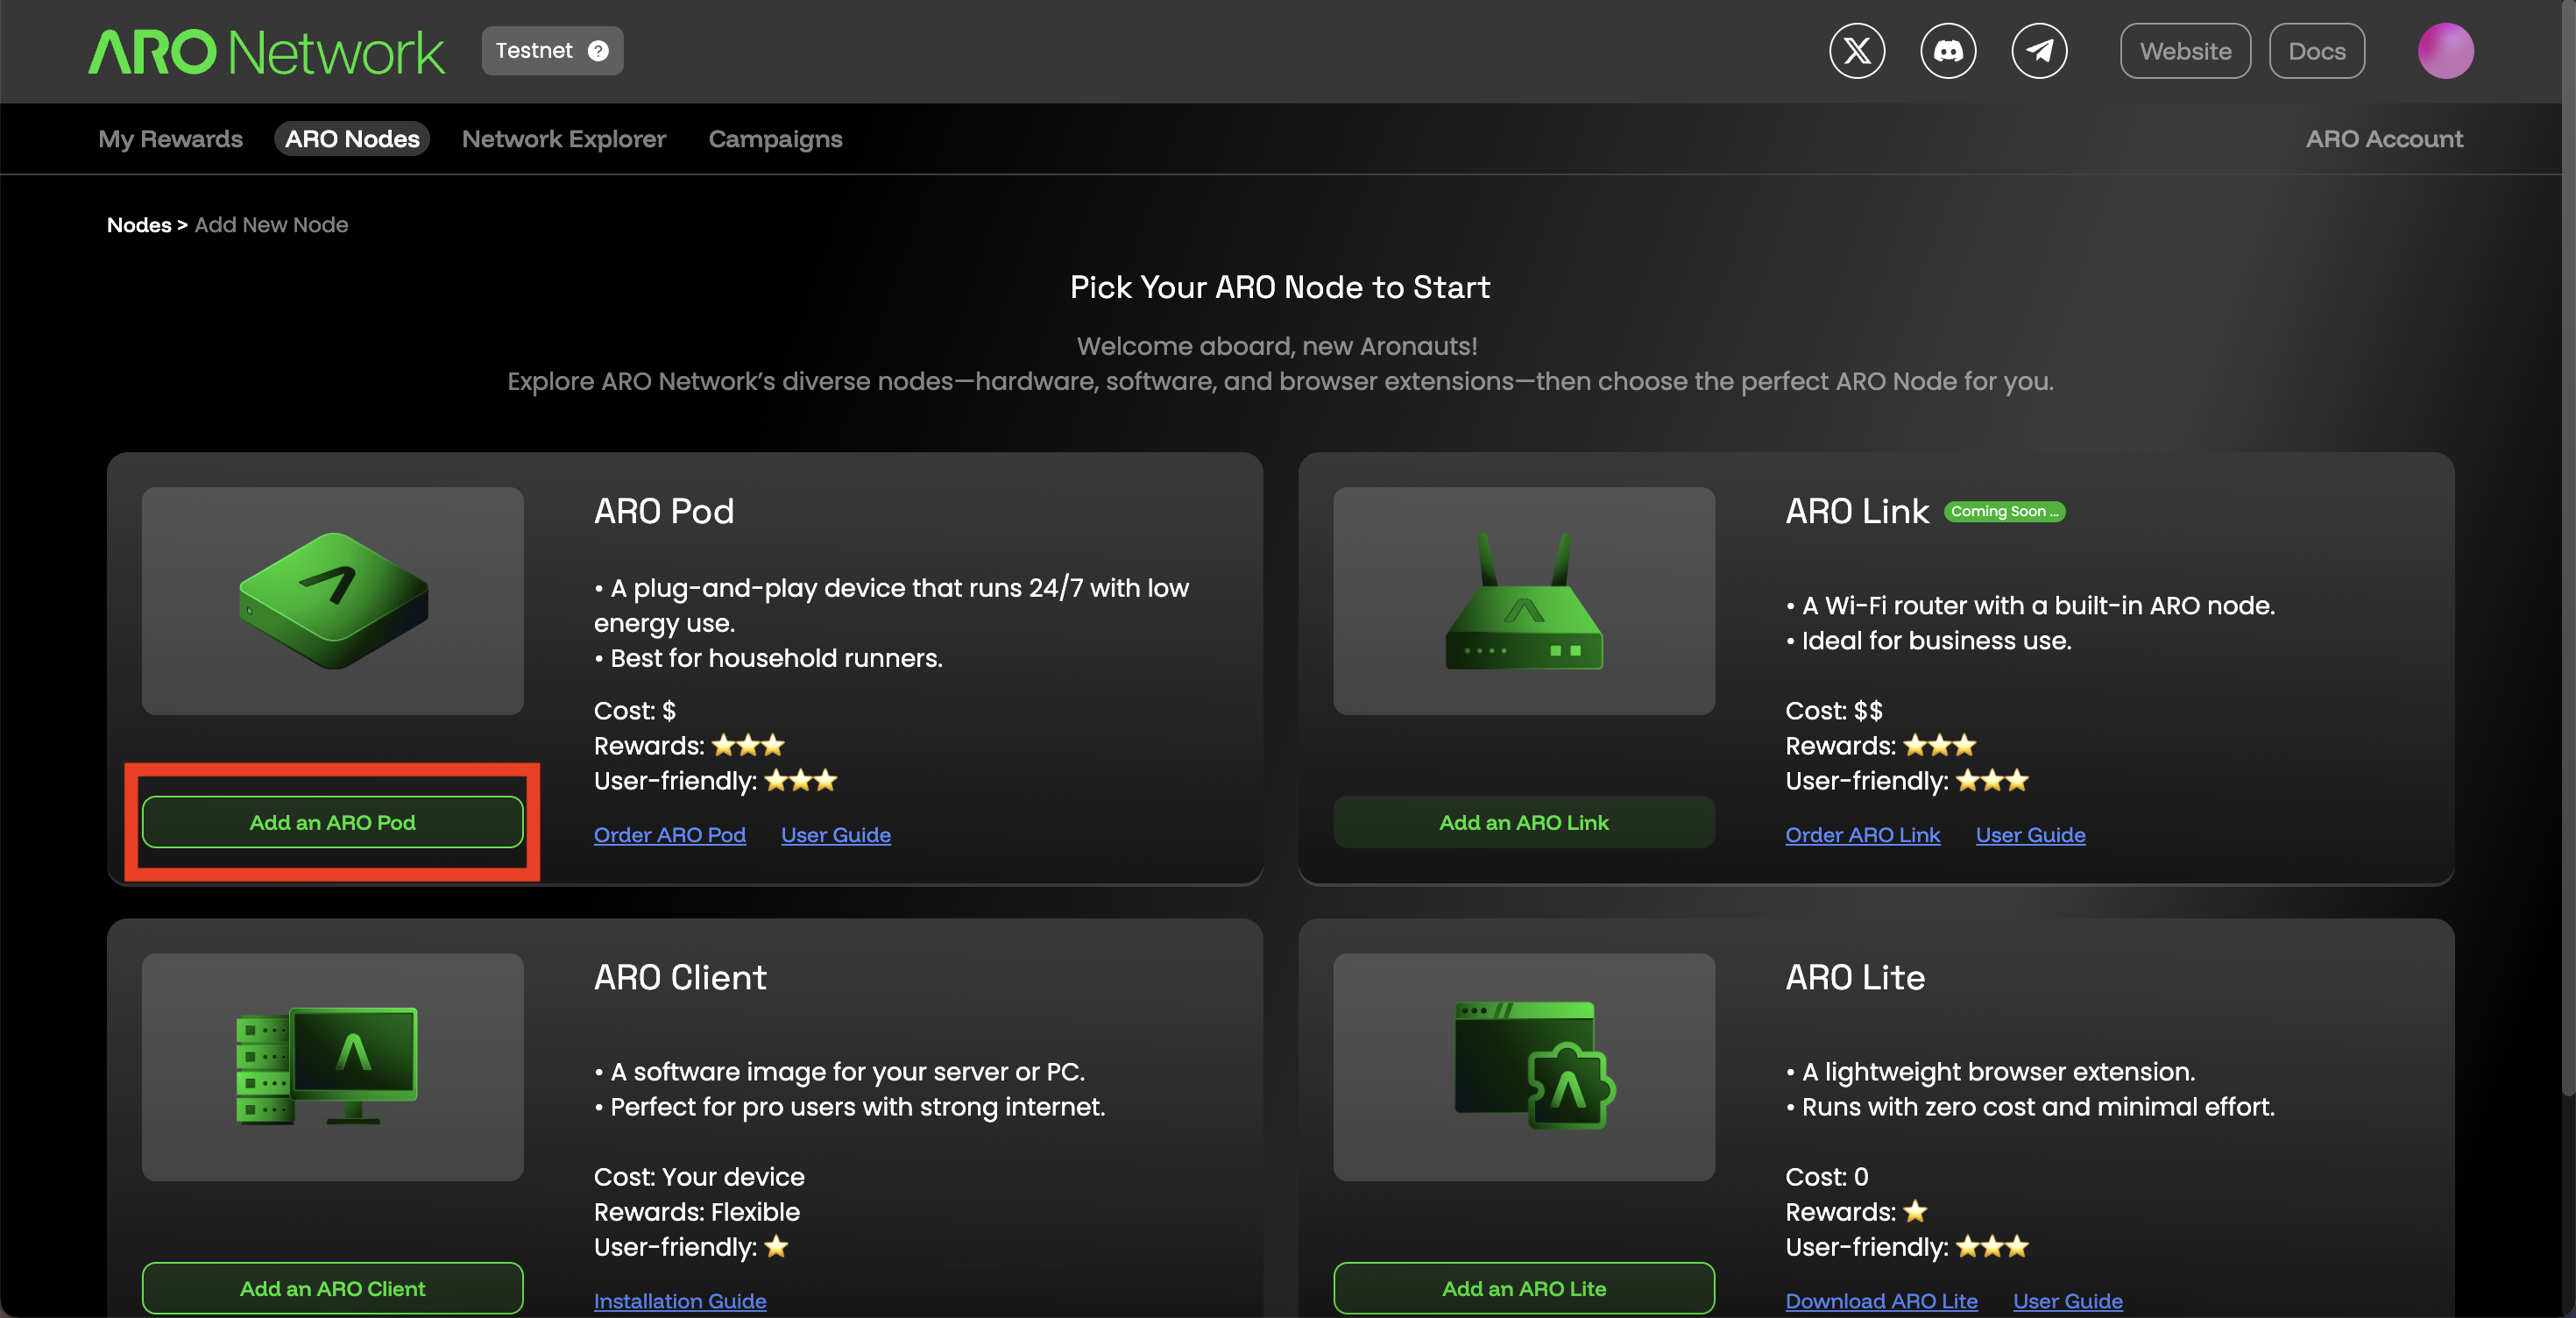
On the Edge Node page in your Dashboard, locate the "Add an ARO Node" button and click to initiate adding process.
Note: Please do ensure the device is online (powered on and connected to the internet) during this process.

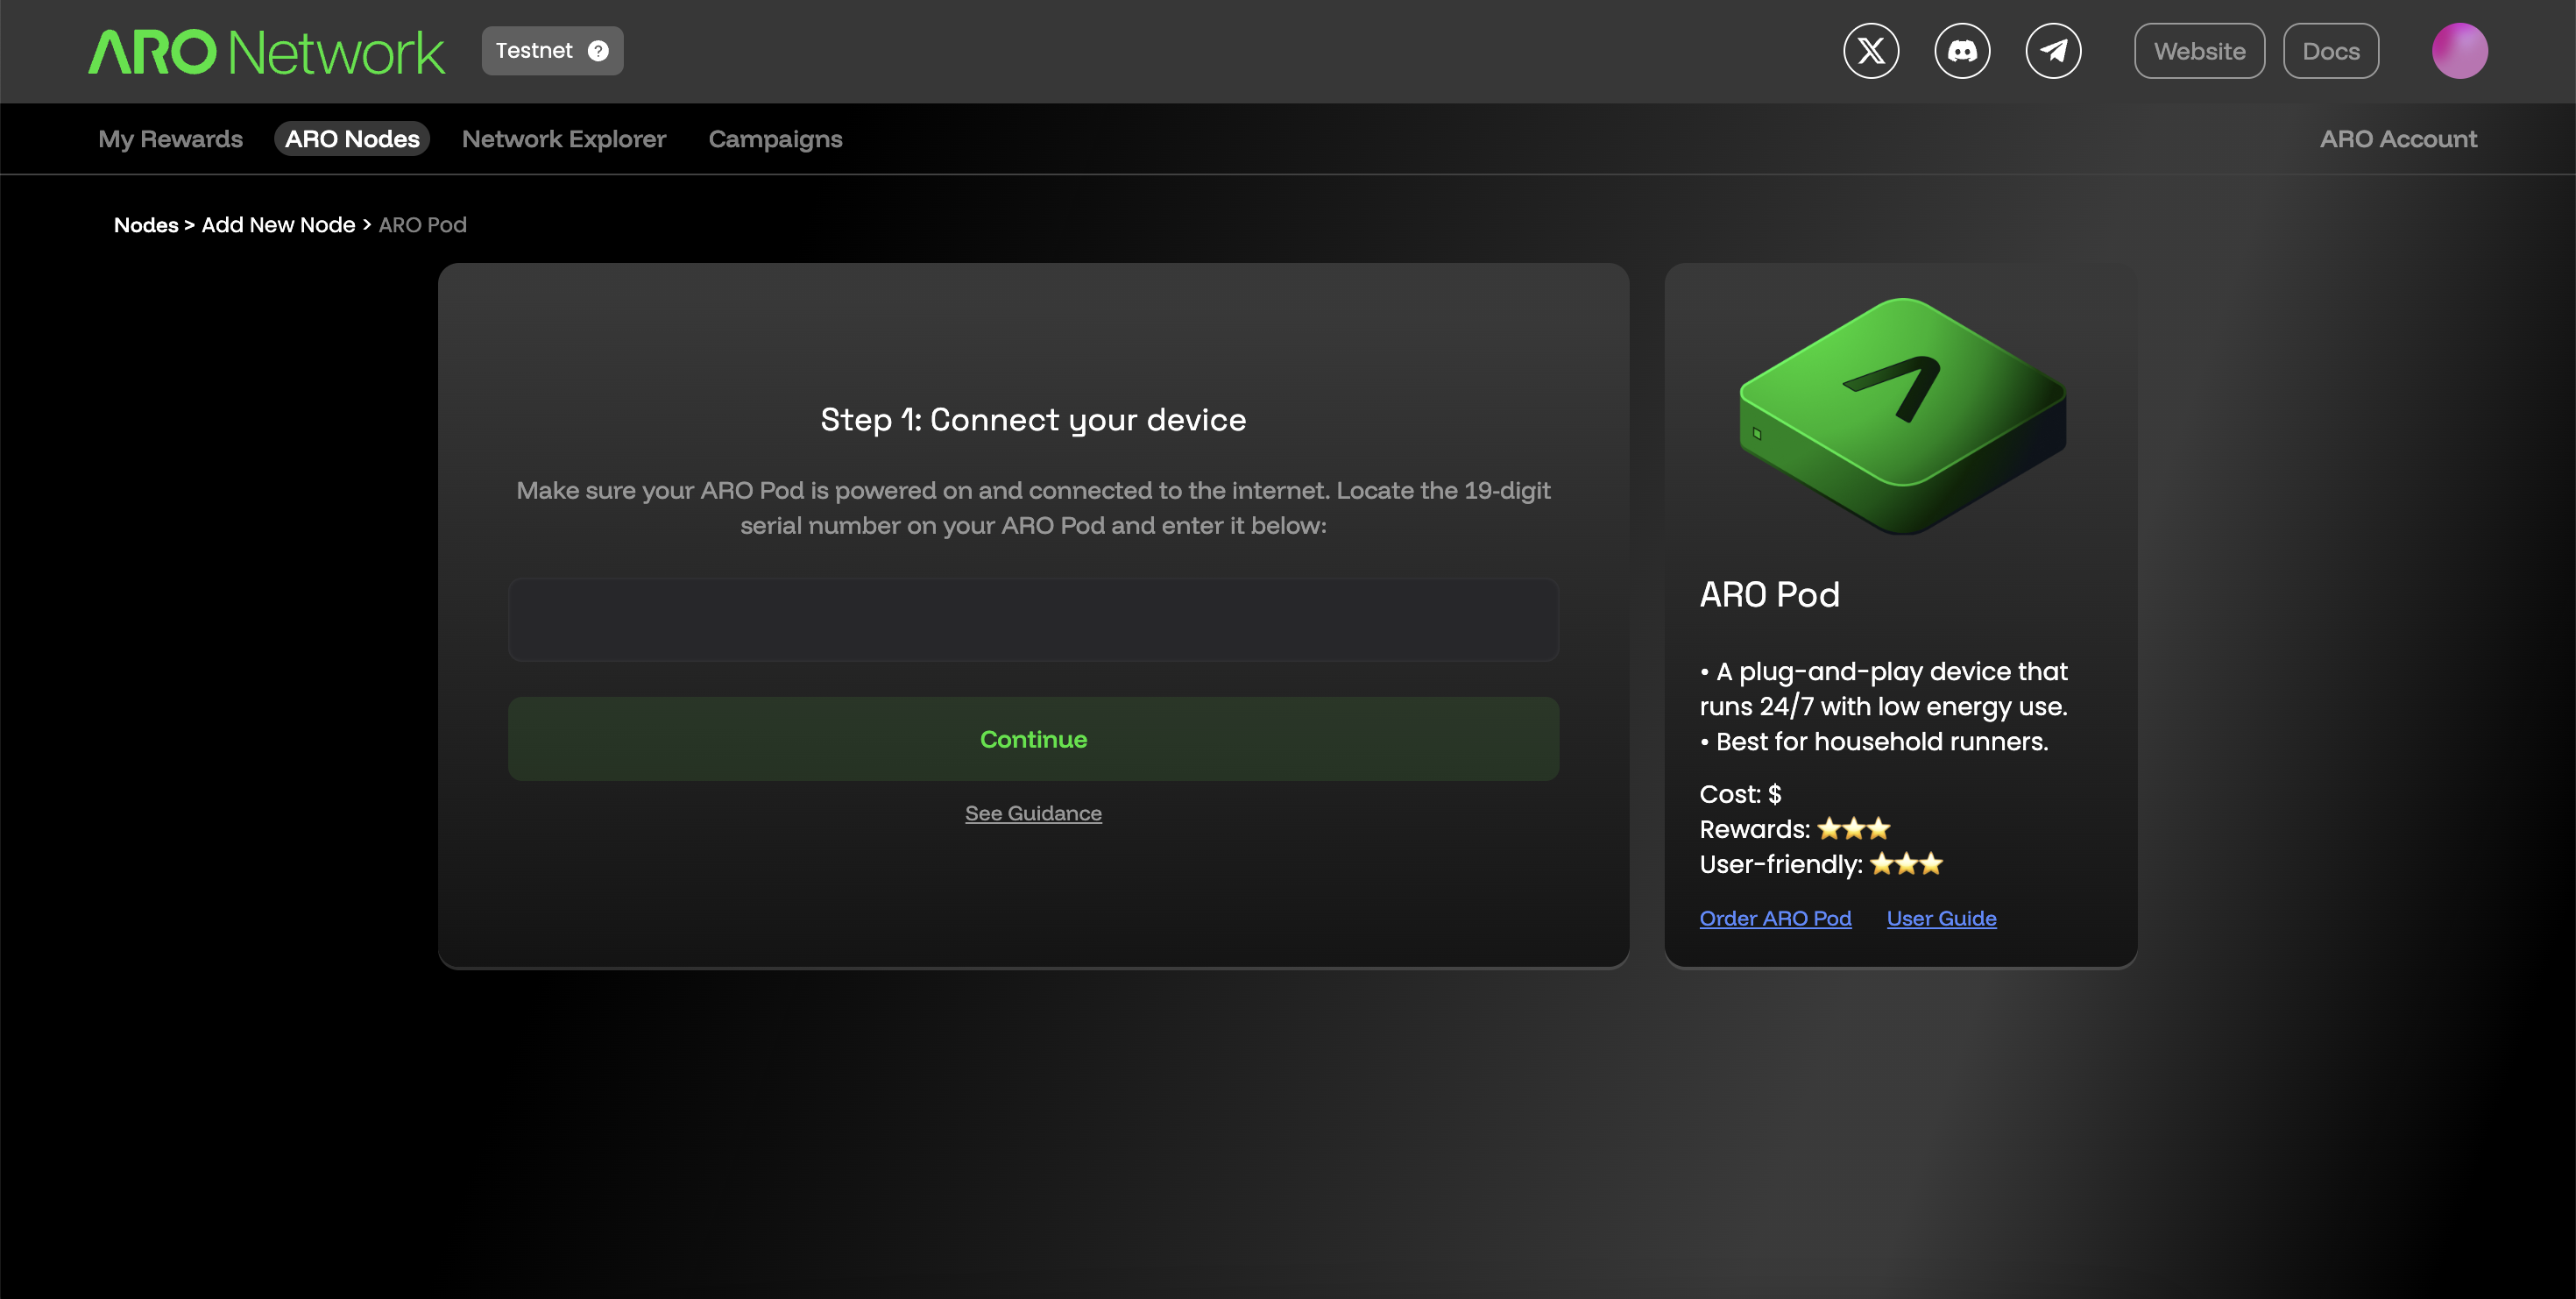
You’ll be prompted to enter the Serial Number (SN) of your device, which is printed on the device label. Enter it carefully to avoid errors.
If successful, the Dashboard will recognize your device, and you can complete the setup with a few clicks.
Step 3: Ready to Go!
Once the device is added, a device card will appear on the Edge Node page. Your first ARO Edge Node is now ready to operate!
Click on the card to check running details of your node.